Description of the Hardware EPC9 Manual 11
Note: Avoid touching the probe's input terminal, since the input circuitry of the probe can
be damaged by static electricity. When it is necessary to touch the input (e.g., while
inserting a pipette into the holder), ground yourself first by touching a grounded
metal surface.
Ref Output: The red 0.04" pin jack carries the command potential Vp.
Note: The metal case of the probe is also connected to this signal, and therefore must be
insulated from ground.
Gnd Connector: The black pin jack carries a high quality ground signal which is
useful for grounding the bath electrode and nearby shields without potential errors
that could arise from ground loops. This ground is connected directly to the signal
ground on the controller through the probe's cable. More details on grounding
practices will be provided in Chapter 8. Patch-Clamp Setup on page 67.
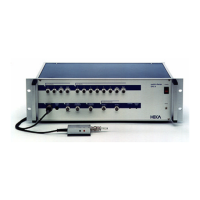
Main Unit
The main unit of the EPC9 contains the power supply, the signal processing
electronics, the AD and DA converters and the connectors for analog and digital
input/output. Essentially all of the calibration adjustments are made by digital
switches in the main unit, including those which depend on the properties of
components in the probe. The calibration parameters are preset by the manufacturer
and contained in the software package as the files “Scale.epc” and “CFast.epc”.
Unlike conventional amplifiers, hardware calibration of the EPC9 can also be
performed by the user if necessary (see section Calibrating the EPC 9 on page 16).
Note: Calibration parameters are unique to each amplifier and head stage combination.
Thus, if you exchange the head stage, be sure to perform a new hardware calibration.
Voltage Switch: A switch on the rear panel of the main unit selects between the 110
and 220 volt operation. Make sure that the switch is in the proper position and that
the correct fuse is installed.
Power Switch: In order to be initialized properly, the EPC9 must be switched on
before starting the software program that drives it, e.g., E9Screen or Pulse. These
programs however allow you to re-initialize the amplifier in case you forgot to turn
it on first.
Note: Since the calibration settings of the amplifier have been determined for a warmed-up
amplifier, switch on the amplifier ~15 min before starting an experiment. This will
ensure that the amplifier has warmed up to regular working temperature and
calibration parameters are most accurate.