Testing the EPC9 EPC9 Manual 31
Making a ”Full Test”
If you ever encounter any hardware problems that can not be solved by simply re-
calibrating the amplifier (see Calibrating the EPC 9 on page 16) you can run the Full
Test in E9SCREEN. This feature is a diagnostic tool that allows us at HEKA
Elektronik to make some conclusions about possible defects of the amplifier.
Otherwise, this function and its output should only be of little interest for you.
Note: The Full Test sometimes reports errors although the amplifier is absolutely fine. This
may have multiple reasons. First, we opted to have stringent test specifications such
that possible problems are not missed. Second, errors may be caused by procedural
errors, or even because of defective BNC cables. If you get the message that your
hardware might be “not ok”, please contact HEKA first and supply us the report
before sending the amplifier in. You might save yourself valuable time!
Before starting the Full Test you should make sure to have nearby a shield for the
probe (e.g., the metallic cap delivered with the EPC9), a 10 MΩ resistor (e.g., the
model circuit) and 5 short BNC cables. Start
the E9SCREEN program. In case you have an
EPC9 Double or Triple, select the amplifier
you want to test from the amplifier popup: 1.
Amplifier, 2. Amplifier or 3. Amplifier.
Now select the menu item Full Test from the Calibrate menu. You will be told to
remove everything from the probe and shield its input. You can use the metallic cap
that came with your amplifier and put it on the BNC connector at the probe to shield
it. Please make sure that really nothing except the metallic cap is connected to the
probe and that especially the red and the black pin jacks are free. You should also
make sure that no BNC cables are connected to the main unit of the amplifier.
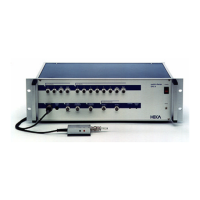
After a short while you will be prompted to connect 3-5 BNC cables, depending on
the amplifier you are testing, see table below. The following figure shows you how
to make the connections for the EPC9. Please note, that the description of the analog-
to-digital converter part (top row of BNCs) is for the EPC9 Triple and looks different
for the EPC9 and the EPC9 Double. The DA- and AD-channels are numbered from 0
to 3, and 0 to 7, respectively.
2. Amplifier Noise
WHOLE-CELLON-CELLSET-UP
Record