Testing the EPC9 EPC9 Manual 19
4. Verifying and Testing the EPC 9
Testing the EPC9 with the Model Circuit
The following tutorial will guide you through most of the basic and some of the
unique and more sophisticated features of the EPC9 amplifier. At the same time it
allows you to check, whether the amplifier is functioning properly. You will use the
model circuit you got together with the amplifier as a substitute for a real patch-
clamp recording and explore the virtual ”front panel” of the EPC9 supplied in the
program E9SCREEN.
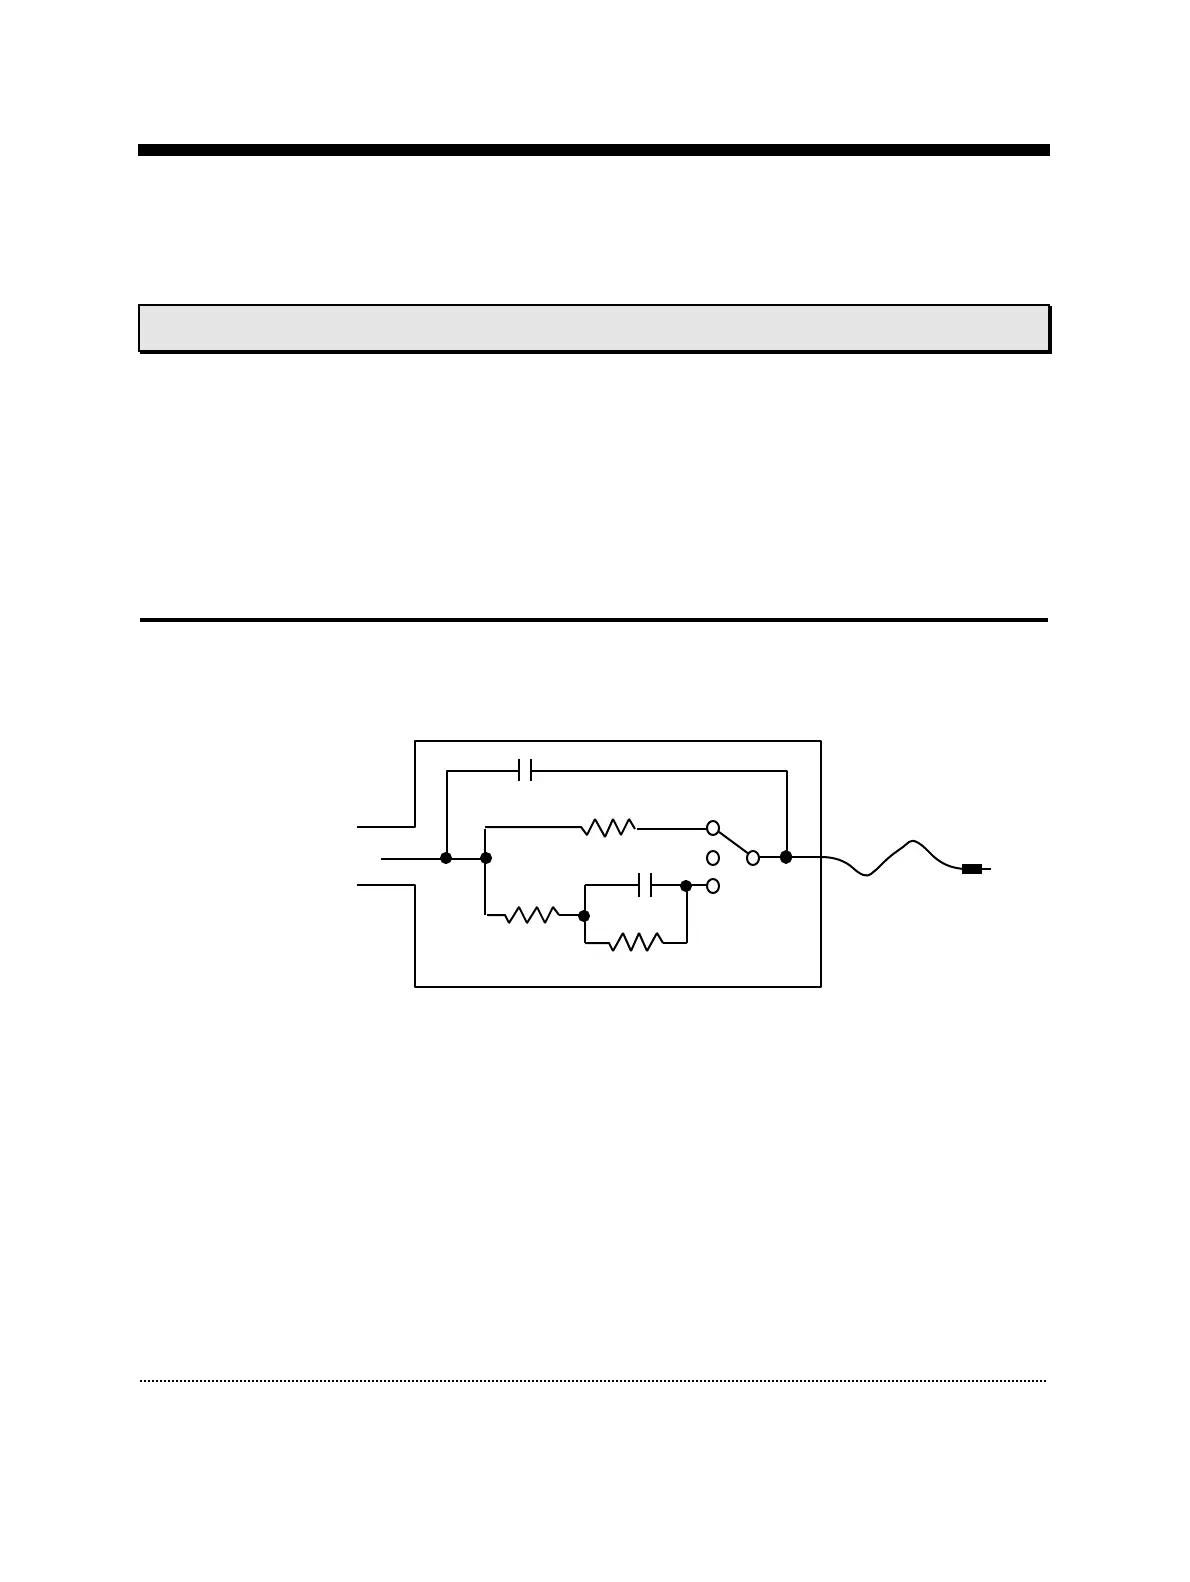
The Model Circuit MC 9
The model circuit connects to the probe input via a BNC adapter and the plug goes
to the black Gnd connector on the probe:
The model cell MC9
The model circuit provides a switch with three positions simulating the following
conditions typically observed during an electrophysiological experiment:
1. In the top position an ”open” pipette with a resistance of 10 MΩ is simulated.
This mode is useful for applying a test pulse and for correcting offset
potentials.
2. The middle position simulates a pipette attached to the cell membrane after
the Giga-Ohm seal formation. In this setting only a capacitance of 6pF is left
over corresponding to the ”fast” capacitance of a pipette sealed to the cell
membrane. This mode allows you to test the C-fast compensation.
10 MΩ
22 pF
5.1 MΩ
0.5 GΩ
6 pF
BNC
(to probe
input)
Plug
(to GND
connector)