Installation EPC9 Installation 17
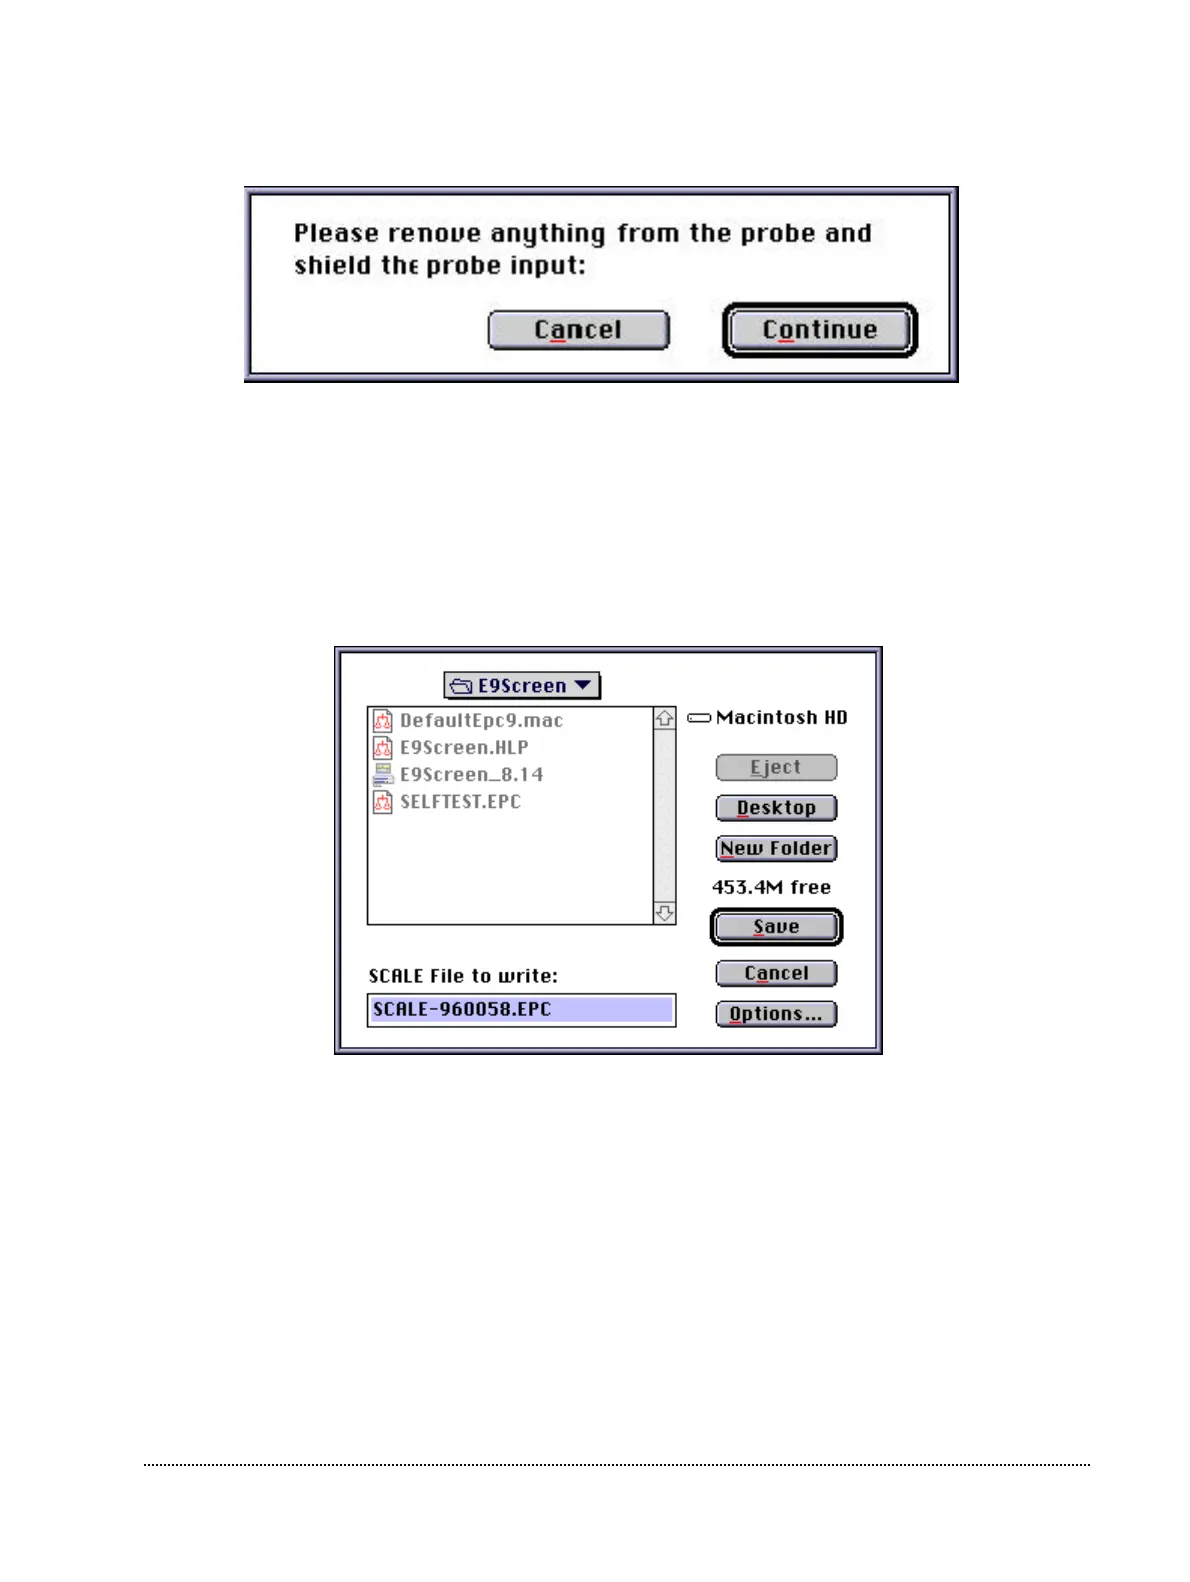
Then you are instructed to remove anything from the probe and shield its input:
You can use the metallic cap that came with your EPC9 and put it on the BNC connector
of the probe to shield it. Please make sure that really nothing except the metallic cap is
connected to the probe (the red and the black pin jack should be free) and that no BNC
cables are connected to the inputs and outputs of the EPC9 !
At the end of the calibration, E9SCREEN will let you know, whether the calibration
succeeded or failed. If it succeeded, the program will ask you, whether you want to save
the new calibration file and generates the proper name for the calibration file.
It is not advicable to save the file under a different name, because in that case you would
have to manually load the scale file during every initialization.
Note: It is very advisable to store the calibration files only in the one place. The best place to
put the calibration files is the E9Screen folder. Most users will run more than one
program which needs the calibration files to properly control the EPC9, e.g. PULSE and
E9SCREEN. Both programs will load by default the calibration files from the E9Screen
folder. If the calibration files are in multiple places the programs may load different
calibration files with possibly unpleasant consequences!
Finally, E9SCREEN re-initializes the amplifier.