Operating instructions • M-BOSS Compact • 06-2020 • v02 • 544-12020
Initial operation
10
5 Initial operation
The following tools are required for the start-up of the
device:
• PC or notebook with Windows 7
®
/10
®
• Microsoft Oce Excel
®
/ TagPrint Pro software
Carry out the start-up in the prescribed sequence:
1. Place the device.
2. Connect the device.
3. Install the device software.
4. Install the TagPrint Pro software.
Æ Section 5.1-5.4
5.1 Device placement
NOTE
Material damage caused by false environmental
conditions!
The device and the materials can be damaged by humidity
and dust.
f Set up the device only in dry places that are not exposed
to spray water or dust.
Proceed as follows:
1 Lift the device carefully out of the packaging using the
folding handles on the sides.
2 Place the device on a level and stable surface.
(To avoid closing off the ventilation openings, you must
keep a clearance of at least 10cm on all sides of the
device.)
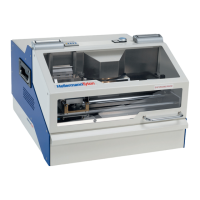
3 Remove the transport securing devices (cable ties).
1
1 Transport securing device
4 Check the device for transport damage.
5 Check the delivery for completeness:
• M-BOSS compact stainless steel embossing system
• Magazine 10 x 45 incl. weight
• Magazine 10 x 90 incl. weight
• Magazine 20 x 45 incl. weight
• Magazine 20 x 90 incl. weight
• Power cable
• USB cable
• Download link:
https://www.hellermanntyton.de/downloads/software
Keep the original packaging for later transport.
If transport damage has been found or if the scope of
delivery was incomplete, please contact Customer Service at
HellermannTyton.
; The device has been setup correctly.
5.2 Connect the device.
DANGER
Danger of lethal electric shock!
There is a risk of lethal injury when touching live
components.
f Only connect the device to a properly installed and
standardised socket with grounding.
f Check the voltage-level and current requirements.
f Do not touch any of the live components.
Proceed as follows:
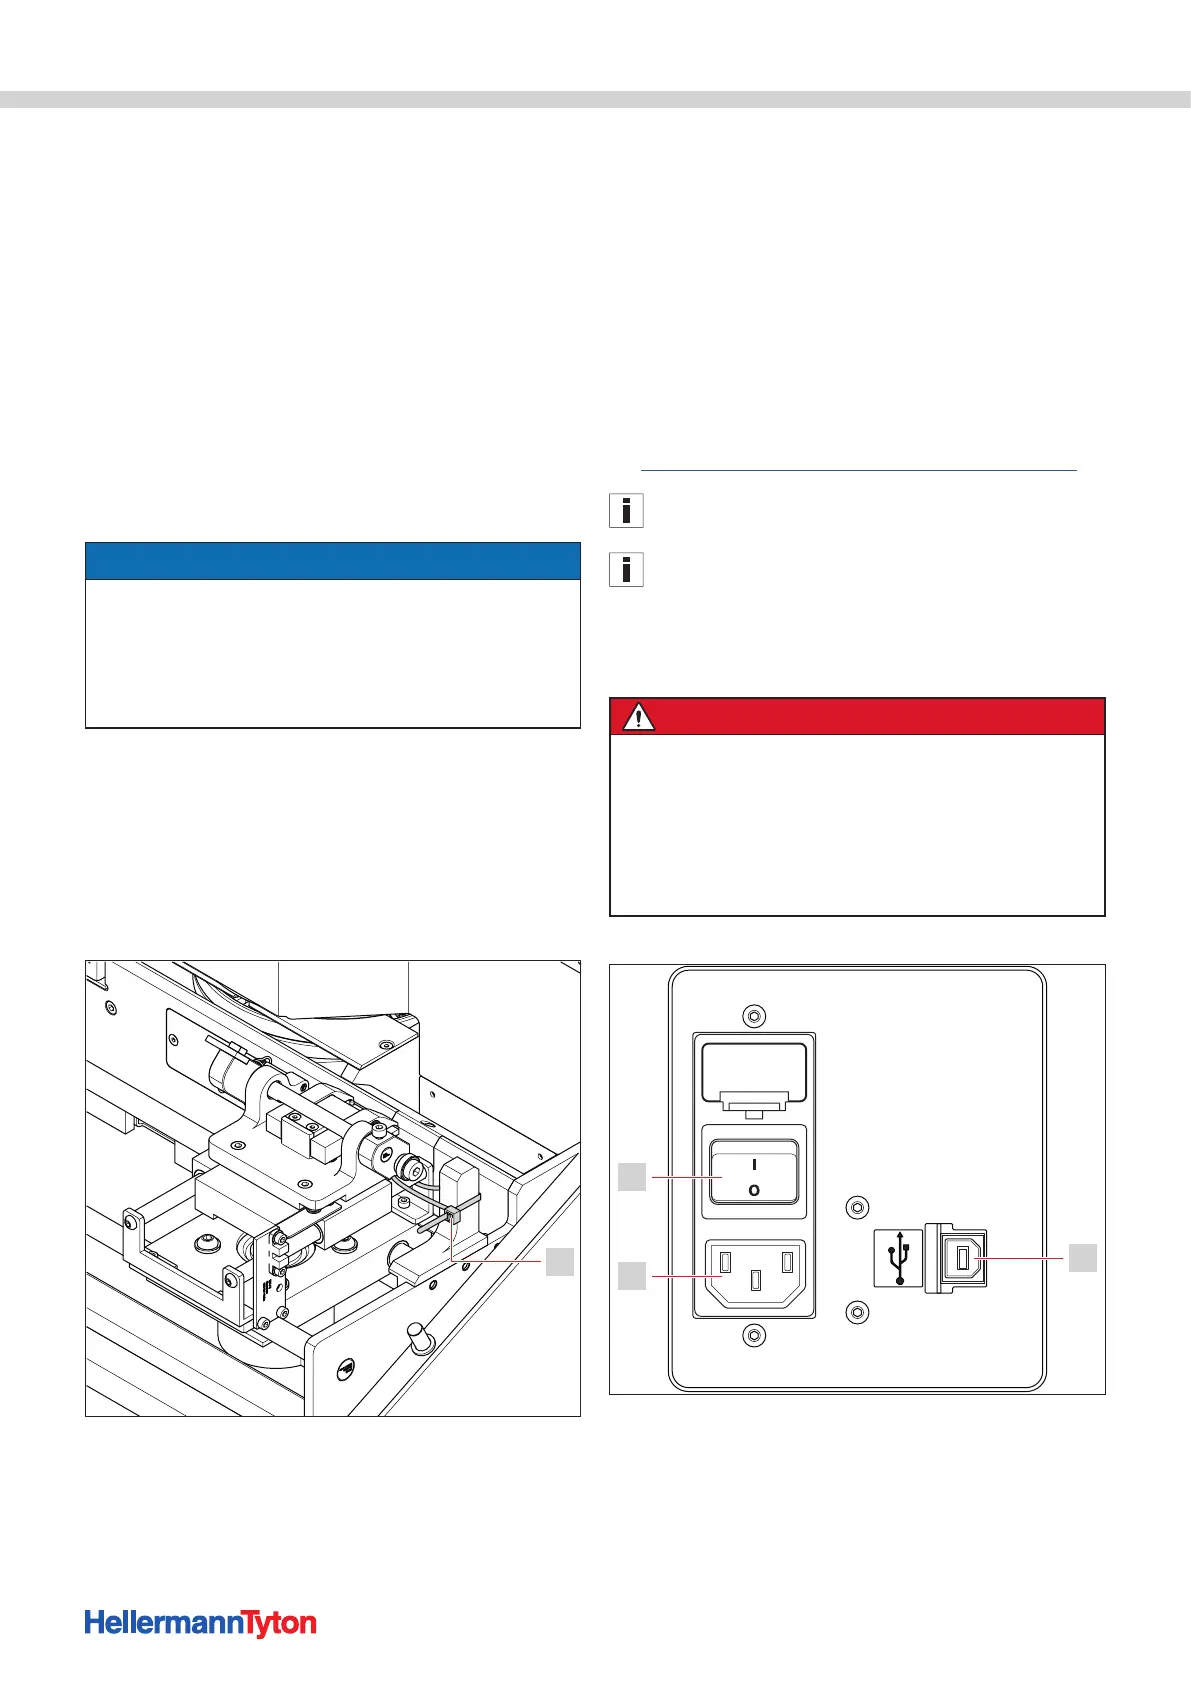
Connect the device.
1 USB port
2 Power supply
3 Main switch
1 Connect the power cable to the device.
2 Connect the USB cable to the device.