USER MANUAL | NOVA XL 4.3
3
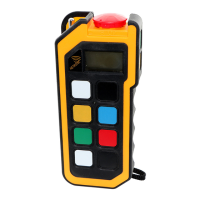
Transmitter Specifications
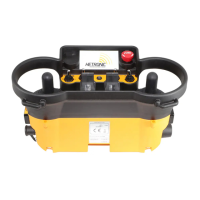
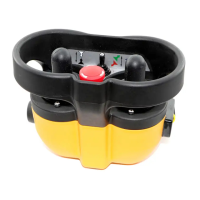
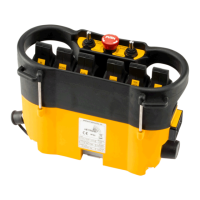
Ergonomically designed Impact Resistant Polymer Composite
IP 65 (Exceeds Nema 12/13)
~2.3kgs (5lbs.) depending on configuration
Internal as default, external via TNC connector
3.7V Li-Ion rechargeable battery
3.6V NiMH rechargeable battery
5V to 30V via cable control
Status LED for operation and standard/advanced low battery
detection
Minimum 20 hrs continuous transmission*
Up to 4x Single/Dual/Triple axis cross joysticks
Up to 8x Single axis paddle levers
Any combination of key switches, toggle switches, push buttons,
rotary switches, potentiometers and stop switches
Customized switches available upon request
4xxMHz or 8xxMhz or 9xxMHz or 1.216GHz or 2.4GHz**
Video frequency is 2.4GHz or 5 GHz
Typically ≤ 10 mW E.I.R.P
150m (492ft) for ≤ 1GHz 10mW module (Line-of-Sight)
70m (150ft) for 2.4GHz 10mW module
Operating Range for
Video Feedback
Near Real-Time Video Feedback 1 to 4 camera capability 100’~300’
w/o booster; extended range with boosters up to 2 miles
20-bit programmable address concept with up to 1,000,000
combinations
Active & Passive Stop Function
Operating Temperature Range
-20°C . . . 70°C (-4°F . . . 158°F)
Storage Temperature Range
-40°C . . . 85°C (-40°F . . . 185°F)
0 - 97% maximum non-condensing
8GB on-board memory (by default)
Linux operating system for advanced graphics management
Belly, neck, chest or shoulder belt
Cushion and customer logo option
Optional Custom housing colour
4.3in 480x272 back-lit TFT
262K colours
User-replaceable protection cover
Technical Specification Transmitter Nova XL 4.3
*varies by transmitter configuration, GUI and/or Video option
** for full Channel Lists refer to Frequency Bands Radio Modules Charts
Video Feedback (Optional)
The Nova XL 4.3VF option can be used with up to four cameras to provide improved safety and productivity. Video Streaming operates at
2.4GHz.
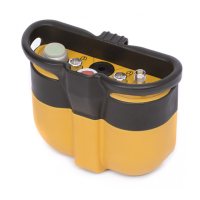
Battery & Charger
You may power your Nova XL 4.3 transmitter with a Hetronic rechargeable Battery MINI 3.6V Grey NiMH inserted in the battery
compartment in the bottom side of the transmitter.
Follow the instructions below to ensure best performance of your transmitter and prolonged battery lifetime.
1. Confirm that your batteries are fully-charged. See “Recharging Your Batteries” section in the UCH 2 Charger section.
2. Slide the recharged battery into the battery compartment at the bottom of the transmitter as shown, and snap it into place.