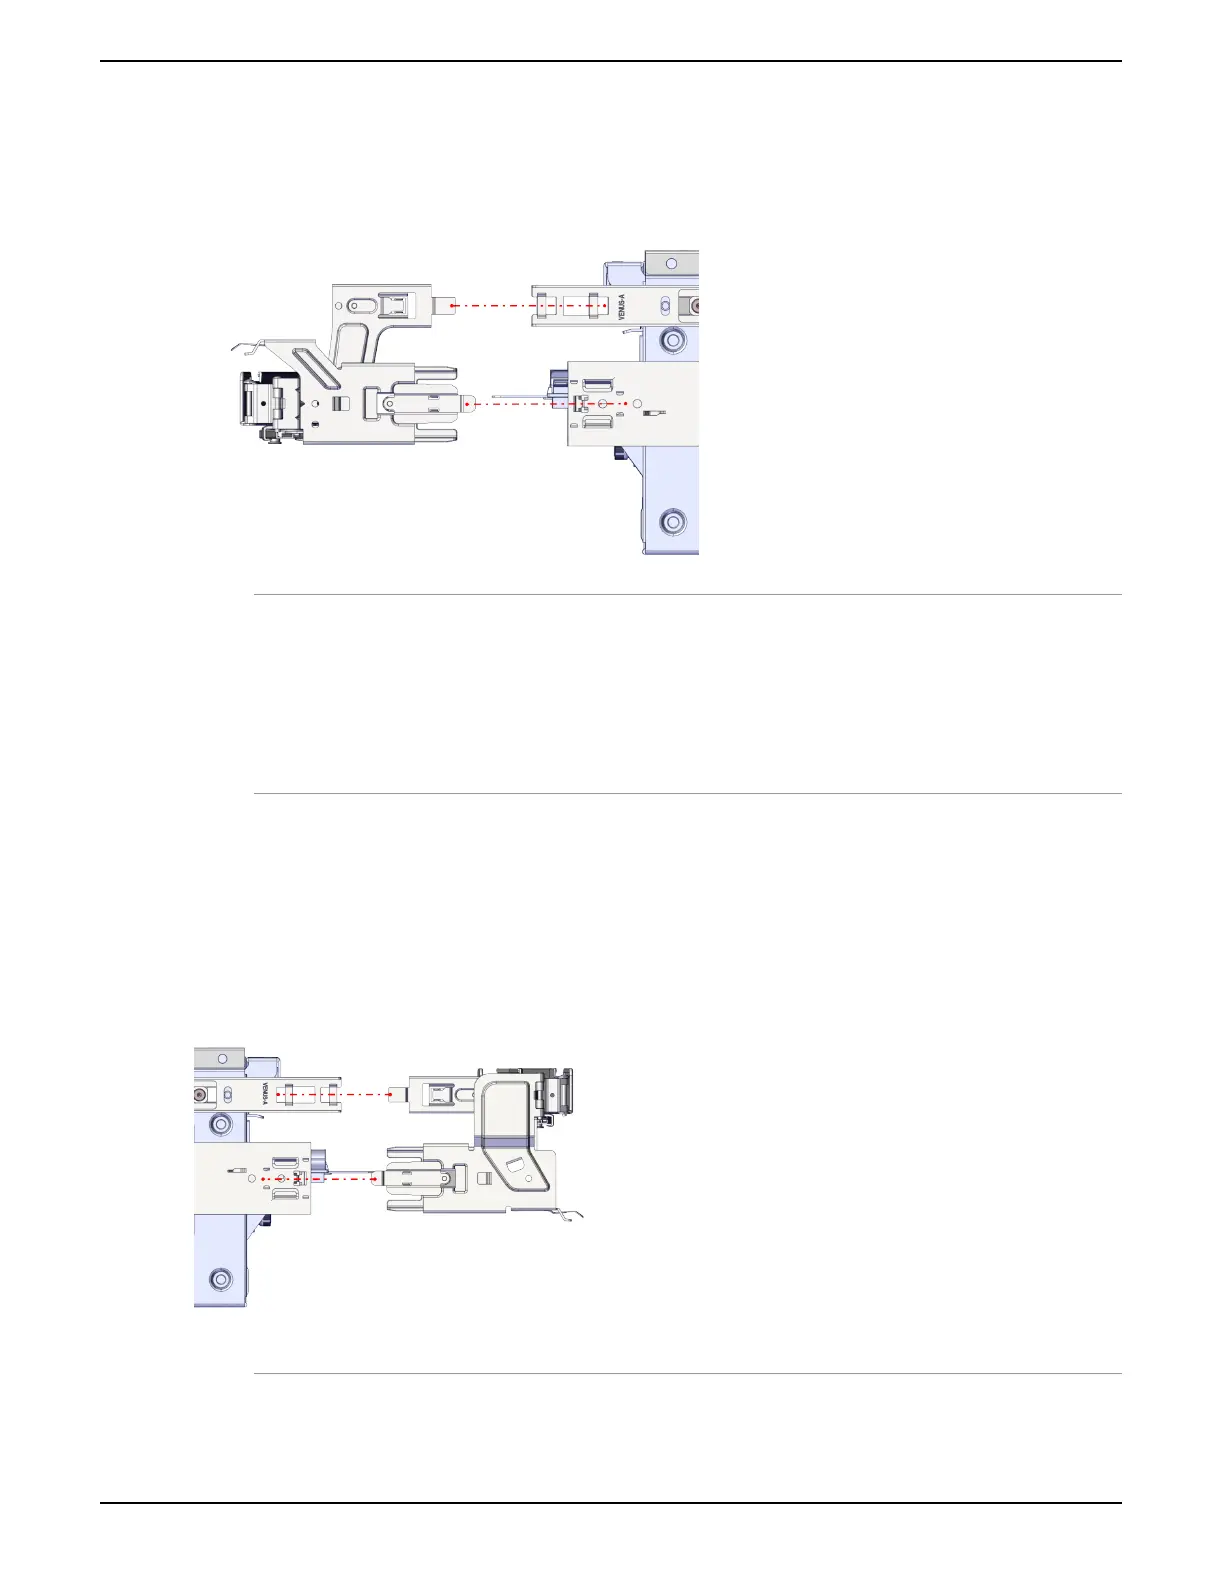
2.
Press the lower CMA into the slide rail and CMA bracket on the chassis until you hear an audible click from the top
and bottom inserts.
Figure 31: Installing the Lower Cable Management Assembly
Note:
• The top tab should slide into the inside middle hole on the CMA bracket.
• When facing the rear of the enclosure, the lower CMA arm will be installed into the right side of the
enclosure.
• When attaching the upper portion of the CMA, ensure that the front tab is inserted into the inside middle
hole and the second tab is insert into the inside rst hole on the CMA bracket.
3.
Swing the CMA arm away from the enclosure.
4.
Locate the CMA arm labeled Upper.
5.
Press the upper CMA into the slide rail and CMA bracket on the chassis until you hear an audible click from the top
and bottom inserts.
Figure 32: Installing the Upper Cable Management System
Note:
• When facing the rear of the enclosure, the upper CMA arm will be installed into the left side of the enclosure.
47
Installation Guide 11 Installing the 4U60 Storage Enclosure
 Loading...