Network Traffic Camera • User Manual
47
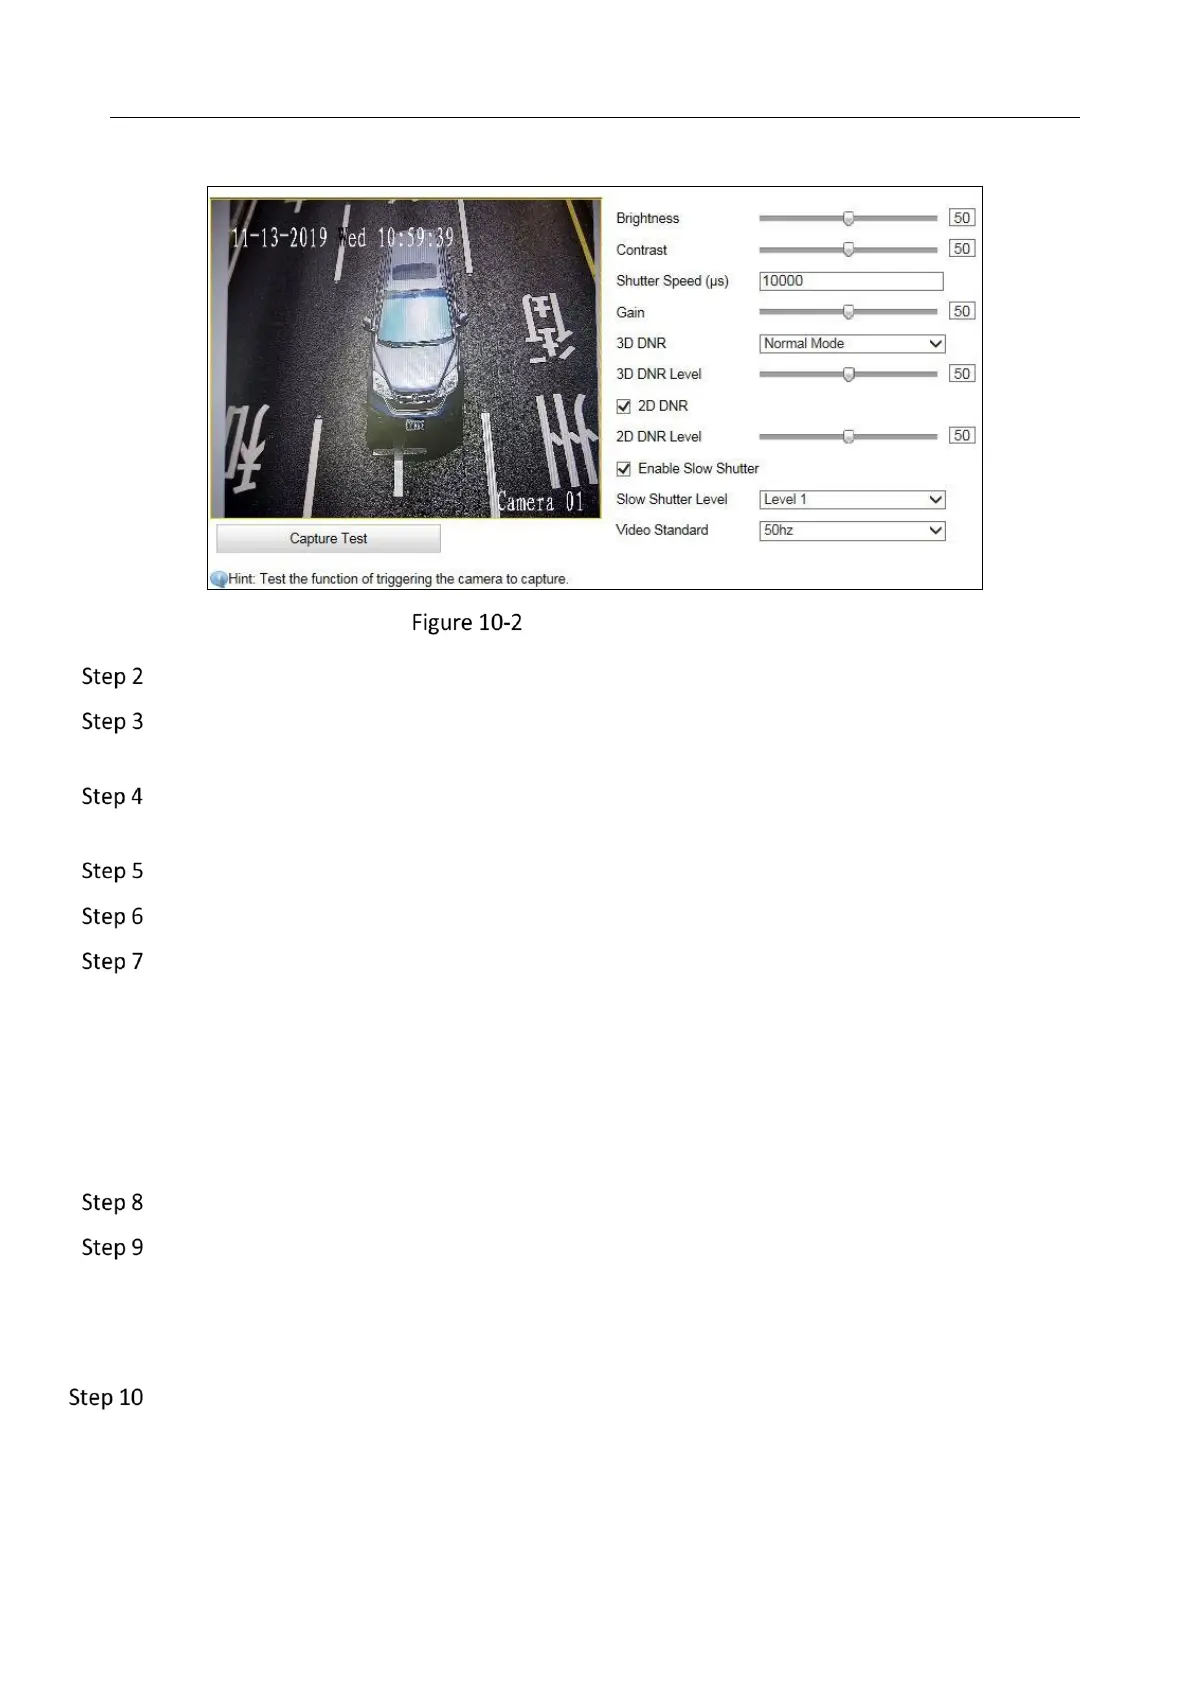
Video Image Configuration
Adjust Brightness [0 to100].
Adjust Contrast [0 to 100]. It refers to the color contrast between the brightest part and
darkest part.
Enter Shutter Speed [120 to 40000 μs]. It refers to the length of time that a camera's shutter
remains open.
Adjust Gain [0 to 100]. It refers to the ratio the output signal and input signal.
Select Hue Range to adapt the display.
Select 3D DNR. It refers to the brightness noise reduction, saturation noise reduction and
original data reduction in the separation of video signals. Comparing with the general 2D
digital noise reduction, the 3D digital noise reduction function processes the noise between
two frames besides processing the noise in one frame. The noise will be much less and the
video will be clearer.
1) If you select Normal Mode, adjust 3D DNR Level from 0 to 100.
2) If you select Expert Mode, adjust Spatial Intensity and Time Intensity from 0 to 100.
(Optional) Check 2D DNR, and adjust 2D DNR Level from 0 to 100.
(Optional) Check Slow Shutter and select slow shutter level.
In slow shutter mode, the shutter speed will automatically decrease in low illumination
conditions to maintain clear video images by increasing the exposure time. Higher level means
lower shutter speed.
(Optional) Click Capture Test to test the effects.
 Loading...