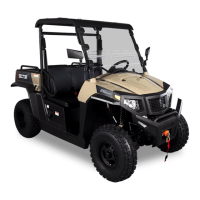
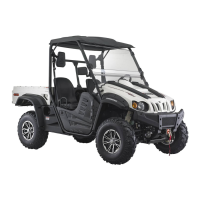
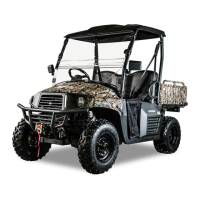
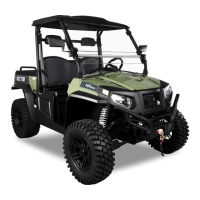
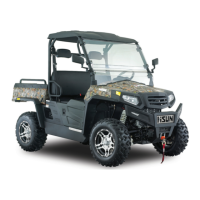
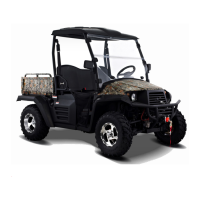
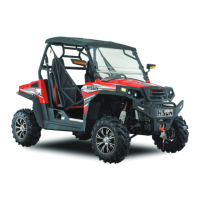
This document describes the HS 200UTV-2/HS 250UTV-2, an off-road utility terrain vehicle (UTV) designed for various applications. The manual provides comprehensive information regarding safe operation, operational instructions, maintenance, and care.
The UTV is designed exclusively for off-road use, and operating it on public streets, roads, or highways is illegal and unsafe. It complies with all applicable off-road noise level and spark arrester laws and regulations in effect at the time of manufacture. Users are advised to check local riding laws and regulations before operation.
The manual emphasizes several important safety messages:
- Read the manual carefully and completely before operating the UTV, ensuring all instructions are understood.
- Pay close attention to all warning and caution labels on the UTV.
- Never operate the UTV without proper training or instruction.
- This UTV should not be ridden by anyone under 12 years of age.
Important information within the manual is highlighted using specific notations:
- The Safety Alert Symbol (!) signifies "ATTENTION! YOUR SAFETY IS INVOLVED!"
- WARNING instructions indicate that failure to follow them could result in severe injury or death to the operator, bystander, or person inspecting or repairing the machine.
- CAUTION indicates special precautions to be taken to avoid damage to the machine.
- NOTE provides key information to make procedures easier and clearer.
Operational Features
Starting the Engine
To start the engine, ensure the parking brake is set and the gear shift lever is in the "NEUTRAL" position. The engine will not start otherwise due to safety devices. The accelerator pedal should be pushed down slowly. The ignition key has "OFF" (stops engine), "ON" (engine runs or headlights on), and "START" (starts engine) positions.
Cold Starting: When the ambient temperature is below -15°C (5°F), the engine is very cold. If the engine fails to start after 5 seconds, turn off the key for 30 seconds and try again. For the first start, it may take longer for fuel to reach the injectors; hold the ignition key on at 5-second intervals, allowing the starter to rest 15 seconds between attempts.
Warming Up: After engine start-up, allow 5 minutes for the engine to warm up without applying any load. This ensures oil reaches all engine parts. Operating under full load without sufficient warm-up can cause engine damage. During warm-up, the parking brake should be set, and the shift lever should be in the "NEUTRAL" position.
Stopping the Engine
After slowing the engine to idle, turn the key to "OFF" and remove it.
Driving
- Seat Belts: The driver and passenger must always wear seatbelts. Seatbelts reduce injury, but may not provide adequate protection for small children.
- Gear Shifting: The gear shift lever can only be shifted when the vehicle is completely stopped and the brake pedal is pressed. Avoid changing gears when ascending or descending a slope. For slopes, shift to "L" (Low Range) to control speed. Operate in reverse at slow speeds.
- Accelerator Pedal: Used to increase engine and vehicle speed. Push down for higher speed.
- Brake Pedal: The left pedal on the floorboard. Depress slowly to stop the vehicle.
- Parking Brake: Set to the top position to park the vehicle. The parking brake warning lamp illuminates when applied.
- Driving on Slopes: Be cautious as this is a primary cause of loss of control and overturn. Drive in a straight line at low speed, reduce weight on rough terrain, and avoid sudden braking uphill or downhill. If momentum is lost or parking is needed when climbing, use the hand lever brakes to stop.
- Harsh Conditions: Operate during the day or under good light conditions. Wear helmets and protective equipment. Slow down according to road, terrain, and visibility. Be cautious over ditches, stone roads, and hidden obstacles. Avoid water deeper than axle height.
- High Speed Driving: Check wheel conditions. Slow down when turning to prevent overturn. Turn on headlights. Drive only at controllable speeds. Sudden steering wheel turns at high speeds reduce stability.
- Cargo: Never carry passengers in the cargo bed. Maximum load in the cargo bed is 110 lbs (50 kg). Evenly distribute cargo for stability and secure it. Reduce loaded weight on poor road conditions or steep inclines. Do not place hands or body under the cargo bed when raised. Secure and lock the cargo bed before driving.
Lighting and Indicators
- Headlight Switch: Toggles headlights "ON" or "OFF."
- Emergency Light Switch: Press the top half to activate, causing lights and instrument panel indicator to flash. Press the bottom half to turn off. Operative when the key switch is "ON" or "OFF," but leaving it "ON" when the engine is off will drain the battery.
- Turn Signal Light Switch: Push the lower half for a right turn, upper half for a left turn. The corresponding turning light and instrument panel indicator will flash. Operative only when the key switch is "ON."
- Fuel Gauge: Indicates fuel level when the key switch is "ON." Avoid fully emptying the tank.
- Coolant Temperature Gauge: Indicates coolant temperature. White zone for "cold," red zone for "hot." If it reaches the red zone, the engine is overheating.
- Speedometer: Indicates traveling speed.
- Hour Meter: Indicates engine operating hours in five digits.
Technical Specifications
Engine
- Type: 1 cylinder, 4-cycle, gasoline, SOHC, liquid cooled
- Displacement: 199CC (HS 200UTV-2) / 229CC (HS 250UTV-2)
- Horsepower:
- 199CC: 11.2 kW (15.02 Hp) @ 7500 Rpm
- 229CC: 12 kW (16.09 Hp) @ 7500 Rpm
- Rated Revolution: 7500 rpm
- Fuel Capacity: ≤ 13.5 L (3.6 ± 0.1 U.S. gallons)
- Fuel Type: Use only 91 Octane or higher gasoline. Non-Ethanol gasoline is recommended for better performance. E-85 gasoline will void the warranty.
- Engine Oil: 10W/40SL, API service classification, SAE Engine Oil suitable for ambient temperatures.
Transmission
- Type: CVT
- Drive System: 4, Rear 2WD
- Gear Selection: L-H-N-R (Low, High, Neutral, Reverse)
Brakes
- Front/Rear: Wet disk brake
- Parking Brake: Rear wheel, hand lever
- Brake Fluid: DOT3 GENUINE BRAKE FLUID from a sealed container.
Steering
- Type: Mechanical power, Steering wheel
Suspension
- Front: Independent, short-long arm type
- Rear: Integral, rear driving axle type
Dimensions
- Length: 2450 mm (96.47 in)
- Wide: 1300 mm (51.18 in)
- Height: 1660 mm (65.35 in)
- Front Tread Centers: 973 mm (38.3 in)
- Rear Tread Centers: 975 mm (38.38 in)
- Wheelbase: 1780 mm (70.08 in)
- Ground Clearance:
- Front axle: 180 mm (7.08 in)
- Rear axle: 180 mm (7.08 in)
- Turning Diameter: 7 m (22.96 ft)
Weights and Capacities
- Max. Rolling Weight: N/A
- Cargo Load Capacity: 50 kg (110 lbs)
- Weight: 298 kg (657.5 lbs)
- Cargo Bed Dimensions:
- Width: 602 mm (23.7 in)
- Length: 846 mm (33.3 in)
- Depth: 208 mm (8.2 in)
- Volume: 0.1 m³ (1.6 cu.ft.)
- Bed Height (unloaded): 720 mm (28.3 in)
- Sound Level (Operator Ear): 85 dB (A)
- Coolant Capacity: 2.2 L (2.3 U.S. qts)
Tires
- Front: 22×7-10 6PR (49 kPa / 0.49 kgf/cm² / 7 psi cold tire pressure)
- Rear: 22×10-10 6PR (49 kPa / 0.49 kgf/cm² / 7 psi cold tire pressure)
Traveling Speeds
- Low Range: 13 km/h (8 mph)
- High Range: 40 km/h (25 mph)
- Reverse: 16 km/h (10 mph)
Body Color Options
Red, Black, White, Blue, Yellow, Orange, Camo.
ROPS Compliance
This structure meets ROPS (Roll-Over Protective Structure) requirements for earth-moving machinery under ISO 3471.
Maintenance Features
The manual outlines a comprehensive maintenance schedule, emphasizing the importance of regular checks and servicing to prevent troubles and ensure safe operation.
Daily Check
Before starting, inspect the exterior, engine oil level, transmission oil level, brake fluid level, coolant level, radiator screen, brake and pedal, parking brake, indicators, gauges, meters, lights, seat belts, roll-over protective structures, joint boots, tire inflation pressure, backup beeper, and refuel if necessary. Check all danger, warning, and caution labels.
Service Intervals
Maintenance tasks are categorized by operating hours or timeframes. Items marked with an asterisk (*) are emission-related critical parts by the U.S. EPA.
First 50 Hours:
- Engine oil change
- Engine oil filter replacement
- Transmission fluid change
- Engine start system check
- Greasing
- Muffler cleaning
- Spark arrester cleaning
- Wheel bolt torque check
- Battery condition check
- Toe-in adjustment
- Fuel filter element check/replacement
- Fuel line check/replacement
- Air cleaner element cleaning/replacement
- Brake pedal check
- Parking brake lever adjustment
- Brake light switch check
- Radiator hose and clamp check/replacement
- Intake air line check/replacement
Every 50 Hours:
- Greasing (especially pivot areas)
Every 100 Hours:
- Engine oil change
- Engine oil filter replacement
- Greasing
- Muffler cleaning
- Spark arrester cleaning
- Wheel bolt torque check
- Battery condition check
- Toe-in adjustment
- Fuel filter element check/replacement
- Fuel line check/replacement
- Air cleaner element cleaning/replacement
- Brake pedal check
- Parking brake lever adjustment
- Brake light switch check
- Radiator hose and clamp check/replacement
- Intake air line check/replacement
Every 200 Hours:
- Engine oil change
- Engine oil filter replacement
- Parking brake lever adjustment
- Brake light switch check
- Radiator hose and clamp check/replacement
Every 300 Hours:
Every 400 Hours:
- Transmission fluid change
- Front axle case oil change
- Knuckle case oil change
Every 500 Hours:
- Fuel filter replacement (consult dealer)
Every 600 Hours:
- Adjusting engine valve clearance (consult dealer)
Every 800 Hours:
- Engine valve clearance adjustment
Every 1500 Hours:
- Checking injection and fuel pump (consult dealer)
Every 3900 Hours:
Every 1 Year:
- Air cleaner primary and secondary element replacement
Every 2 Years:
- Changing brake fluid (consult dealer)
- Remote hydraulic hose replacement
- Rear brake cylinder seal replacement
- Front brake seal replacement
- Cooling system flush
- Coolant change
- Radiator hose and clamp replacement
Every 4 Years:
- Brake hose replacement (consult dealer)
Specific Maintenance Procedures
Engine Oil: Check oil level by drawing out the dipstick, wiping it clean, replacing it, and drawing it out again. Add new oil to the prescribed level if low.
Coolant: Do not open the radiator cap when hot. When cool, slowly rotate to the first stop to relieve pressure, then remove completely. Check coolant level between "FULL" and "LOW" marks on the recovery tank. Add coolant up to the full level. If leakage occurs, add anti-freeze and water in the specified mixing ratio. Flush cooling system and change coolant every 2 years. The antifreeze mixing ratio must be less than 50%. Use ethylene glycol (EG) type for this engine.
Radiator Screen: Clean once a week (or daily in dusty conditions) to remove debris and prevent overheating.
Brake Fluid: Never operate if fluid is below the minimum mark. Use only DOT3 fluid. Avoid contamination. If fluid spills on power steering hose, wash off immediately. Check level on a flat surface with the hood open. Add fluid if below "MIN" mark.
Brake Pedal: Inspect for free play. Adjust if necessary.
Parking Brake Lever: Pull the lever to apply the brake. Push the release button and push down on the lever to release.
Gauges and Warning Lamps: Inspect for broken bulbs or lenses.
Seat Belt and ROPS: Check condition and attaching hardware. Replace if damaged.
Tire Inflation Pressure: Maintain specified pressure (7 psi / 49 kPa for both front and rear).
Greasing: Apply multi-purpose grease to pivot areas every 50 hours.
Engine Start System: Check that the engine only starts when the operator is seated, the gear shift lever is in "NEUTRAL," and the brake pedal is pressed.
Wheel Bolt Torque: Check and tighten if loose (75 to 90 N.m).
Air Cleaner Primary Element: Remove cover and primary element. Clean by blowing compressed air from the inside (under 205 kPa) or washing with detergent and water if carbon/oil adheres. Replace yearly or after every sixth cleaning. Do not run the engine without the filter element.
Evacuator Valve: Open the air cleaner cover once a week (or daily in dusty conditions) to remove large particles of dust and dirt.
Battery: Check condition annually. If stored for long periods, remove and store in a dry place. Recharge every three months (hot seasons) or six months (cold seasons). When charging, connect positive to positive and negative to negative. Use 12V8Ah battery for replacement.
Toe-in: Adjust if the front wheel-to-wheel distance is not 0 to 12 mm (0 to 0.47 in) shorter than the rear distance. Loosen the lock nut and turn the tie rod to adjust.
Muffler: Visually check for cracks or holes. Replace if damaged. Clean spark arrester every 100 hours.
Fuel Filter: Check fuel line and fuel filter. Replace fuel filter every 500 hours.
Fuses: Mini fuses protect electrical cabling. If blown, pinpoint the cause and replace.
Light Bulbs: Replace head lights (2x35W/2x55W), tail lights (2x0.6W/2x0.6W), brake lights (2x1W/2x1W), and instrument panel light (0.02W) as needed.
Winch Mount Plate
Always read and follow the winch owner's manual for installation and use.
Transportation
Use a suitable truck or trailer. Apply the parking brake and place chocks against the front and rear tires. Pay attention to surroundings when loading or unloading.
Vehicle Storage
For extended storage, check and tighten bolts/nuts. Apply grease to metal and pivot areas. Unload cargo bed. Inflate tires slightly higher than usual. Charge engine oil and run the engine for 5 minutes. Coat exposed rods with grease. Remove and store the battery. Store the vehicle in a dry, sheltered area, protected from sunlight.
Removing Vehicle from Storage
Check tire pressure. Install charged battery. Check fan works. Check all fluid levels. Start engine, observe gauges, and move the vehicle outside. Park and idle for at least 5 minutes. Shut off engine and inspect.
Troubleshooting
The manual includes troubleshooting tables for common issues:
Engine is difficult to start or cannot start:
- No fuel flow: Check fuel tank, electric fuel pump, injector, ECU, fuel tank cover.
- Water in the fuel system: Drain and clean.
- In winter, oil viscosity increases, and engine revolution is slow: Use oils of different viscosities depending on ambient temperatures.
- Battery becomes weak and the engine does not turn over quick enough: Clean battery cables and terminals, charge battery. In cold weather, remove battery and store indoors, install only when vehicle is going to be used.
Engine power is insufficient:
- Insufficient fuel: Check fuel system.
- The injector is clogged: Clean or replace injector.
- Crankshaft position sensor is bad: Replace crankshaft position sensor.
- The air cleaner is clogged: Clean or replace air cleaner.
- Spark plug is dirty or fouled: Clean or replace spark plug.
- Ignition coil is bad: Replace ignition coil.
Engine stops suddenly:
- Check with the diagnostic instrument (Motor Scan KF90121).
- Engine overloaded: Shift to lower gear or reduce load. Fill cooling system to correct level.
- Low coolant level: Check radiator and hoses for loose connections or leaks.
- The motor driven fan does not turn: Check if the fuse is not blown. Check electric system.
- Dirty radiator core or grille screens: Remove all trash.
- Coolant flow route corroded: Flush cooling system.
Machine Troubleshooting (Non-agility for Gearshift, Transmission Noise, Less Vehicle Power, No Good Brake or Noise):
- High idling speed: Replace throttle cable, pedal, or throttle.
- High rotary speed for clutch connection: Replace junior clutch spring or primary clutch.
- Non good adjust for gearshift stay wire: Put gearshift rod into "N," put gearshift arm of engine into "N," adjust stay wire and bolt, lock tightly.
- Gear abrasion: Replace gears.
- Big matching clearance for inner and outside gears of transmission shaft: Replace gears.
- Big clearance of transmission gears: Replace gears.
- Non good connection of gear end face: Replace gears.
- Parking brake: Loosen lay-up rod.
- Non full uncoupling for disc brake: Contact distributor.
- CVT transmission sliding: Remove grease for clutch, replace CVT transmission belt, replace clutch.
- Less brake oil: Check braking oil level.
- Air inside the braking system: Contact distributor.
- Brake discs abrasion: Contact distributor.
- Assembling bolt of disc plate loose: Lock tightly.
- Assembling bolt for disc brake clippers loose: Lock tightly.
Diagnostic Trouble Code Table (MT05 ECU Malf Code)
The manual provides a table of diagnostic trouble codes (DTCs) and their descriptions, such as:
- P0107: MAP Circuit Low Voltage or Open
- P0108: MAP Circuit High Voltage
- P0112: IAT Circuit Low Voltage
- P0113: IAT Circuit High Voltage or Open
- P0117: Coolant/Oil Temperature Sensor Circuit Low Voltage
- P0118: Coolant/Oil Temperature Sensor Circuit High Voltage or Open
- P0122: TPS Circuit Low Voltage or Open
- P0123: TPS Circuit High Voltage
- P0131: O2A Circuit Low Voltage
- P0132: O2A Circuit High Voltage
- P0031: O2A Heater Circuit High Voltage
- P0032: O2A Heater Circuit Low Voltage
- P0201: Injector 1 Circuit Malfunction
- P0202: Injector 2 Circuit Malfunction
- P0230: FPR Coil Circuit Low Voltage or Open
- P0232: FPR Coil Circuit High Voltage
- P0336: CKP Sensor Noisy Signal
- P0337: CKP Sensor No Signal
- P0351: Cylinder 1 Ignition Coil Malfunction
- P0352: Cylinder 2 Ignition Coil Malfunction
- P0505: Idle Speed Control Error
- P0562: System Voltage Low
- P0563: System Voltage High
- P0650: MIL Circuit Malfunction
- P1693: Tachometer Circuit Low Voltage
- P1694: Tachometer Circuit High Voltage
Users are advised to consult their local dealer for any questions regarding these codes.
Battery Troubleshooting
- Starter does not function: Battery overused/not recharged, poor terminal connection, battery life expired. Countermeasures include charging, cleaning/tightening terminals, or replacing the battery.
- From beginning starter does not function, and lights soon become dim: Insufficient charging. Countermeasures include charging sufficiently or servicing the battery before initial use.
- When viewed from the top of plates, look whitish (refillable type battery only): Battery used with insufficient electrolyte or too much without recharging. Countermeasures include adding distilled water and charging, or replacing the battery.
- Recharging is impossible: Battery life expired. Countermeasure is to replace the battery.
- Terminals are severely corroded and heat up: Poor terminal connection. Countermeasures include cleaning and tightening terminals, applying grease, and treating with anti-corrosives.
- Battery electrolyte level drops rapidly (refillable type battery only): Crack or pinholes in electrolytic cells, or charging system trouble. Countermeasures include replacing the battery or consulting the local dealer.
The factory-installed battery is non-refillable.
Options
The manual mentions options such as a roof, windshield, and windlass, along with the Motor Scan KF90121.
Emissions Warranty
The manual refers to an Emissions Warranty statement, indicating the manufacturer's responsibility for emission-related critical parts.