EasyManua.ls Logo

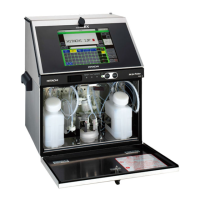
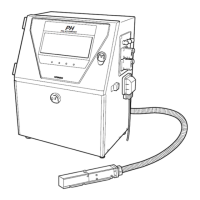
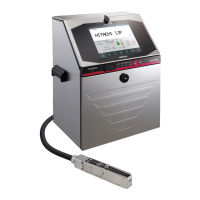
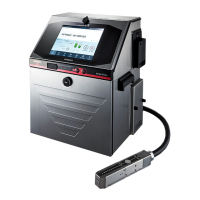
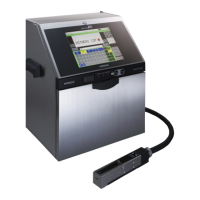
Hitachi IJ RX2-SD160 User Manual

Hitachi IJ RX2-SD160
224 pages
To Next Page IconTo Next Page
Page #1 background imageLoading...
Page #1 background image
HITACHI Printer
Instruction Manual
INK JET PRINTER FOR INDUSTRIAL MARKING
Model RX2
Thank you for purchasing the Hitachi IJ Printer Model RX2.
This printer employs a noncontact, ink-jet method to print onto a print target.
This instruction manual describes the basic operating procedures, maintenance procedures, and other detailed
handling procedures of the Hitachi IJ Printer Model RX2.
If the printer is improperly handled or maintained, it may not operate smoothly and may become defective or
cause an accident. It is therefore essential that you read this manual to gain a complete understanding of the
printer and use it correctly.
After thoroughly reading the manual, properly store it for future reference.
IF you changed the language of the screen by mistake, see Chapter 7.8 "Selecting Languages".
Table of Contents

Questions and Answers:

Hitachi IJ RX2-SD160 Specifications

General IconGeneral
BrandHitachi
ModelIJ RX2-SD160
CategoryPrinter
LanguageEnglish

Summary

HITACHI Printer Instruction Manual

INK JET PRINTER FOR INDUSTRIAL MARKING

Product category for the HITACHI Printer Model RX2.

Model RX2

Specifies the model of the HITACHI Printer.

SAFETY PRECAUTIONS

WARNING Definitions

Defines the meaning of WARNING for hazardous situations.

CAUTION Definitions

Defines the meaning of CAUTION for hazardous situations.

Pictograph Examples

Explains safety pictographs used in the manual.

SAFETY PRECAUTIONS (Continued)

WARNING

Provides critical safety warnings for printer operation.

SAFETY PRECAUTIONS (Continued)

WARNING

Continues critical safety warnings, including mercury warning.

Warning for Mercury

Specific warning regarding mercury content in the product.

SAFETY PRECAUTIONS (Continued)

WARNING

Provides further critical safety warnings related to printer operation.

SAFETY PRECAUTIONS (Continued)

WARNING

Continues safety warnings concerning flammability and handling.

SAFETY PRECAUTIONS (Continued)

CAUTION

Provides cautionary advice for safe printer operation and handling.

SAFETY PRECAUTIONS (Continued)

FCC Notice

Regulatory compliance information regarding FCC rules.

SECURITY PRECAUTIONS

CAUTION

Provides cautionary advice regarding system security and network risks.

1. USAGE PRECAUTIONS

1.1 Ink and makeup

Guidance on handling ink and makeup consumables.

1.2 IJ printer long-term shutdown

Procedures for shutting down the printer for extended periods.

1.3 Print head cleaning

1.4 Shutdown (no-cleaning stop)

1.5 Cautions on operating time when printer is in service

1.6 Heating of ink

1.7 Ink concentration control

1.8 Gutter cleaning

1.9 Protection sheet

2. COMPONENT NAMES AND FUNCTIONS

2.1 External views

Identifies external parts of the printer unit.

2.2 Main body internal parts arrangement

2.3 Print head

3. BASIC OPERATION

3.1 Start operation

Step-by-step guide to starting the printer.

3.1 Start operation (Continued)

3.1.1 Start operation

Detailed steps for initiating printer operation.

3.1 Start operation (Continued)

3.1.1 Start operation (Continued)

Detailed steps for initiating printer operation.

3.1 Start operation (Continued)

3.1.1 Start operation (Continued)

Detailed steps for initiating printer operation.

3.1.2 When an error occurred at the start of operation

3.1.2 When an error occurred at the start of operation (Continued)

3.1.2 When an error occurred at the start of operation (Continued)

3.1.2 When an error occurred at the start of operation (Continued)

Ink ejection using the Manual Control Menu

3.1.3 Ready and Standby state switching operation

(1) “Ready” state → “Standby” state switching

Procedure to switch the printer from Ready to Standby state.

3.1.3 Ready and Standby state switching operation (Continued)

(2) “Standby” state → “Ready” state switching

Procedure to switch the printer from Standby to Ready state.

3.1.4 Specifying the user

(1) Functions

Describes functions related to user specification.

(2) Operation

Explains the procedure for specifying the user.

3.2 Shut down operation

3.2.1 Automatically stopping by pressing one button (RX2-S only)

Procedure for automatic shutdown using a single button.

3.2.2 Stopping ink ejection by pressing the screen button

3.2.3 Turning off the main power switch

Handling the nozzle rubber seal

3.3 Basic operation

3.3.1 Operating Scheme

Provides an overview diagram of basic operation flows.

3.3.1 Operating Scheme (Continued)

(2) Change message

Details the process of changing messages within the operation scheme.

3.3.1 Operating Scheme (Continued)

(3) Environment setup menu, Auxiliary menu, Maintenance menu

Illustrates menu navigation for setup, auxiliary, and maintenance functions.

3.3.2 Status

(1) The printer is in one of the following states.

Lists and describes the different operational states of the printer.

3.3.2 Status (Continued)

(3) When there is a “Not reset alarm”, a Warning is displayed.

Explains how warnings are displayed for non-reset alarms.

3.3.3 Basic operation to change the settings

(1) Overview

Provides an overview of the three types of settings available.

3.3.3 Basic operation to change the settings (Continued)

(2) Operation (Maintenance “Excitation V update” screen is used as an example.)

Demonstrates changing settings using the Excitation V update screen.

3.3.4 Operations (OK, Back, Apply) which exit from a screen

(1) Overview

Explains the functions of OK, Back, and Apply buttons for screen navigation.

(2) Screen examples

Provides examples of screen operations using OK, Back, and Cancel.

3.3.4 Operations (OK, Back, Apply) which exit from a screen (Continued)

3.3.4 Operations (OK, Back, Apply) which exit from a screen (Continued)

4. CREATION AND PRINTING OF MESSAGES

4.1 Print description screen (initial screen)

Describes the initial screen for creating and managing print messages.

4.1 Print description screen (initial screen) (Continued)

(2) Operation

Explains how to operate the Print description screen.

(3) Current message and saved message

Differentiates between current and saved messages.

4.2 Edit messages to be printed (Change message screen)

(1) Overview

Introduces the message editing screen and print format types.

4.2 Edit messages to be printed (Change message screen) (Continued)

4.2 Edit messages to be printed (Change message screen) (Continued)

(2) Operation

Details the operational steps for editing messages.

4.3 Call and print saved messages

(1) Overview

Explains how to retrieve and print saved messages.

4.3 Call and print saved messages (Continued)

(2) Operation

Provides steps for calling and printing saved messages.

4.4 Overwrite messages to be printed

(1) Overview

Explains how to overwrite existing messages with new data.

4.5 Edit messages different from the current message

(1) Overview

Describes editing saved messages distinct from the current one.

4.5 Edit messages different from the current message (Continued)

(2) Operation

Provides steps for editing messages different from the current one.

4.6 Save created messages

(1) Overview

Details the capacity and process for saving created messages.

4.6 Save created messages (Continued)

(2) Operation

Explains the steps for saving created messages.

4.6 Save created messages (Continued)

4.7 Set the print format (Fixed layout)

4.7.1 Select the print items to be edited

Methods for selecting individual print items for formatting.

4.7 Set the print format (Fixed layout) (Continued)

4.7.1 Select the print items to be edited (Continued)

Methods for selecting all print items for formatting.

4.7.2 Set the number of print lines

(1) Function

Sets the number of lines for selected columns.

4.7.3 Add and delete print items

(1) Function

Allows deletion, insertion, and addition of print items in columns.

4.7.4 Set dot matrix, inter-character space, and other parameters

(1) Function

Sets line spacing, dot matrix, inter-character space, and bold font.

4.7.4 Set dot matrix, inter-character space, and other parameters (Continued)

3 Dot matrix

Sets the character grid size (dots).

4.7.4 Set dot matrix, inter-character space, and other parameters (Continued)

4 Inter-character space

Sets the spacing between characters.

4.7.4 Set dot matrix, inter-character space, and other parameters (Continued)

4.7.5 Print a bar code (RX2-S only)

(1) Kinds of bar codes

Lists the supported types of bar codes.

4.7.5 Print a bar code (RX2-S only) (Continued)

(2) Examples

Provides examples of setting up different barcode types.

4.8 Set the print format (Free layout; RX2-S only)

4.8.1 Select the print items to be edited

Methods for selecting print items in a free layout.

4.8.2 Set the print items to be edited

(1) Function

Defines the coordinate system for positioning print items.

4.8.2 Set the print items to be edited (Continued)

(2) Set the coordinate of one print item

Explains how to set coordinates for individual print items.

4.8.3 Add and delete print items

(1) Function

Allows adding or deleting print items in free layout.

4.8.3 Add and delete print items (Continued)

4.8.3 Add and delete print items (Continued)

4.8.4 Set dot matrix, inter-character space, and other parameters

4.8.5 Print a bar code

4.9 Print characters

4.9.1 Print fixed characters

Describes inputting pre-defined characters for printing.

4.9.1 Print fixed characters (Continued)

4.10 Use the calendar function

4.10.1 Print calendar characters

Explains how to print date and time information.

4.10.1 Print calendar characters (Continued)

(2) Total number of days

Details printing the total number of days in a year.

(3) Alphabet month 3 digits (JAN, FEB, ----)

Explains printing month abbreviations.

4.10.1 Print calendar characters (Continued)

(4) Week number

Details printing the week number of the year.

(5) Day of the week

Explains printing the day of the week.

4.10.1 Print calendar characters (Continued)

(6) Operation

Explains how to use the calendar keyboard for input.

4.10.1 Print calendar characters (Continued)

4.10.1 Print calendar characters (Continued)

4.10.1 Print calendar characters (Continued)

4.10.2 Print future date (offset)

(1) Offset function

Sets future dates by adding offset values to the current date.

4.10.2 Print future date (offset) (Continued)

(2) Operation

Explains the steps to set date offsets.

4.10.2 Print future date (offset) (Continued)

4.10.3 Print by substituting a different character for the date (substitution rule)

(1) Substitution rule function

Allows custom character substitution for date elements.

4.10.3 Print by substituting a different character for the date (substitution rule) (Continued)

(3) Operation

Explains how to apply substitution rules for date characters.

4.11 Print shift code (Optional on RX2-S)

(1) Overview

Describes printing different codes for different work shifts.

4.11 Print shift code (Optional on RX2-S) (Continued)

(2) Operation

Explains the steps to set up shift codes.

4.11 Print shift code (Optional on RX2-S) (Continued)

4.11 Print shift code (Optional on RX2-S) (Continued)

4.12 Update the print contents at a fixed interval (Time count) (Optional RX2-S)

(1) Overview

Describes updating print content based on time intervals.

4.12 Update the print contents at a fixed interval (Time count) (Optional RX2-S) (Continued)

(2) Operation

Explains the steps for configuring time count updates.

4.12 Update the print contents at a fixed interval (Time count) (Optional RX2-S) (Continued)

4.12 Update the print contents at a fixed interval (Time count) (Optional RX2-S) (Continued)

4.13 Use the count function

4.13.1 Print count characters

Details the functionality for printing sequential count characters.

4.13.1 Print count characters (Continued)

4.13.1 Print count characters (Continued)

(2) Count conditions setting examples

Provides examples for setting count conditions.

4.13.1 Print count characters (Continued)

4.13.1 Print count characters (Continued)

4.13.1 Print count characters (Continued)

4.13.1 Print count characters (Continued)

4.13.2 Use count multiplication printing

(1) Function

Explains multiplying count values by a predetermined factor.

4.13.2 Use count multiplication printing (Continued)

(2) Operation

Details the steps for setting the count multiplier.

4.13.2 Use count multiplication printing (Continued)

4.13.2 Use count multiplication printing (Continued)

4.13.2 Use count multiplication printing (Continued)

4.13.2 Use count multiplication printing (Continued)

4.13.2 Use count multiplication printing (Continued)

4.13.3 Skip specified character and print (Count skip)

(1) Function

Allows skipping specific characters in the count sequence.

4.13.3 Skip specified character and print (Count skip) (Continued)

(3) Operation

Explains the steps for configuring count skip functionality.

4.13.3 Skip specified character and print (Count skip) (Continued)

4.14 Set the print specifications

4.14.1 Set the character height, character width, and orientation

Configures character height, width, and printing orientation.

4.14.1 Set the character height, character width, and orientation (Continued)

(4) Character orientation

Sets the direction of character printing.

(5) Printing method

Selects between single scan, interlaced, and mixed printing methods.

4.14.1 Set the character height, character width, and orientation (Continued)

6 Print start delay

Adjusts the timing of the print start.

4.14.1 Set the character height, character width, and orientation (Continued)

7 Product speed matching

Adapts print settings to conveyor speed.

8 Line speed

Sets the printer's operational line speed.

9 Pulse rate division factor

Configures encoder signal recognition intervals.

10 Speed compensation (RX2-S)

Ensures print position stability by compensating for speed variations.

4.14.1 Set the character height, character width, and orientation (Continued)

11 Distance between print head and work

Sets the distance between the print head and the target.

12 Print Target width

Defines the range for print target detection.

13 Actual Print width

Sets the actual width of the printed area.

4.14.1 Set the character height, character width, and orientation (Continued)

14 Target sensor timer

Sets the time for displaying fault messages when the sensor is ON.

15 Target sensor filter

Sets time to ignore sensor signal chattering.

16 Ink drop charge rule (RX2-S only)

Optimizes print quality by controlling ink drop charge.

4.14.1 Set the character height, character width, and orientation (Continued)

4.14.1 Set the character height, character width, and orientation (Continued)

4.14.1 Set the character height, character width, and orientation (Continued)

4.14.2 Set repeat printing

(1) Overview

Explains how to set up continuous printing.

4.14.3 Set various printing

(1) Function

Provides an overview of various special print setup options.

4.14.3 Set various printing (Continued)

3 EAN Prefix (RX2-S only)

Sets EAN barcode prefixes for specific barcode types.

4 Barcode print (RX2-S only)

Configures barcode printing modes.

5 QR Error correction level (RX2-S only)

Sets the error correction level for QR codes.

4.14.4 Fine adjust the print specifications (Adjust print parameters)

(1) Function

Allows fine-tuning of print parameters like character height and width.

4.15 Using the AI code input support function (RX2-S only)

(1) Function

Explains the AI code input function for barcode data.

4.15 Using the AI code input support function (RX2-S only) (Continued)

(2) Operation

Provides steps for selecting AI codes from the list.

4.15 Using the AI code input support function (RX2-S only) (Continued)

5. MAINTENANCE

(1) Functions

Lists the available maintenance functions.

5.1 Confirm the Unit information

(1) Functions

Displays unit type, serial number, and ink information.

5.2 Monitor operational status

(1) Functions

Displays operational status like ink level and print count.

5.3 Print without any sensor signal (Test print, Start printing)

(1) Functions

Allows printing without a start signal for testing.

5.4 Confirm the registered software

(1) Functions

Displays the name and version of the installed software.

5.5 Checking the functions that can be performed

(1) Functions

Checks function accessibility and protection status.

5.5 Checking the functions that can be performed (Continued)

(2) Operation

Explains how to check function protection settings.

6. ENVIRONMENT SETUP

(1) Functions

Lists the various environment setup options.

6.1 Set the user environment

(1) Functions

Configures user-specific environment settings.

6.1 Set the user environment (Continued)

3 Reverse print

Sets the print direction for characters.

4 Print signal type (Optional on RX2-B)

Configures the printer's output signal type.

5 Print Data Changeover In Progress error

Manages errors during print data changeover.

6.1 Set the user environment (Continued)

6 Char. Size menu

Selects the character size from available menus.

7 Excitation V-ref. warning

Handles warnings related to excitation voltage reference.

8 Print characters one by one

Prints characters individually for each print target detection.

9 QR Code printing (RX2-S only)

Configures QR code printing settings.

6.1 Set the user environment (Continued)

(2) Operation

Explains how to set user environment options.

(3) Change character orientation (Change mode) supplement

Provides supplemental details on character orientation and change modes.

6.1 Set the user environment (Continued)

6.1 Set the user environment (Continued)

6.2 Set the date and time

(1) Functions

Sets the current time, calendar time, and clock system.

6.2 Set the date and time (Continued)

(2) Operation

Explains the steps to set the date and time values.

6.3 Set up the touch screen

(1) Functions

Configures touch screen settings like display timeout and keyboard layout.

6.3 Set up the touch screen (Continued)

(2) Operation

Explains the steps to configure touch screen settings.

6.4 Changing the user

(1) Functions

Describes logging in as different users and managing user accounts.

6.4 Changing the user (Continued)

(2) Operation

Provides steps for selecting and logging in as a different user.

6.5 Setting password for each user

(1) Functions

Allows users to set and change their passwords.

7 AUXILIARY FUNCTIONS

(1) Functions

Lists the available auxiliary functions of the printer.

7.1 Manage messages

7.1.1 Managing stored messages

Handles renaming, deleting, saving, and grouping messages.

7.1.1 Managing stored messages (Continued)

(3) Message selection method

Describes methods for selecting messages (Normal, Multiple, Area).

7.1.2 Changing the message name

(1) Functions

Allows changing the name of a saved message.

7.1.3 Deleting stored messages

(1) Functions

Provides the procedure for deleting stored messages.

7.1.4 Changing message number

(1) Functions

Allows changing the stored number of a message.

7.1.4 Changing message number (Continued)

7.1.4 Changing message number (Continued)

7.1.5 Changing the group to which a message belongs

(1) Functions

Changes the group assignment of a stored message.

7.1.6 Checking the print image of registered print data (RX2-S only)

(1) Functions

Allows previewing the print image of saved message data.

7.2 Manage group

7.2.1 Manage group

Basic functions for managing message groups.

7.2.2 Change group name

(1) Functions

Allows changing the name of a group.

7.2.3 Delete a stored group

(1) Functions

Deletes a group and its associated messages.

7.2.4 Change group number

(1) Functions

Allows changing the numerical order of groups.

7.2.4 Change group number (Continued)

7.3 Creating a user pattern

7.3.1 Creating and saving user pattern

Guides on creating and saving custom dot patterns.

7.3.1 Creating and saving user pattern (Continued)

(2) Operation

Explains the steps for creating and editing user patterns.

7.3.1 Creating and saving user pattern (Continued)

7.3.1 Creating and saving user pattern (Continued)

7.3.2 Selecting a user pattern

(1) Functions

Allows selection of saved user patterns.

7.3.3 Editing a pattern

(1) Functions

Provides tools for editing user patterns (e.g., rectangle, invert).

7.3.3 Editing a pattern (Continued)

7.3.3 Editing a pattern (Continued)

7.3.4 Creating a user pattern of a free size

(1) Functions

Enables creation of user patterns with arbitrary dimensions.

7.3.4 Creating a user pattern of a free size (Continued)

7.3.5 Selecting a bitmap file(BMP)

(1) Functions

Details conditions for using bitmap files as user patterns.

7.3.5 Selecting a bitmap file(BMP) (Continued)

7.4 Touch screen coordinate correction

(1) Functions

Corrects touch screen and coordinate position offsets.

7.5 Backing up data to USB memory

7.5.1 Copy data all at once

Backs up all print data and user patterns to USB memory.

7.5.1 Copy data all at once (Continued)

(2) Backup operation

Explains the steps for performing a full data backup.

7.5.1 Copy data all at once (Continued)

(3) Data copy operation

Describes copying data from USB memory to the printer.

7.5.2 Copy data individually

7.5.2 Copy data individually (Continued)

7.5.2 Copy data individually (Continued)

(5) Copy data from the Upper model to the Lower model

Details data transfer between different printer models.

7.5.2 Copy data individually (Continued)

7.5.2 Copy data individually (Continued)

(2) Individual Copy data operation for Print data

Steps for individually copying print data from USB.

7.5.2 Copy data individually (Continued)

(3) Individual Copy data operation for User pattern

Steps for individually copying user patterns from USB.

7.5.2 Copy data individually (Continued)

7.5.2 Copy data individually (Continued)

7.6 Editing standard pattern

(1) Functions

Describes editing built-in dot patterns.

7.6 Editing standard pattern (Continued)

7.7 Editing Substitution Rules

(1) Functions

Allows editing substitution rules for date and time elements.

7.8 Selecting Languages

(1) Functions

Enables changing the printer's display language.

8. INK AND MAKEUP REPLENISHMENT

WARNING

Critical safety warnings for handling ink and makeup.

CAUTION

General cautions for handling ink and makeup.

8.1 Replenishing the ink

(1) Overview

Provides details on refilling the ink reservoir.

8.2 Replenishing the makeup

(1) Overview

Provides details on refilling the makeup reservoir.

9. WHEN WARNING OR FAULT WAS GENERATED

9.1 Display when warning or fault was generated

Explains how warning and fault messages are displayed.

9.1 Display when warning or fault was generated (Continued)

(2) When warning was generated

Describes the display of warning messages.

(3) When a mistake was generated or when processing judgment is prompted

Explains confirmation messages for errors or judgments.

9.2 On-screen message descriptions

9.2.1 Fault messages

Lists fault messages that cause ink stoppage.

9.2.1 Fault messages (Continued)

9.2.1 Fault messages (Continued)

(2) Faults that do not invoke ink stoppage

Lists fault messages that do not stop ink ejection.

9.2.1 Fault messages (Continued)

9.2.2 Warning messages

9.2.2 Warning messages (Continued)

9.2.3 Other messages

9.3 When checking the warning and fault generation status

(1) Functions

Allows viewing the history of warning and fault messages.

9.4 Remedial Action to Be Taken in the Event of a Printing Failure

9.4 Remedial Action to Be Taken in the Event of a Printing Failure (Continued)

10. TROUBLESHOOTING GUIDE

11. EMERGENCY PROCEDURES

WARNING

Critical warnings for actions during emergencies.

CAUTION

Cautions regarding procedures after power restoration.

12. SPECIFICATIONS

13. APPENDIX

INDEX

Index for topics covered in the appendix.

13. APPENDIX (Continued)

13. APPENDIX (Continued)

13. APPENDIX (Continued)

13. APPENDIX (Continued)

Related product manuals