10.1.10 Removal of the float switch
Nº Part
1 Securing plate screw
2 Securing base
3 Drain mechanism
4 Float switch
5 Nut
Remove the drain pan Removal of the drain pan, see on page
273.
Loosen the resin nut securing the float switch and remove it.
Remove the two screws securing the drain mechanism to remove
the mechanism.
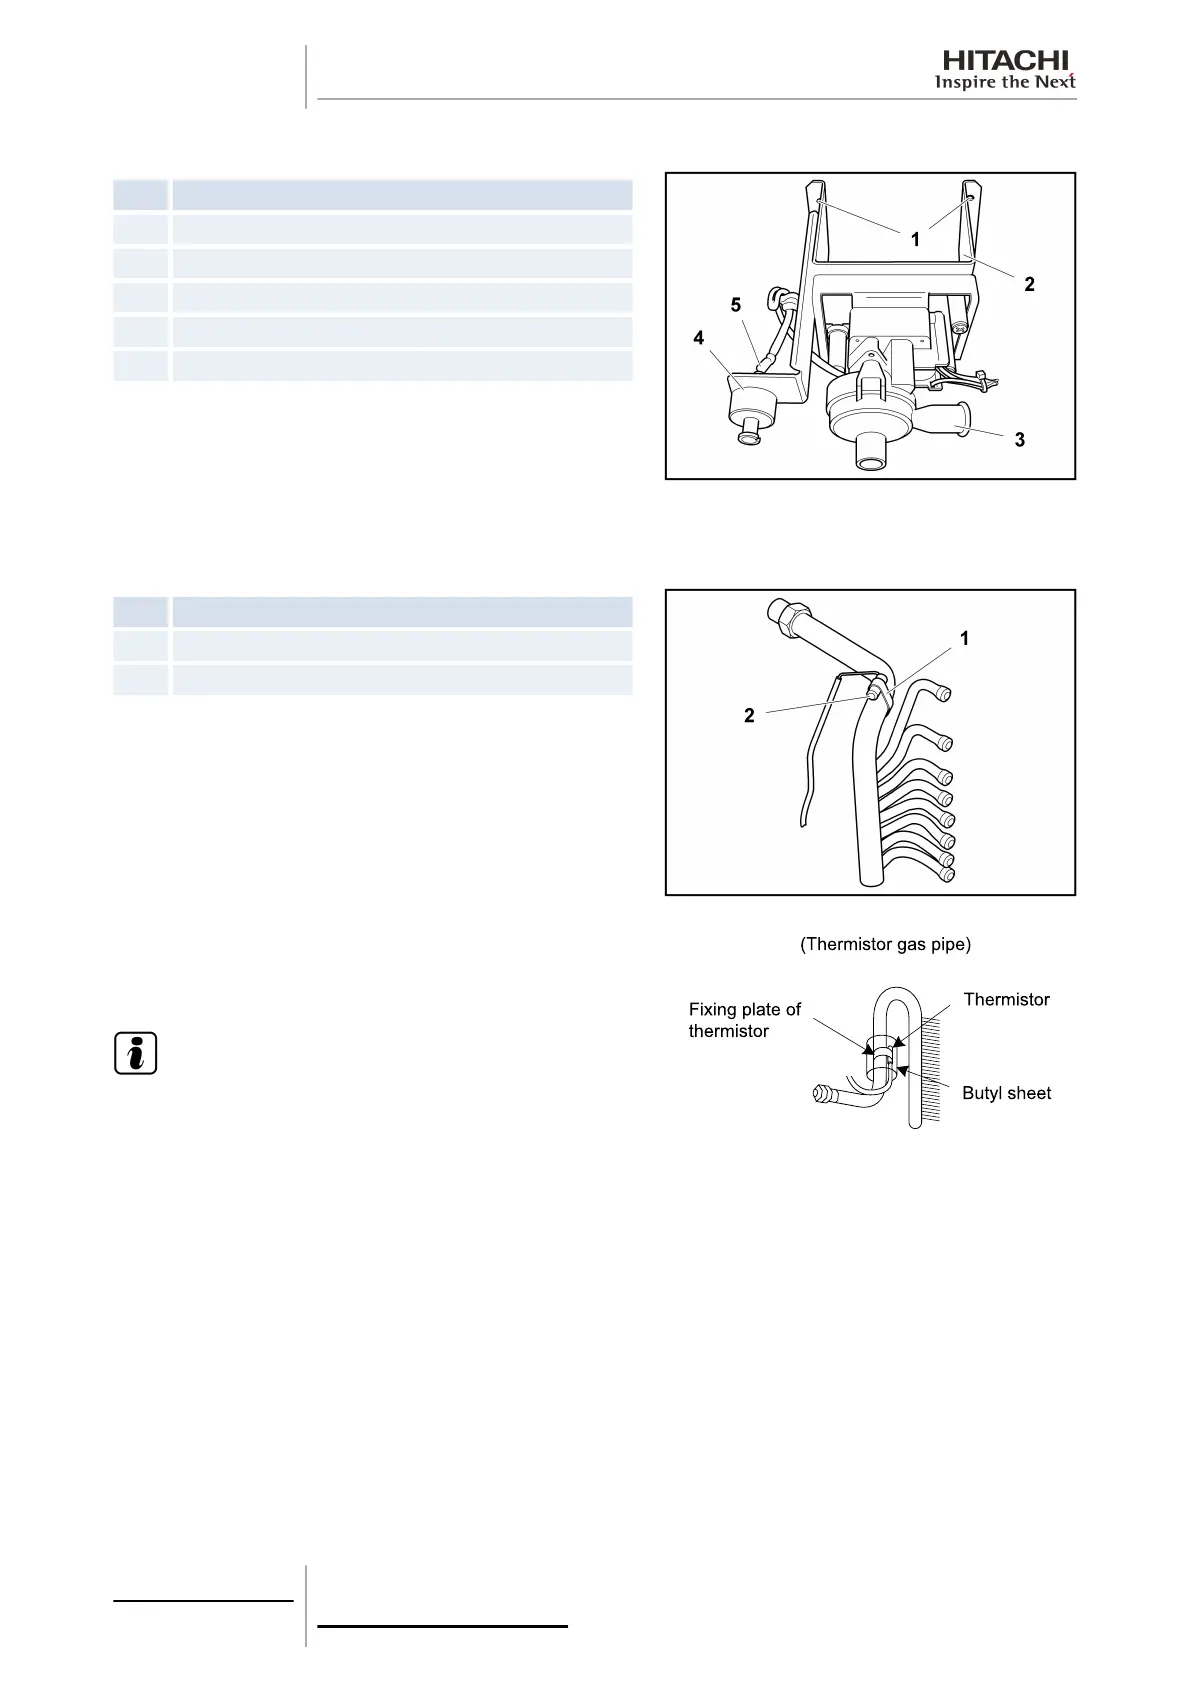
10.1.11 Removal of the thermistors from the liquid and gas pipes
Nº
Part
1 Thermistor securing plate
2 Thermistor
Remove the optional air panel in line with the instructions given in
chapter Removal of the optional air panel, see on page 270.
Remove the fan duct in line with the instructions given in chapter
Bellmouth removal, see on page 271.
Remove the drain pan as indicated in chapter Removal of the drain
pan, see on page 273.
Remove the butyl sheet covering the thermistor. Remove the plate
securing the thermistor to the pipe on which it is located and
remove.
N O T E
The thermistor protection and securing system is the same on
the gas and liquid pipe.
10 Servicing
274
SMGB0063 rev. 1 - 10/2010
 Loading...


