Prepare a polyvinyl chloride (PVC) pipe with an outer diameter of
25 mm.
Secure the pipe with the clamp and adhesive supplied (for RPI 8/10
only).
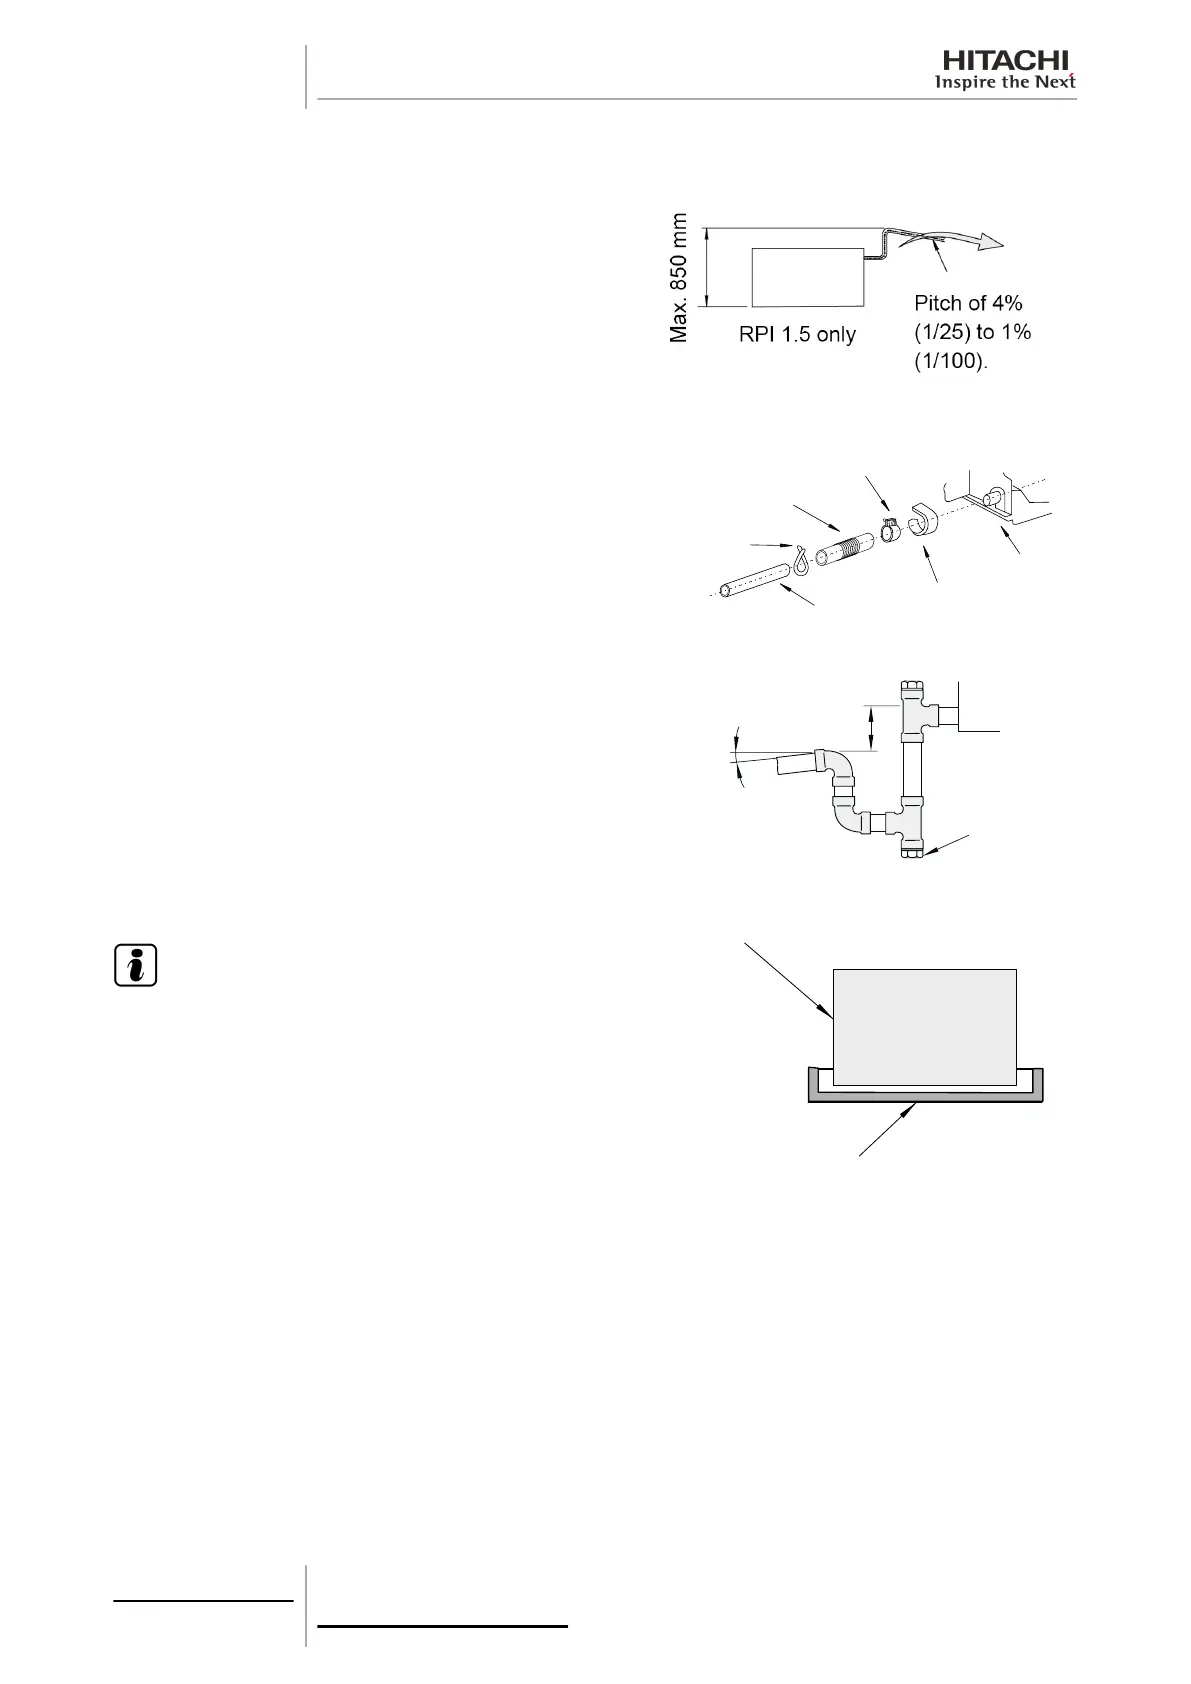
The drain hose must have a gradient of 1% (1/100) to 4% (1/25).
The drain hose cannot be installed on an upwards line, not even
on one section of the installation. In this case, the condensate water
accumulates at the lowest point immediately before the raised
section of the installation.
1 Insert the drain hose in the clamp "A".
2 Push the drain hose towards the boss until it reaches the end
of the pan.
3 Tighten the screw on the wire clamp to secure the pipe around
the drain connection without causing water leaks.
4 Insulate the drain hose around the wire clamp to avoid
condensation.
5 Insert the drain pipe into the drain hose and secure it using the
wire clamp “B”.
Connect a trap to the drain hose at the angle indicated, as indicated
in the figure.
N O T E
If the relative humidity of the inlet air or the ambient air
exceeds 80% in the place where the unit is installed, fit an
auxiliary drain pan (field-supplied) below the indoor unit, as
indicated in the figure.
3.5.8 RPK - Wall type (1.0-4.0)FSN(H)2M
¿ Gas refrigerant pipe installation
Gas pipe connection
The position of the gas pipe connection is possible in all directions (above, left or right).
Clamp B
Drain pipe
Clamp A
Insulation
Drain pipe
Drainage
Cap
> 75 mm
4% (1/25) - 1% (1/100)
Indoor unit
Auxiliary drain pan
(field-supplied)
3 Piping work and
refrigerant charge
104
SMGB0063 rev. 1 - 10/2010
 Loading...


