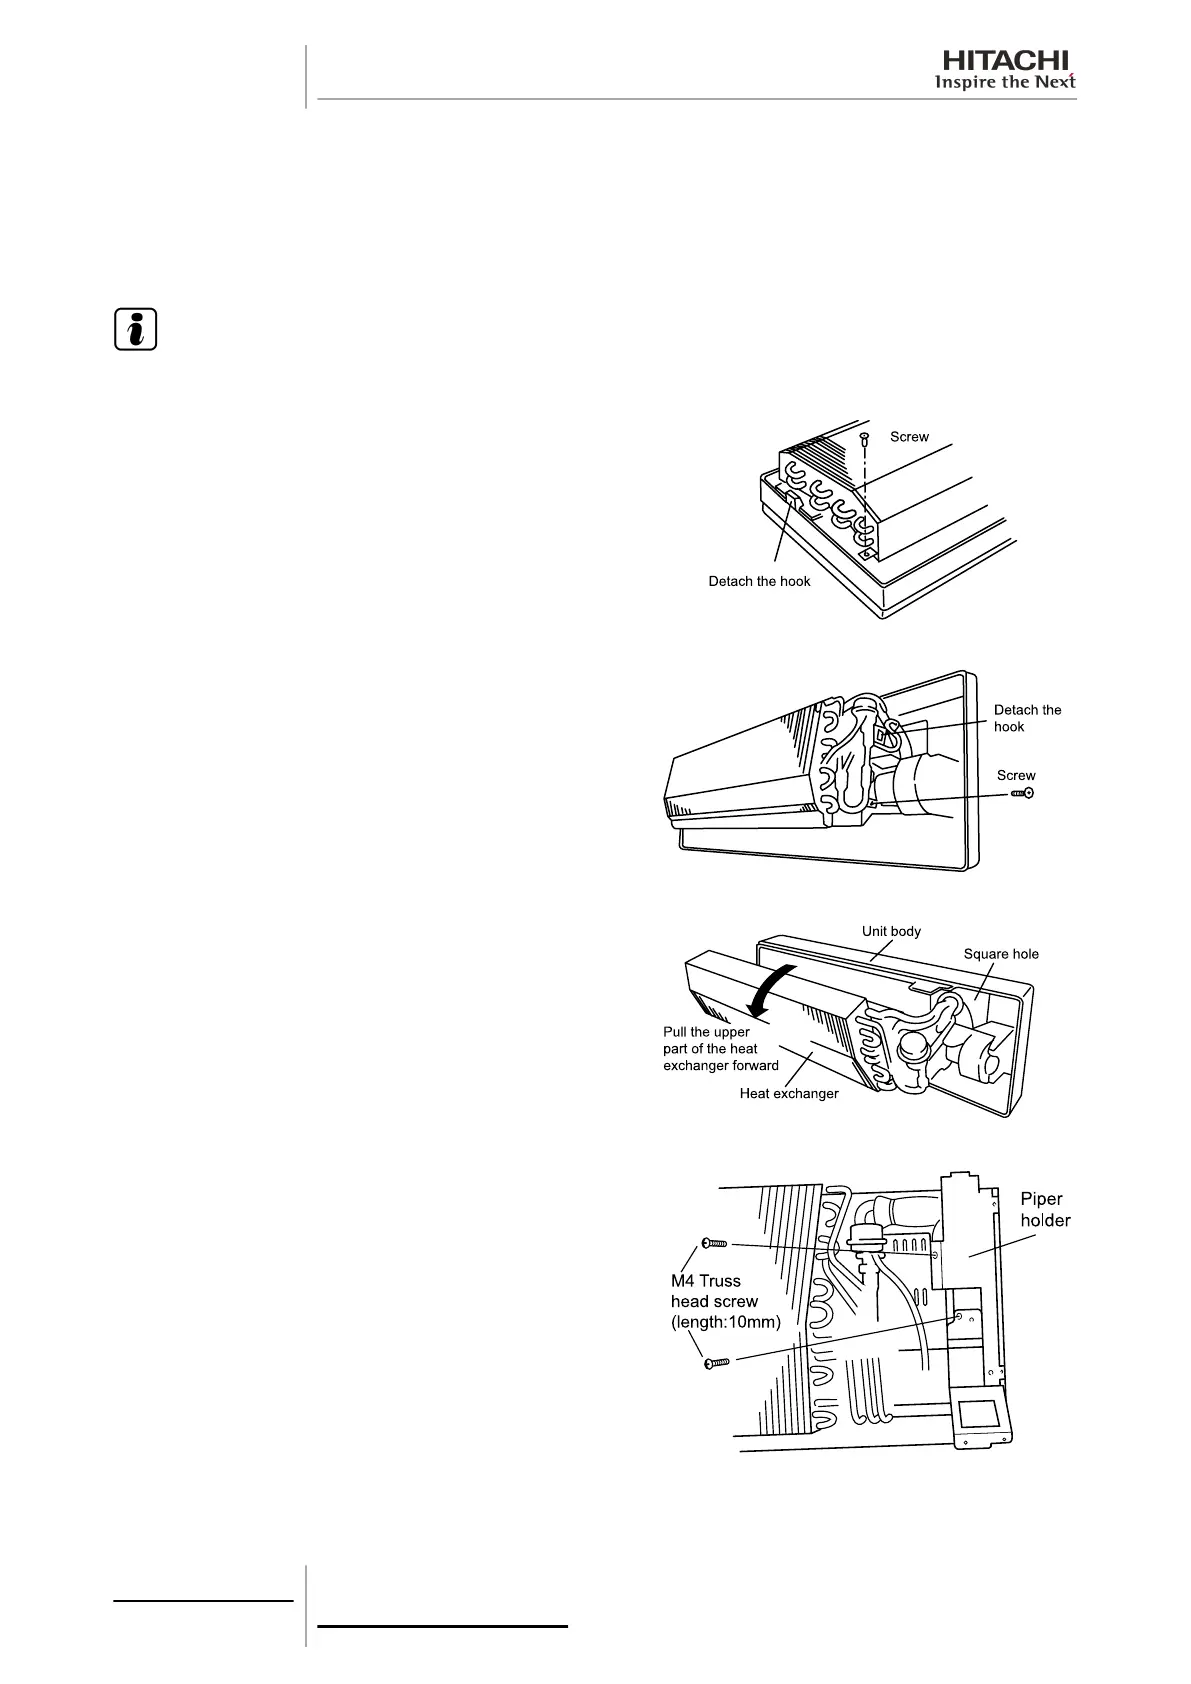
Release the attachment securing the left of the heat exchanger and remove the screw securing the exchanger.
Remove the screw securing the heat exchanger and release the hook securing the right of the exchanger.
Lift the heat exchanger. Pull the rear heat exchanger piping out from the square hole by pulling the top of the exchanger
forwards and removing the exchanger.
To fit the heat exchanger, carry out the removal procedure in reverse order.
N O T E
After fitting the heat exchanger, make sure the hooks and screws on the left and right sides are correctly connected.
RPK-(1.0-2.0)FSN(H)2M
RPK-(1.0-2.0)FSN(H)2M
RPK-(1.0-2.0)FSN(H)2M
RPK-(2.5-4.0)FSN2M
10 Servicing
338
SMGB0063 rev. 1 - 10/2010
 Loading...


