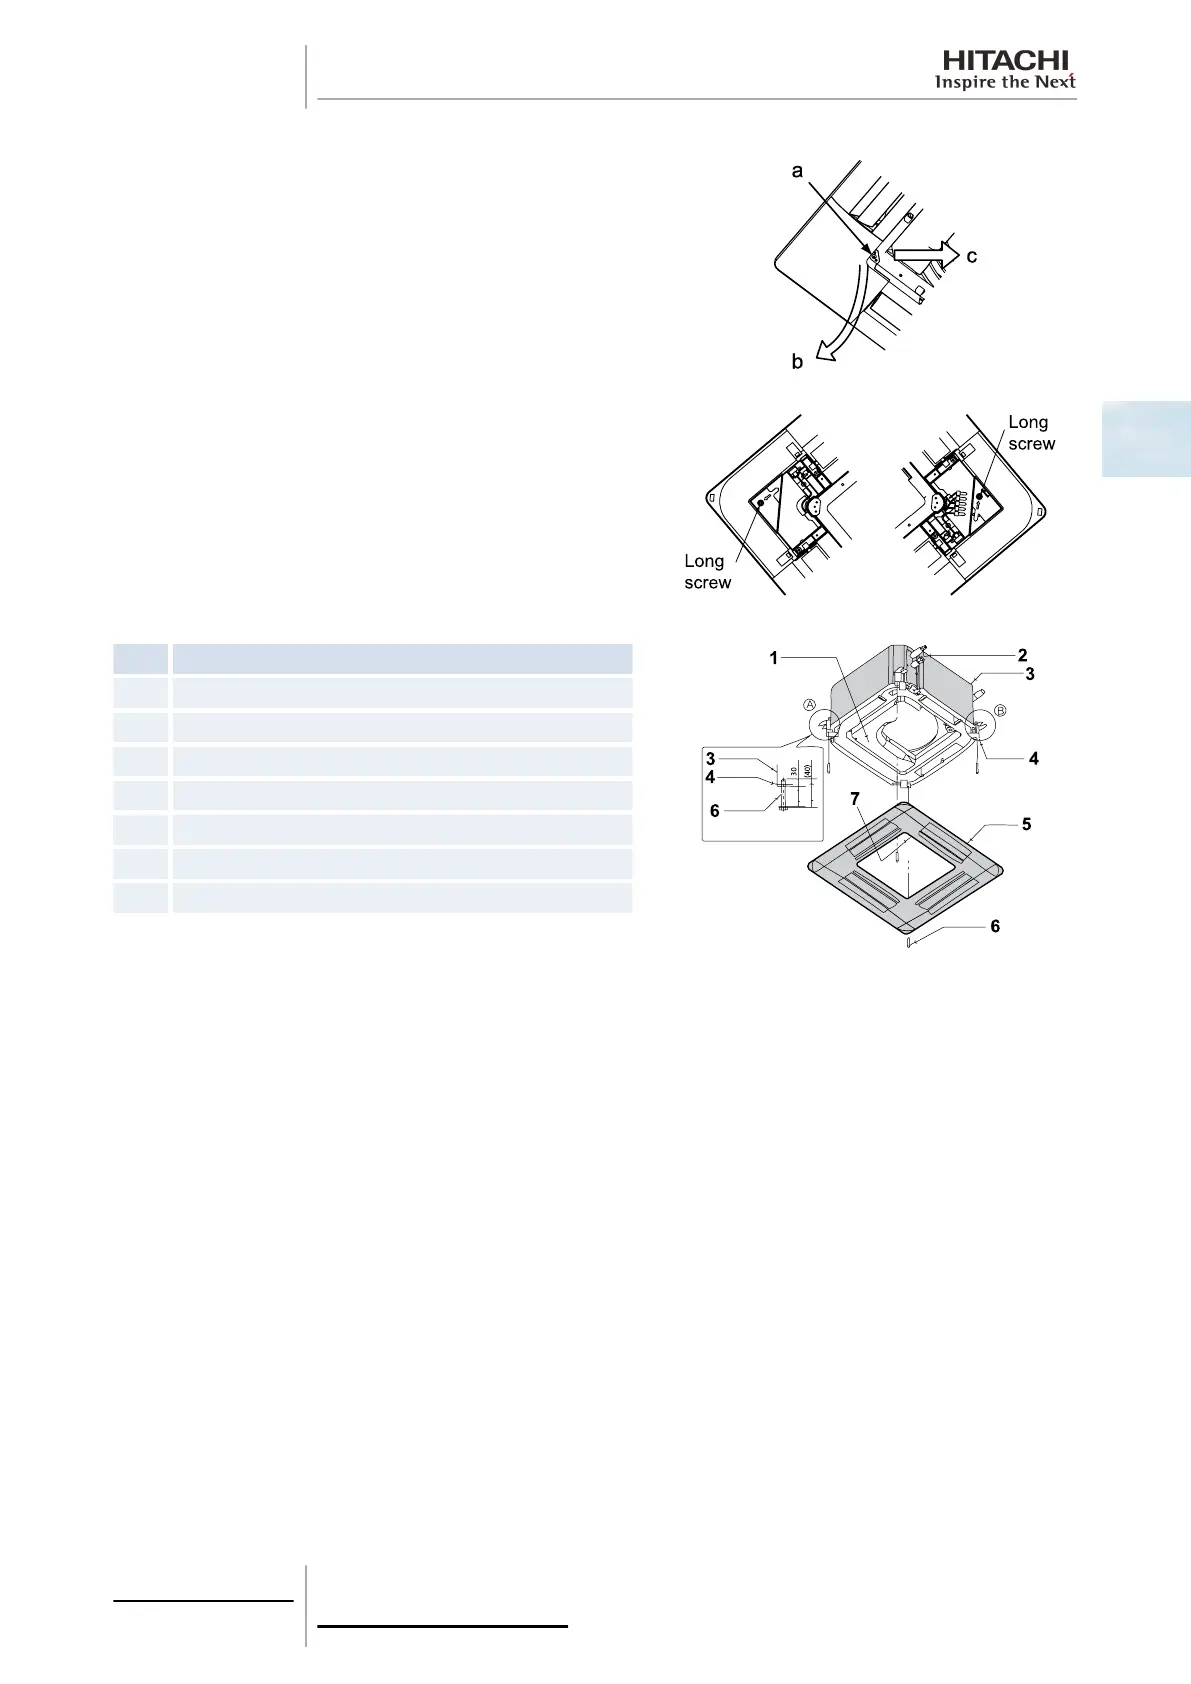
Air panel installation
Remove the screw located next to mark -a-.
Press the securing tabs in the direction of the arrow -b-.
Remove the corner cover by pulling it in direction -c-.
Thread the long screw to secure the air panel temporarily.
Adjust the corner of the indoor unit at the refrigerant connection
part to the position marked as PIPE SIDE.
Attach the air panel to the long screw (2 position) so that it can be
temporarily fitted and adjusted.
Nº
Part
1 Electric control box
2 Refrigerant pipe connections
3 Indoor unit
4 Securing plate
5 Air panel
6 Long screw (4)
7 Indication “PIPE SIDE”
Fit the air panel in the attachment position using the screws
supplied (M6 x 50). First secure the screws in positions -A- and -B-
and then the rest.
Check that there are no gaps in the touching surface between the indoor unit and the air panel. Gaps may cause air leaks
or condensation.
2 Unit installation
29
SMGB0063 rev. 1 - 10/2010
2