Aircraft
(ACRO)
Section
– –
38
50. The aileron dual rate setting automatically
affects both ailerons if the flaperon function is
active. To set the aileron dual rate, move the
arrow by pressing the
Right Cursor
key until
the little arrow is under or over the numeral 1
(the arrow depends on the position of the Ail
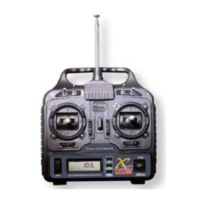
D/R switch above the right stick.) Now move
the aileron D/R switch up or down, noticing
the position of the arrow. You can set two
dual rates, one for each switch position. If
you set them, be sure to note which switch
position turns them on.
51. By pressing the
Data +Increase
or
–
Decrease
keys, you can add or subtract from
the numerical value displayed. Note that you
may pick a value anywhere from 0% to 125%
(125% is larger than the normal amount, so if
you do this be careful not to exceed servo
travel limits and cause stalling or excess
current drain). If you quickly want to get back
to the default 100%, press the
Clear
key. We
suggest using an initial value of 75%.
52.
NOTE: if you set any of the dual rates to
0%, you will have ZERO CONTROL
AUTHORITY and LOSE CONTROL OF
YOUR AIRCRAFT when the switch is in
that position. DON’T DO IT!
53. Also note that the flight mode indicator
NOR may be flashing. This tells you that you
have set the dual rates for the NOR mode, and
if you activate other flight modes, you can set
dual rates for them as well.
54. Elevator dual rate setting: press the
Right
Cursor
key one time to get the little arrows
above or below the numeral 2. Now set the
elevator dual rates in the same way you set the
ailerons in the previous step.
upper
arrow
indicates
upper D/R
switch
setting
D/R 80
CH
%
ST1
421
ST2 ST3 NOR
55. Rudder dual rate setting: press the
Right
Cursor
key one time to get the little arrows
above or below the numeral 4. Now set the
rudder dual rates in the same way you set the
ailerons and elevator in the previous steps.
56. Note that you can have different values
of dual rates in each of the different flight
conditions. When you activate flight
conditions, be sure to go and set dual rates for
each one if you desire.
57. Landing setup. You can get an airbrake
effect by flipping a switch to raise or lower
both flaperons and add elevator to keep it
trimmed. This high-drag configuration makes
the landing approach steeper to help make
safe landings in small fields. This is an on-off
function, not proportional.
58. With landing mode on, it is possible to lose
some aileron effectiveness. Be sure to test the
landing settings at altitude before trying it on a
landing approach. You should spend some
time fine-adjusting the elevator travel so that
there is minimal trim change when the landing
(Flt. Mode) switch is operated.
59. Press one of the
Up Down Edit
buttons until
the LAND window appears, as shown. The
landing mode is OFF unless the Flt. Mode
switch (upper left of transmitter) is fully
forward.
LAND 0
CH
%
OFF ON
26
ON or OFF
depends on
Flt. Mode
switch
setting
60. The arrow should be over the numeral
2
.
Now press the
Data +Increase
key to change
the percentage shown. You may input the
amount of offset for the elevator at this time.
This should be set from -7% to -10%. Don’t
use too much or it could crash your model.
61. Press the
Cursor Right
key one more time,
and you may now input the CH6 setting. The
rates may vary considerably for different
models, but for initial settings you might try
the flap rate around 50-55%. You may want