Rev. 1.30 21 of 34 November 13, 2020
e-Link32/e-Link32 Pro User’s Guide
2 MDK_ARM (KEIL) Setup and Use
2 MDK_ARM (KEIL) Setup and Use
▀
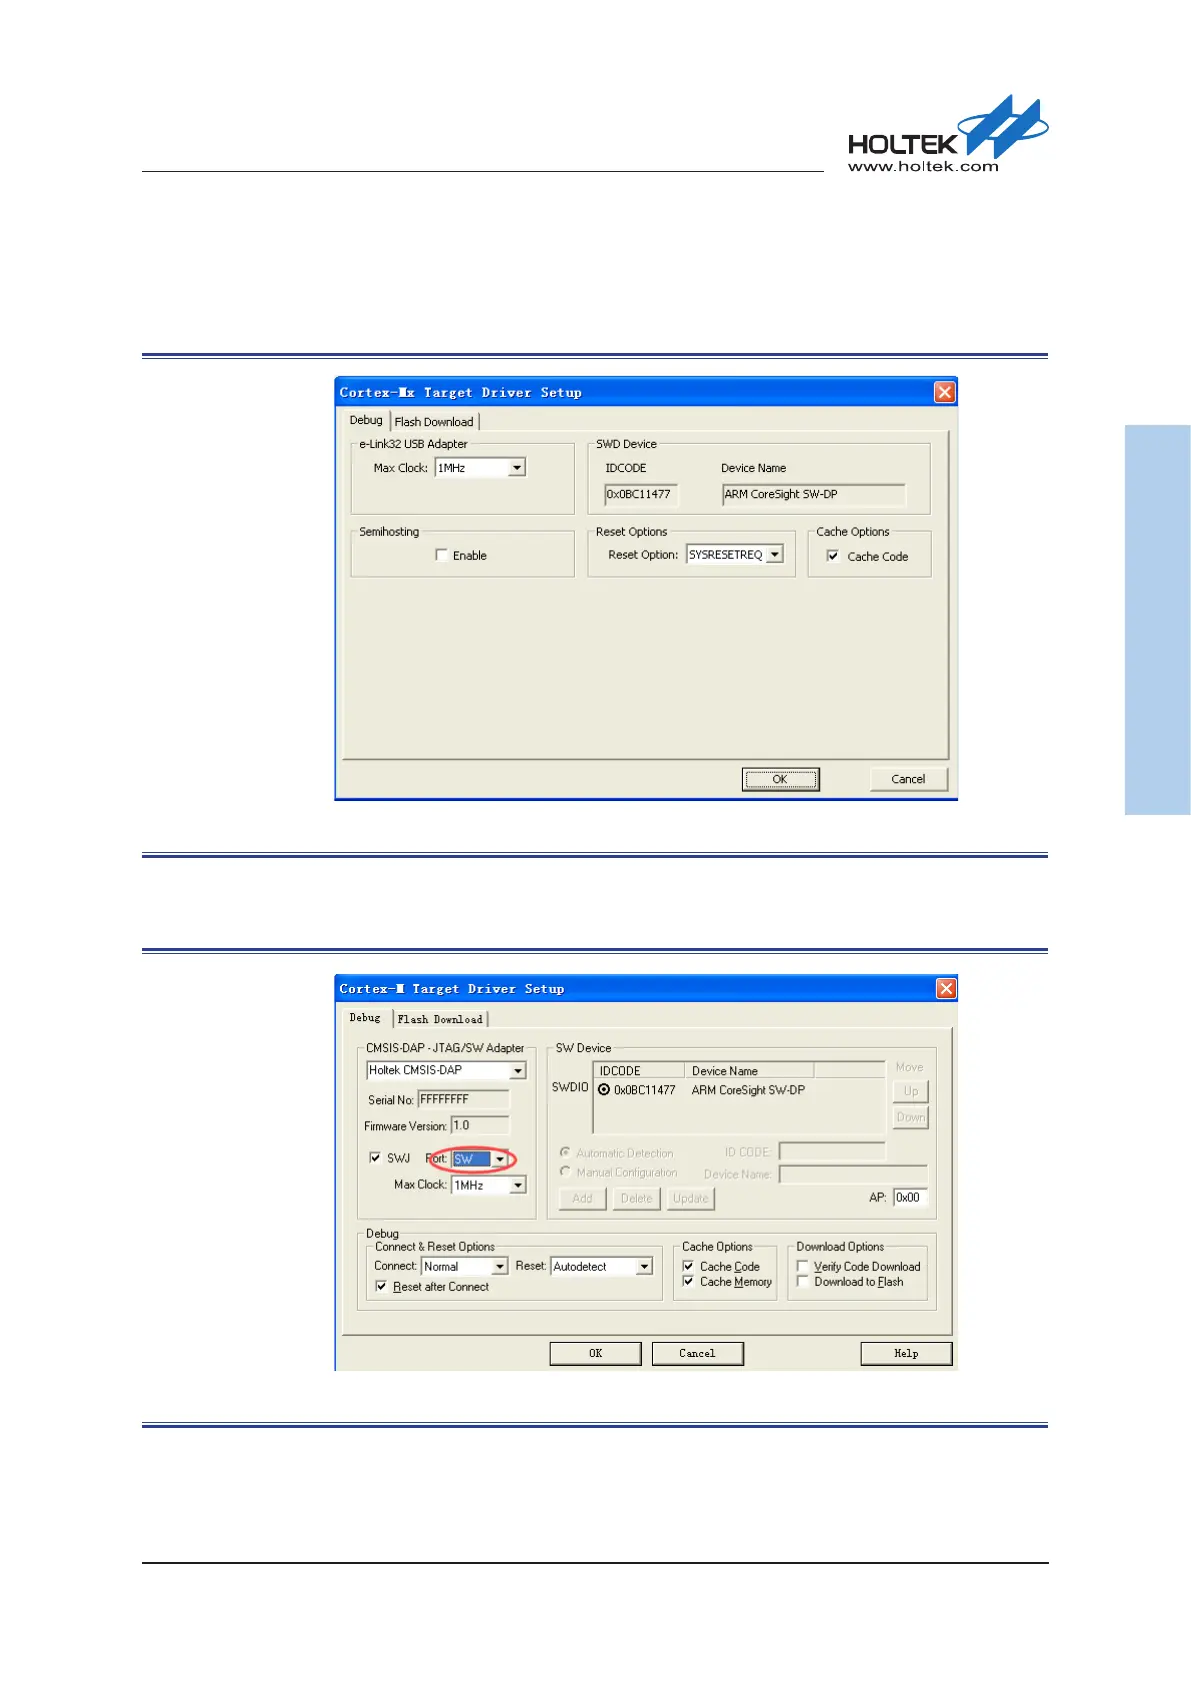
After the bebugger is selected, click the “Settings” button on the right side to open the
corresponding setting window. Conrm that the setting is successful when the device ID is read.
The e-Link32 setting window is shown below:
Figure 21. Keil4 e-Link32 Setting Window
The e-Link32 Pro setting window is shown below:
Select SW mode as the Port type.
Figure 22. Keil4 e-Link32 Pro Setting Window