FRAME/BODY PANELS/EXHAUST SYSTEM
REAR FENDER
The rear carrier and
rear side body pan-
els can be removed
as an assembly for
service. If removed,
use the procedure
described on page
3-15.
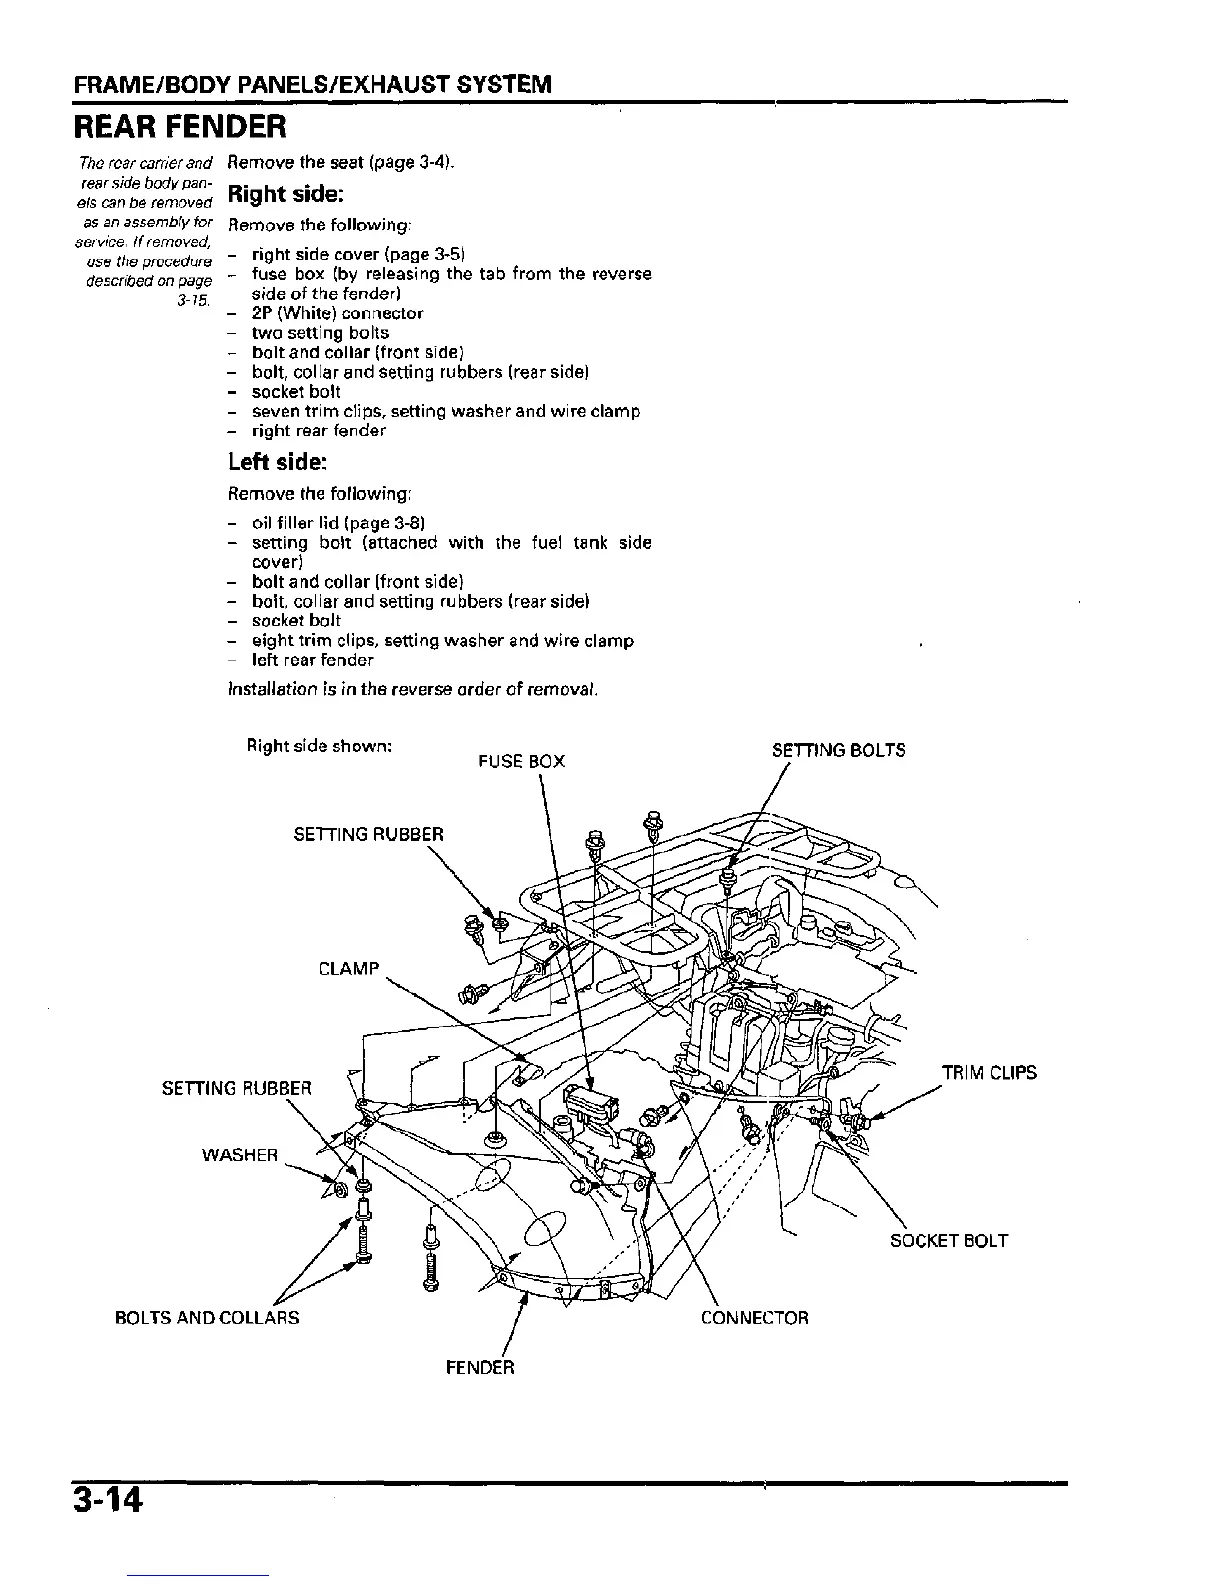
Remove the seat (page 3-4).
Right side:
Remove the following:
- right side cover (page 3-5)
- fuse box (by releasing the tab from the reverse
side of the fender)
- 2P (White) connector
- two setting bolts
- bolt and collar (front side)
- bolt, collar and setting rubbers (rear side)
- socket bolt
- seven trim clips, setting washer and wire clamp
- right rear fender
Left side:
Remove the following:
- oil filler lid (page 3-8)
- setting bolt (attached with the fuel tank side
cover)
- bolt and collar (front side)
- bolt, collar and setting rubbers (rear side)
- socket bolt
- eight trim clips, setting washer and wire clamp
- left rear fender
Installation is in the reverse order of removal.
Right side shown:
SETTING RUBBER
FUSE BOX
SETTING BOLTS
CLAMP
SETTING RUBBER
WASHER
BOLTS AND COLLARS
TRIM CLIPS
SOCKET BOLT
CONNECTOR
FENDER
3-14




 To Next Page