Ultra HD IP Camera User Guide
24
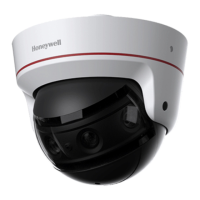
Configuring Customized Text Overlays
You can configure customized text
overlays on the Setup > Compression
Setup > Overlay > Text Overlay page.
To display the text overly, click Enable,
enter the desired text in the Input Text
field, and then click Save. By default, the
text overlay appears in the lower right
corner of the video image.
Set Text Alignment to Left or Right.
To move the text overlay, drag the yellow
Text Overlay box to the desired location
in the preview window, and then click Save.
To hide the text overlay, click Disable, and then click Save.
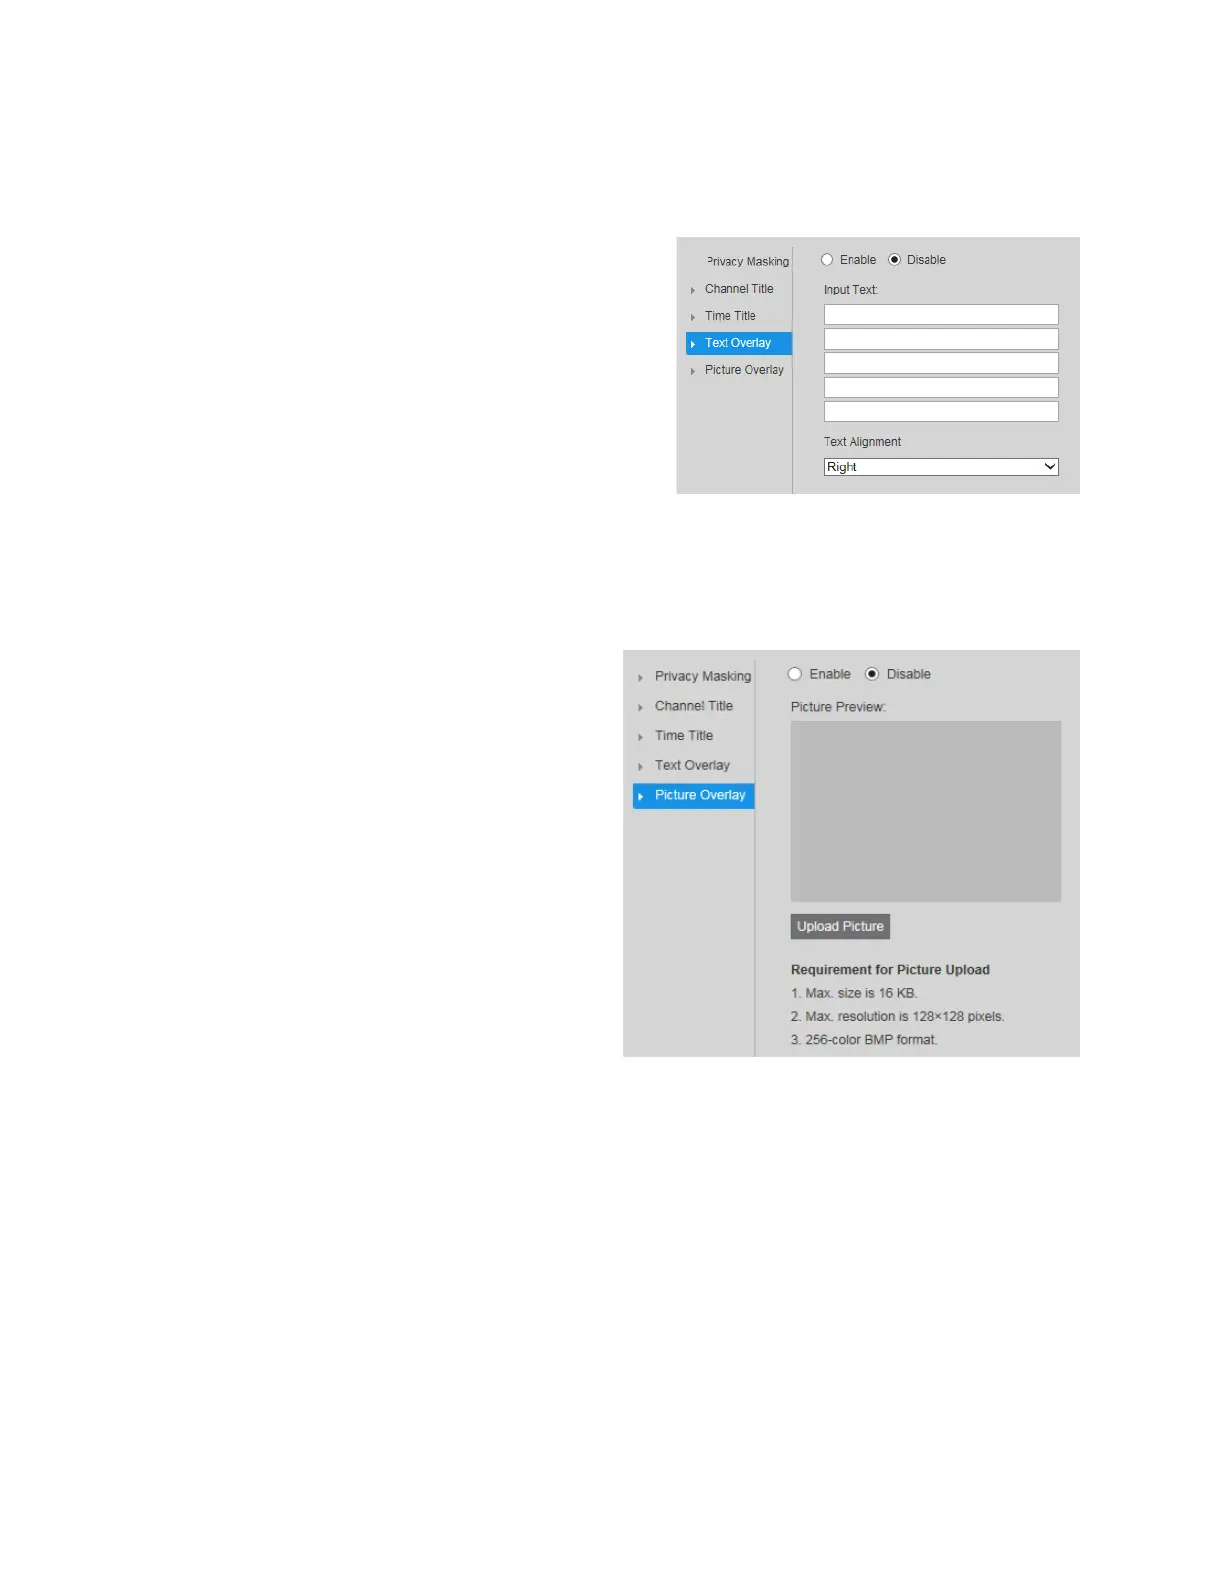
Configuring Picture Overlays
You can configure picture overlays
on the Setup > Compression
Setup > Overlay > Picture Overlay
page.
To display a picture overlay, click
Enable, click Upload Picture,
upload the picture, and then click
Save. The file must be in BMP
format, less than 16 KB, and no
more than 128×128 pixels.
To move the picture overlay, drag
the yellow frame to the desired
location in the preview window,
and then click Save.
To hide the picture overlay, click
Disable, and then click Save.
Configuring Regions of Interest
You can configure regions of interest (ROI) on the Setup > Compression Setup > ROI page.
To enable the ROI function, click Enable.
In the preview window, drag your mouse over the portion of the scene that you want to
designate as a region of interest, select an Image Quality level between 1 (lowest) and 6
(highest), and then click Save. You can add up to 4 regions of interest.
To delete a single region of interest, select it, and then click Delete. To delete all regions of
interest, click Remove All.
 Loading...