Viewing Live Video
27
Enlarge a specific area of the
image. Click the button
digital zoom and then drag the mouse in the
to select the area that you want to
a clip to a USB storage device. Click the button to
recording. Click again to stop recording. The clip
saved to the connected USB storage
Save a screen capture to the hard drive or to a
connected USB
storage device. To view the captured
go to Main Menu > Operate > Search and click
File List button.
the video sound (if applicable). Click the button to
mute sound. Click again to enable
sound.
: Mute only works in single-channel view.
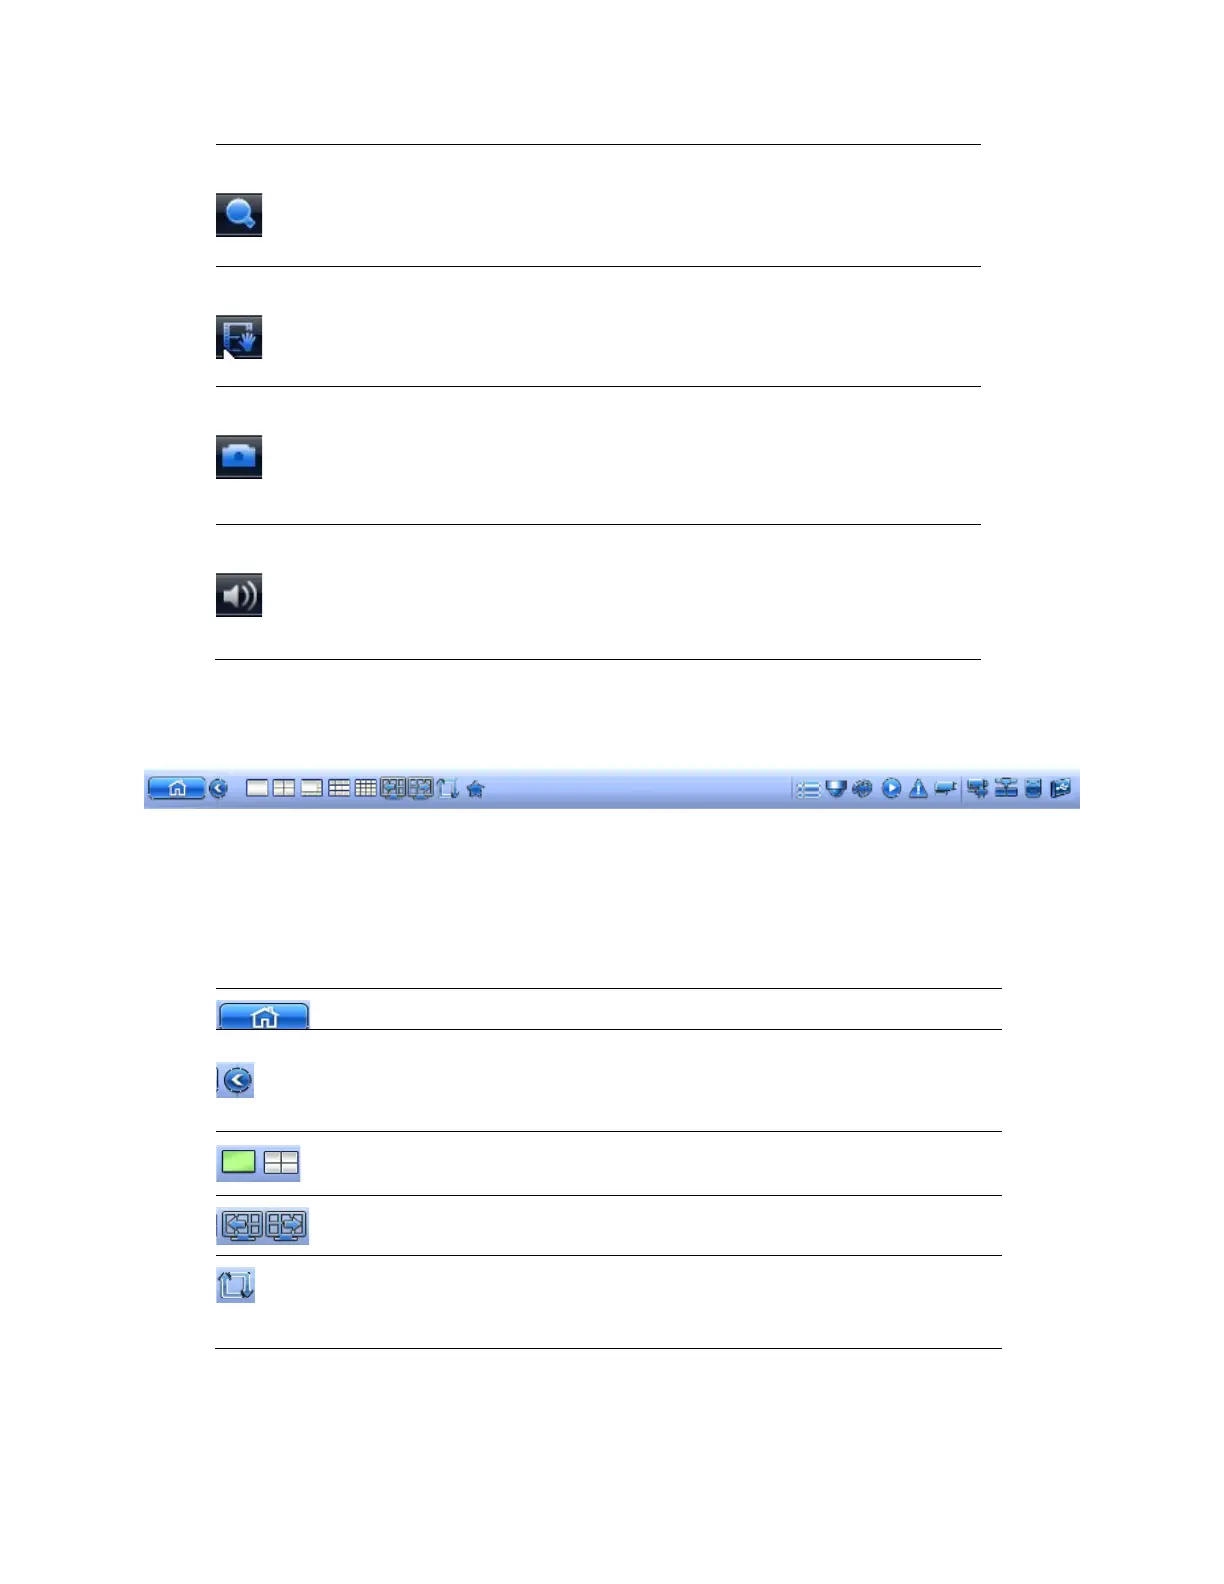
Live View Toolbar
Figure 3-4
If enabled, the live view toolbar appears along the bottom of the live view screen.
The toolbar is disabled by default. To enable it, right-click and go to Main Menu > Setting >
System > General > General and select the Navigation check box and then click Apply. Right-
click twice to return to the live view screen. Click anywhere on the screen to display the toolbar.
Table 3-2
the main menu.
xpand or condense the toolbar
Select screen layout format.
Navigate to the previous or next screen/channel.
tour (automatically cycles through
See Configuring Tour Settings on
121.
 Loading...