Configuring Network Settings
77
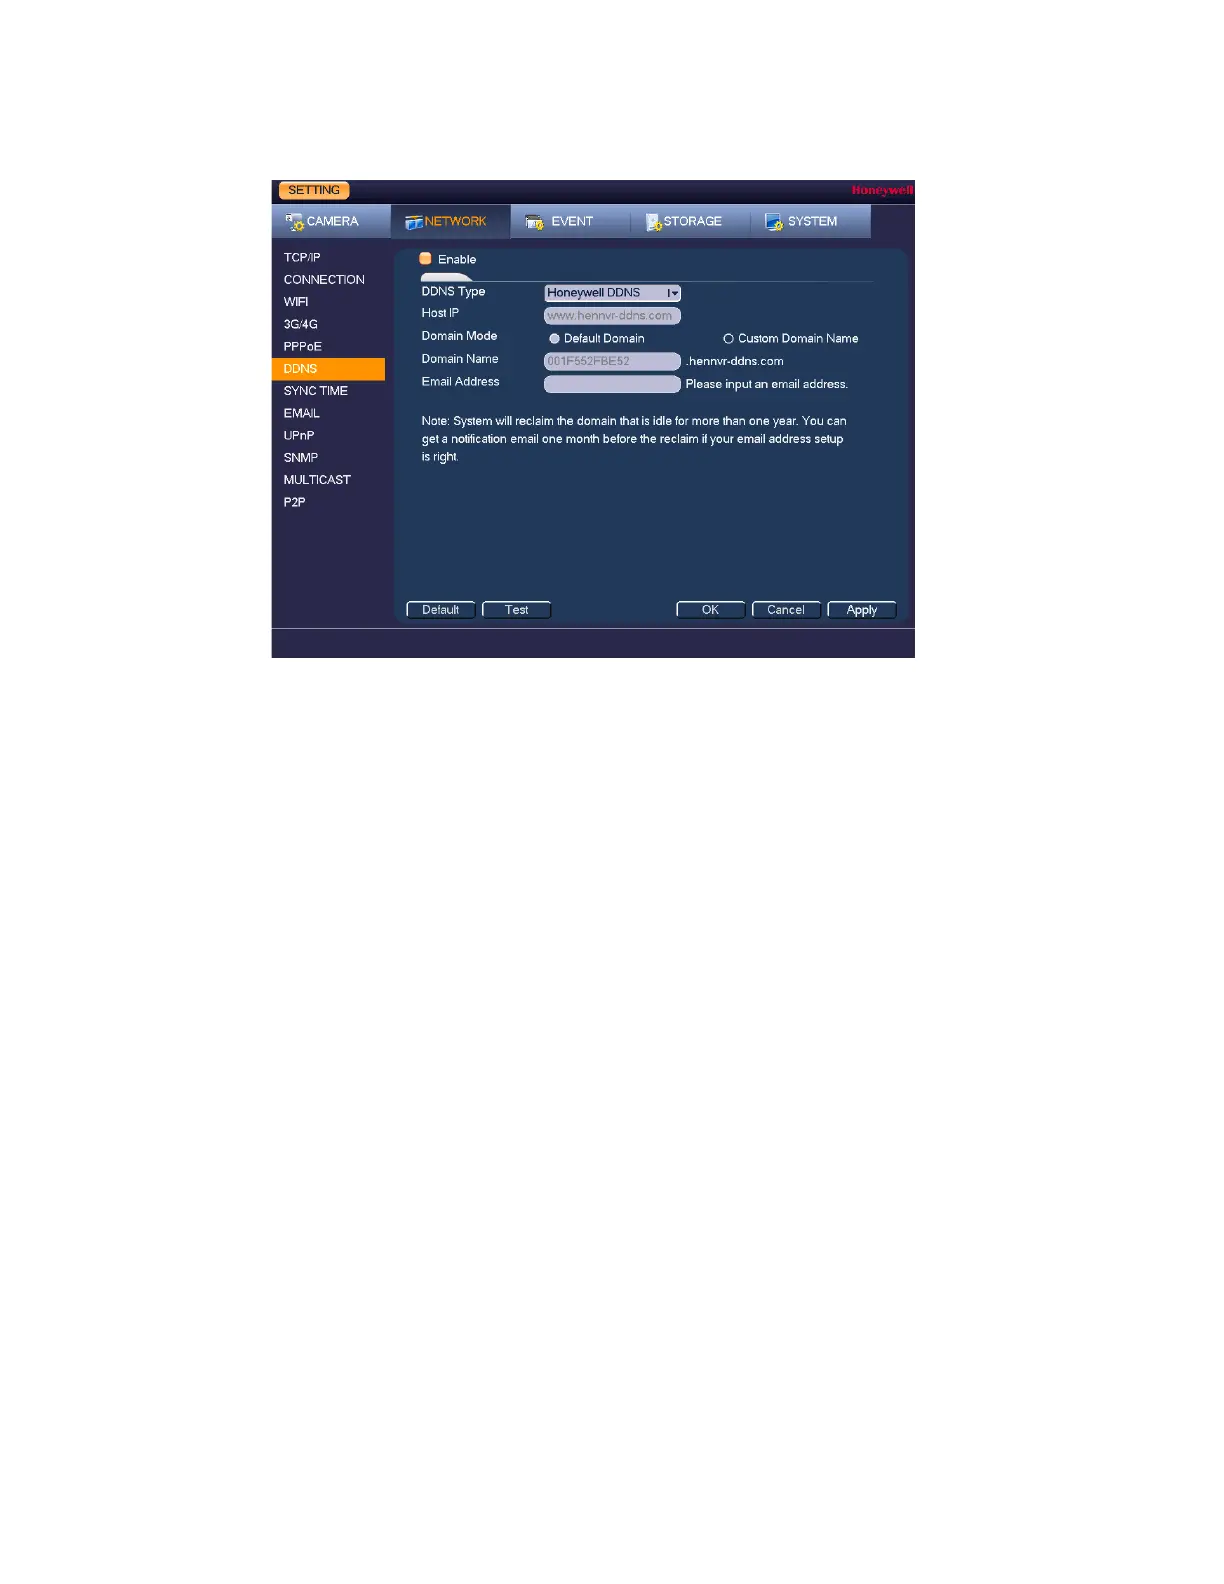
Figure 9-6
2. On the DDNS page, select the Enable check box to enable a DDNS network connection.
3. In the DDNS Type box, select the DDNS service that you want to use.
4. Depending on the DDNS Type you select, you may need to enter the following details:
• Host The address appears automatically unless DDNS Type is
set to Private DDNS. In that case, enter the server IP
address of your DDNS service provider.
• Domain Mode If DDNS Type is set to Honeywell DDNS, click Default
Domain to use the default domain name or click Custom
Domain Name to create your own domain name.
• Domain Name Enter a domain name (if you are not using a default domain
name). You can obtain this from your DDNS service
provider.
• User Name If applicable, enter a user name to access your DDNS
service.
• Password If applicable, enter a password to access your DDNS service
• Email Address Unused Honeywell DDNS domain names will expire after a
year. Enter your email address if you want to receive a
notification before an unused domain name is reclaimed.
5. Click Apply, and then click OK.
6. Restart the DVR for the new network connection settings to take effect.
7. To test the settings, on the DDNS page, click Test.
 Loading...