EXP Pedal
Some of Ampero Mini’s preset patches have been set up to use the
built in expression pedal. These can be used without any further
setup. For more on expression pedal settings. See page 11.
To turn the built in expression pedal on, press the pedal all the way
forward so it clicks. When the built-in expression pedal is on, the LED
under the pedal will turn green, and this icon will show up on the
Main Display screen to indicate it is on:
You can either use the built in expression pedal (EXP 1) or connect
your own (EXP 2) to control various Ampero Mini paramaters.
Reminder:
1. When the built in expression pedal is off, it continues to work as a
volume pedal for Ampero Mini. For more on volume pedal settings,
see page 11.
2. You can use CTRL footswitch to switch built in expression pedal
on/off. See page 10.
3. If your external expression pedal has an off switch and is turned
off, it will not function.
4. If you use an external expression pedal, the display won’t show
any message when it is connected. As soon as you connect and turn
on an external expression pedal, it will function to control the effects
parameter determined by the current patch. If the current patch does
not have any effects controllable by expression pedal, the pedal will
not function. See page 13.
DES I G N IN S P IRAT I ON
7
Customizing Your Ampero Mini
This section will show you how to customize your Ampero Mini’s settings, edit patches, setup the expression pedal, and change other features to
your taste.
EDIT
Edit your patches to get the tone you want.
Remember that turning the modules on/off and adjusting parameters will change the current patch. If you switch patches or turn Ampero Mini off
before saving your changes, the changes will be lost.
Make sure to press SAVE on the upper right of the display screen to save your settings.
Patch Edit Menu
Select a patch from the main menu by using the forward/backward arrows on the screen.
Tap the footswitch 1 to move back through the patches, tap the footswitch 2 to move forward through the patches.
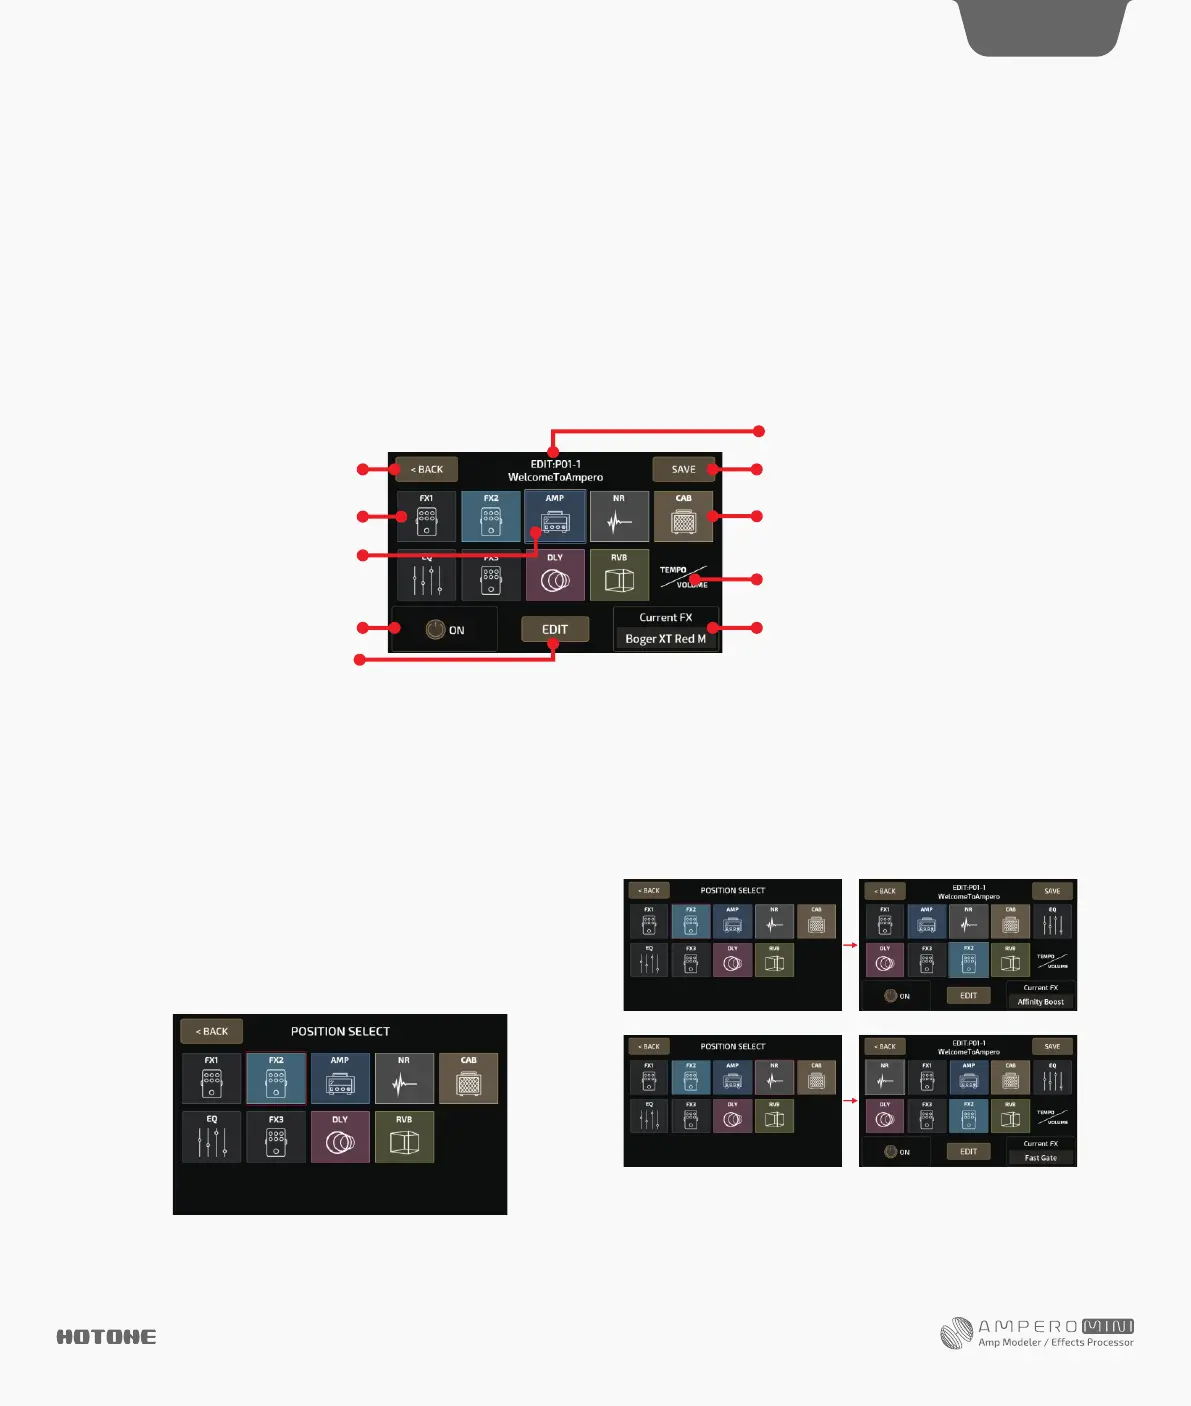
Next, press EDIT to enter the patch edit menu:
The menu is made of ten icon squares representing Ampero Mini’s nine effects modules and a volume/tempo module.
The default signal chain is ordered like this:
FX1 (select one)-FX2 (select one)-AMP (amp simulator)-NR (noise reducer)-CAB (cabinet simulator)-EQ (equalization)-FX3 (select one)-DLY
(delay)-RVB (reverb)
FX1, FX2, and FX3 will hold effects of your choosing.
Exitediting Entersavemenu
Currentpatchnumber, patch name
Indicates a module that is turned off Indicatedsamodulethatisturnedon
Presstoeditpatchtempoandpatchvolume
Turntheselectedmoduleon/off
Edittheselected module
Indicatestheeffectusedintheselectedmodule
Turn Quick Access Knob 3 to change effects
The highlighted frame indicates that
the AMP module is selected
Press a square to select that module, then use the on/off button to
turn that module on or off. Press EDIT to enter the module edit menu.
Current FX shows the effect on the current module.
When you select TEMPO/VOLUME square, you can adjust the patch
tempo (40-250BPM) and the patch volume (0-99) with the touch
screen.
To move a square to a different position, press a square twice to pick
it up:
Press another square to insert into the selected position:
Reminder: The VOLUME/TEMPO square is fixed at the end.