HP D300 Digital Dispenser
v. Notice that the endpoints for this zone change as values are entered and that zone
location within the titration range and point spacings are shown on the green graph on
the Titration1 pane.
vi. Click the Use button as shown in Figure 5-23.
vii. Click the red X at the top-right corner to exit this window when finished with centered
zones.
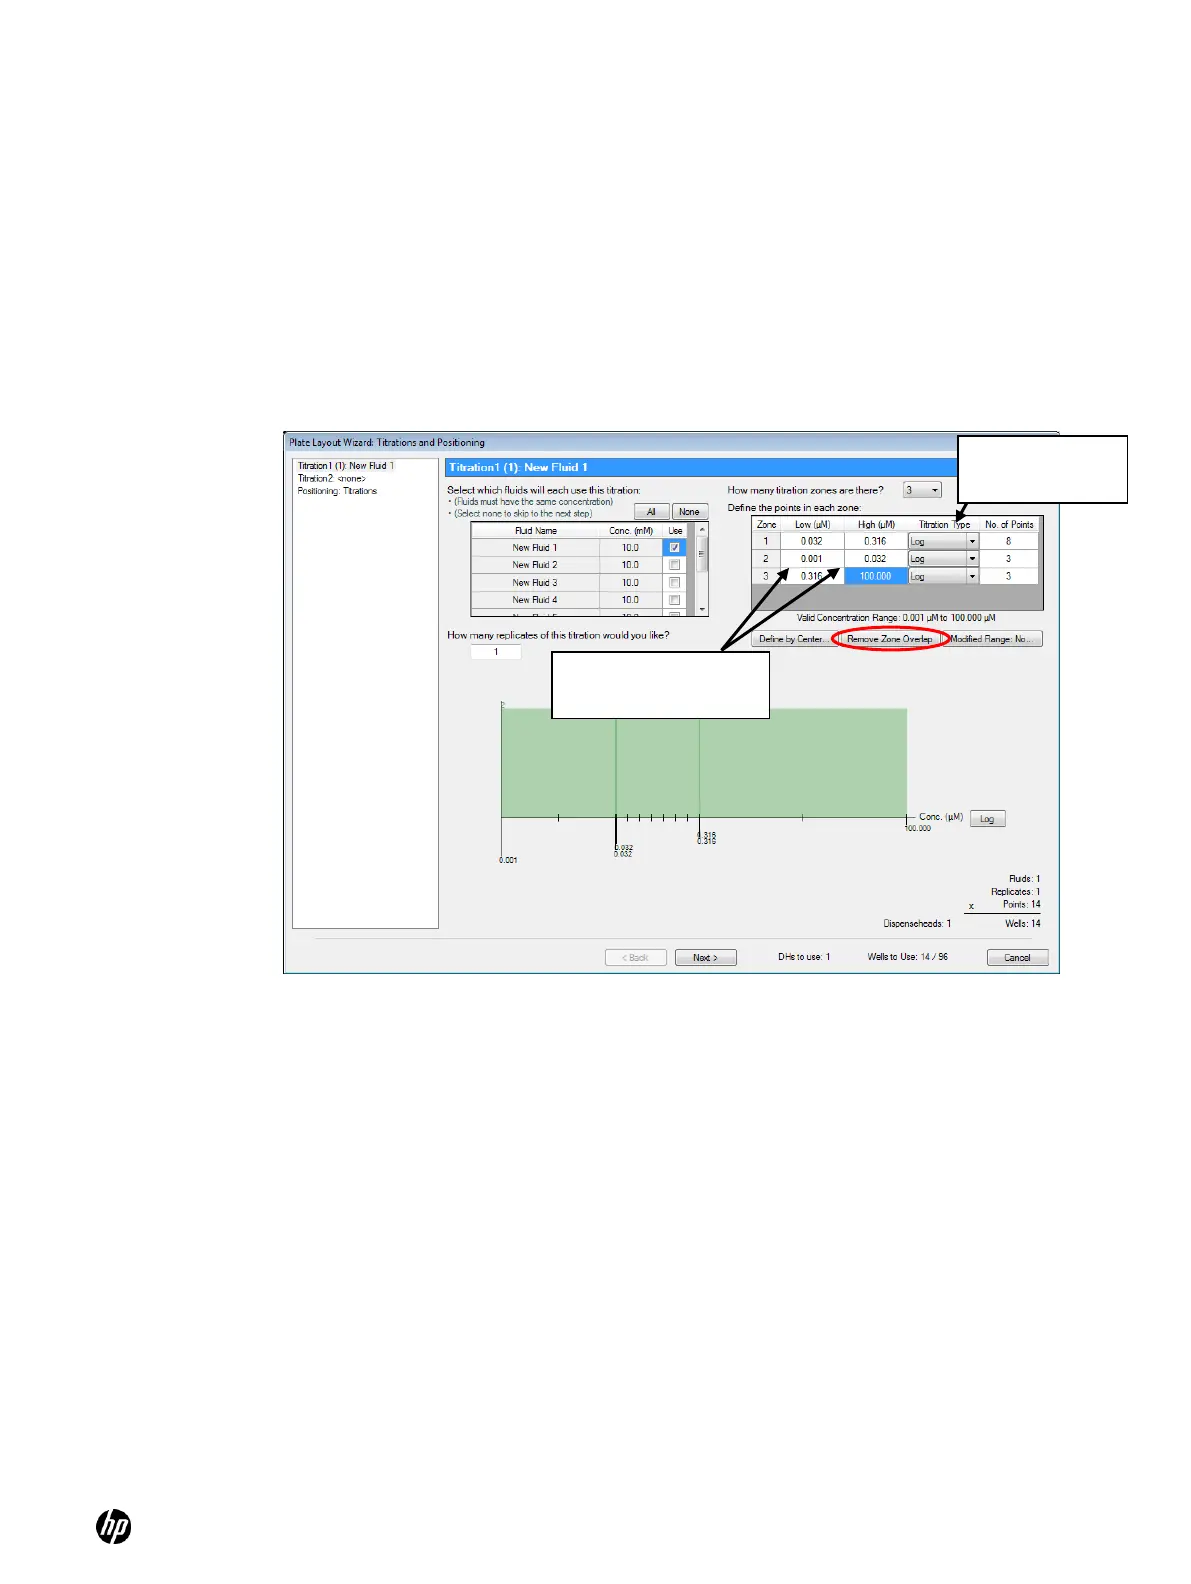
d. Now define the sparsely spaced zones 2 and 3.
i. Use the endpoints of the centered zone 1 and the valid concentration range to define
the endpoints for zones 1 and 3. Enter the appropriate values in the Low (µM) and High
(µM) columns for zones 1 and 3 as shown in Figure 5-24.
ii. Select the Titration Type for zones 1 and 3.
Figure 5-24 Titration1 pane—creating a multizone titration1 layout, part 2
iii. Click on the Remove Zone Overlap button since the three zones have some
overlapping concentrations. Removing the zone overlap will delete points from the
titration, which is why the number of points for zones 2 and 3 was set to 5, as shown in
Figure 5-24. Note that the two zones that have points overlapping with zone 1 are
reduced by one point to result in the desired 16 point titration. The result of this
operation is shown in Figure 5-25.
Note that the Remove Zone Overlap button is unavailable again because the zone
overlap was removed.
Define endpoints here
in zones 2 and 3
Select titration
type here