Hard drive cage
The hard drive cage is located under the hard drive. It is secured with one Torx screw.
To remove the hard drive cage:
1. Prepare the computer for disassembly (see Preparing to disassemble the computer on page 19).
2. Remove the access panel (see Access panel on page 21).
3. Remove the rear port cover (see Removing the rear port cover on page 19).
4. Remove the stand (see Stands on page 20).
5. Remove the access panel (see Access panel on page 21).
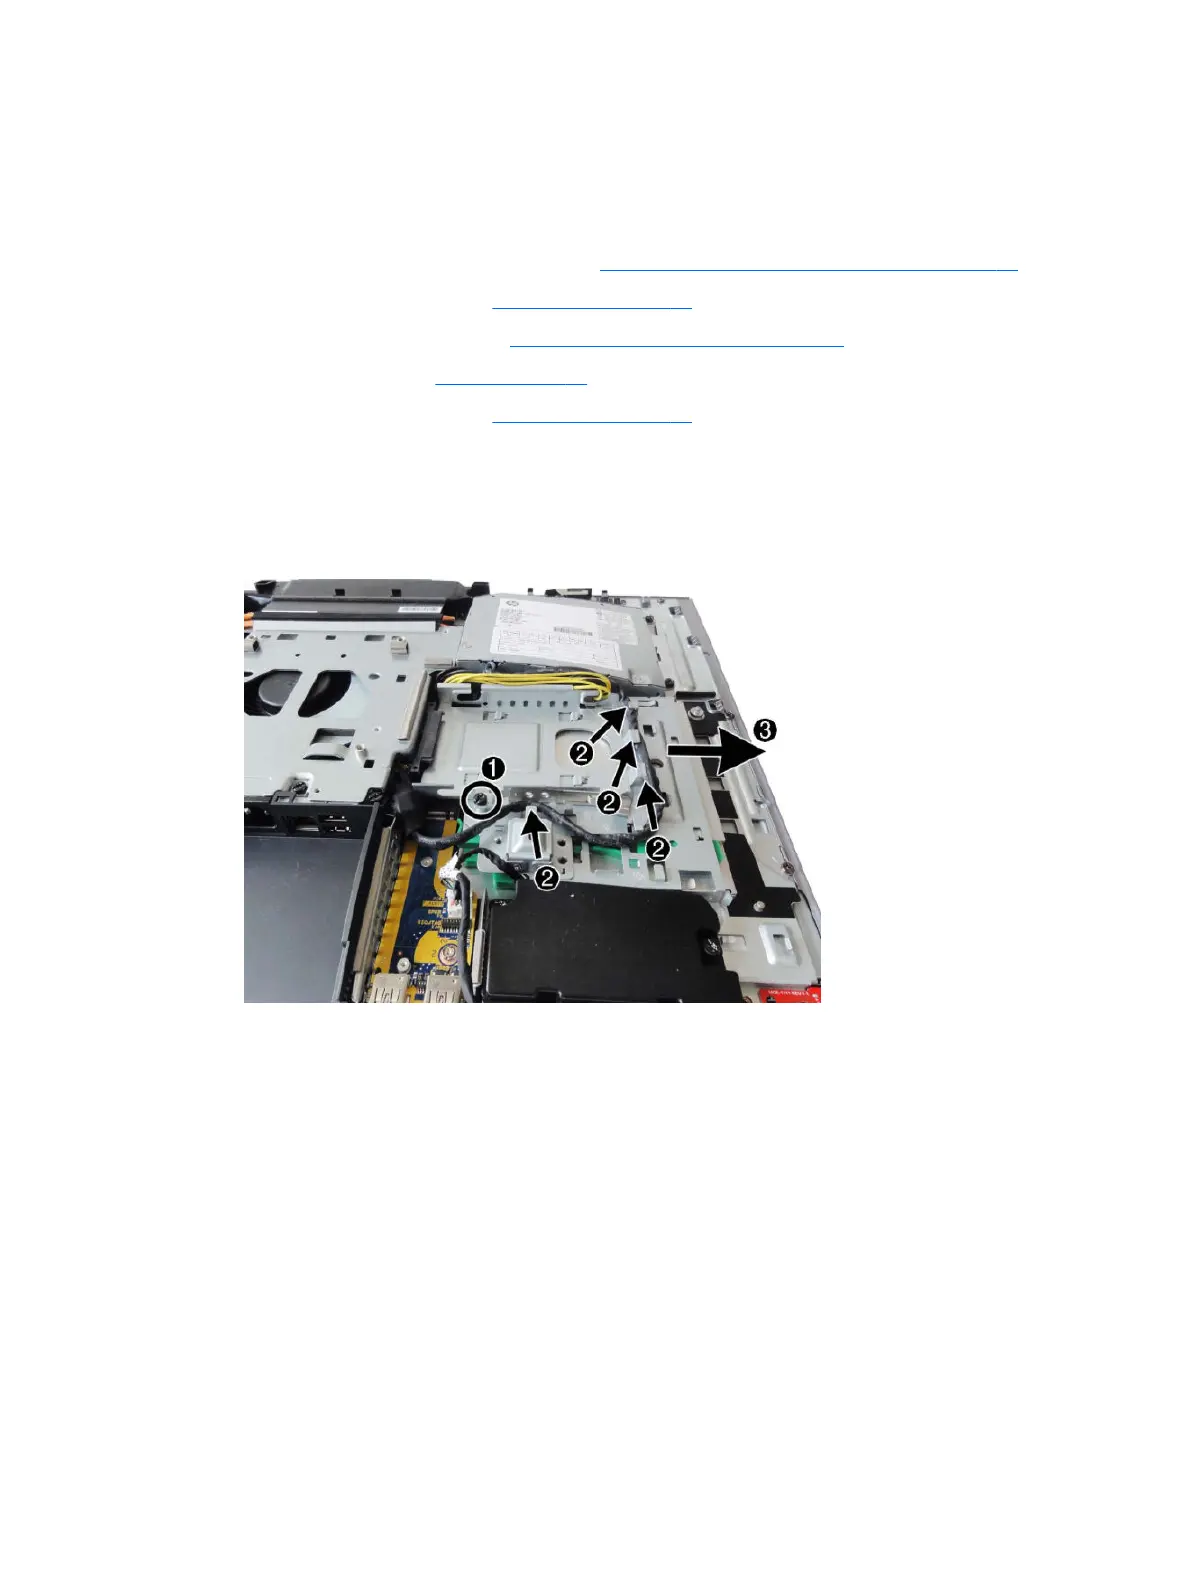
6. Remove the Torx screw (1) that secures the hard drive cage to the computer.
7. Remove the power supply cable from the clips around the hard drive cage (2).
8. Slide the hard drive cage away from the system board to disengage it from the clips, and then lift the
hard drive cage from the chassis (3).
To replace the hard drive cage, reverse the removal procedures.
Hard drive cage 49
 Loading...