Before removing the display panel, follow these steps:
1. Prepare the computer for disassembly (see Preparation for disassembly on page 38).
2. Remove the bottom cover (see Bottom cover on page 38).
3. Disconnect the battery cable from the system board (see Removing and reinstalling the same
battery on page 41).
Remove the display assembly:
NOTE: You can remove the bezel, display panel, and camera module without removing the entire
display assembly from the computer.
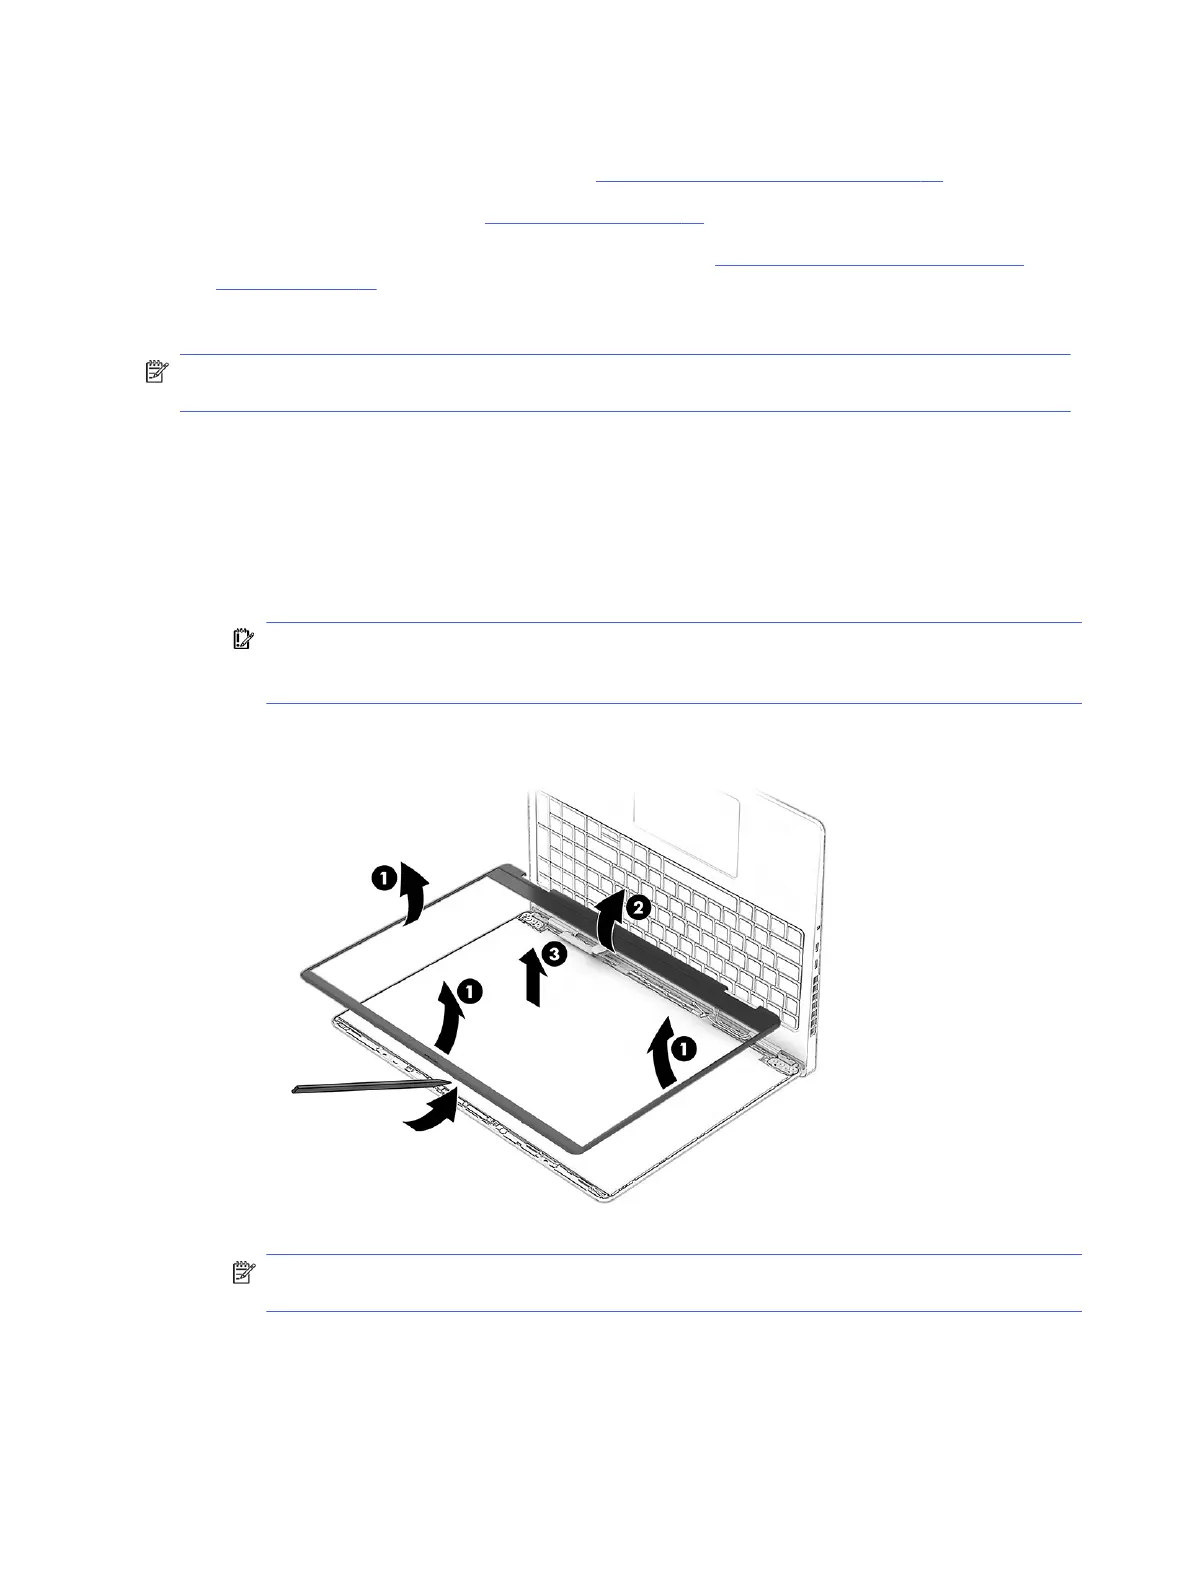
1. To remove the bezel:
a. From the outside of the bezel, release the top, left, and right sides (1) of the bezel from the
display assembly.
b. Release the bottom (2) of the bezel from the display assembly.
c. Remove the bezel (3) from the display assembly.
IMPORTANT: To avoid damaging the panel, do not use a tool on the inside of the bezel. You
can use a tool only when you insert it from the outside of the top, left, and right sides of the
bezel. Use your fingers to lift up on the bezel. Avoid pressing down on the panel during removal.
The bezel is available as spare part number P30854-001 in ceramic white models and
P30855-001 in shadow black models.
NOTE: When removing the bezel, do not pull up the black protective strip under the bottom of
the bezel. Be sure the strip remains flat against the panel.
68
Chapter 7 Removal and replacement procedures for authorized service provider parts