EasyManuals Logo

HP ProCurve 2650 Install Guide

HP ProCurve 2650
86 pages
To Next Page IconTo Next Page
To Previous Page IconTo Previous Page
Page #29 background imageLoading...
Page #29 background image
2-13
Installing the Switch 2650
Installation Procedures
Installing the Switch 2650
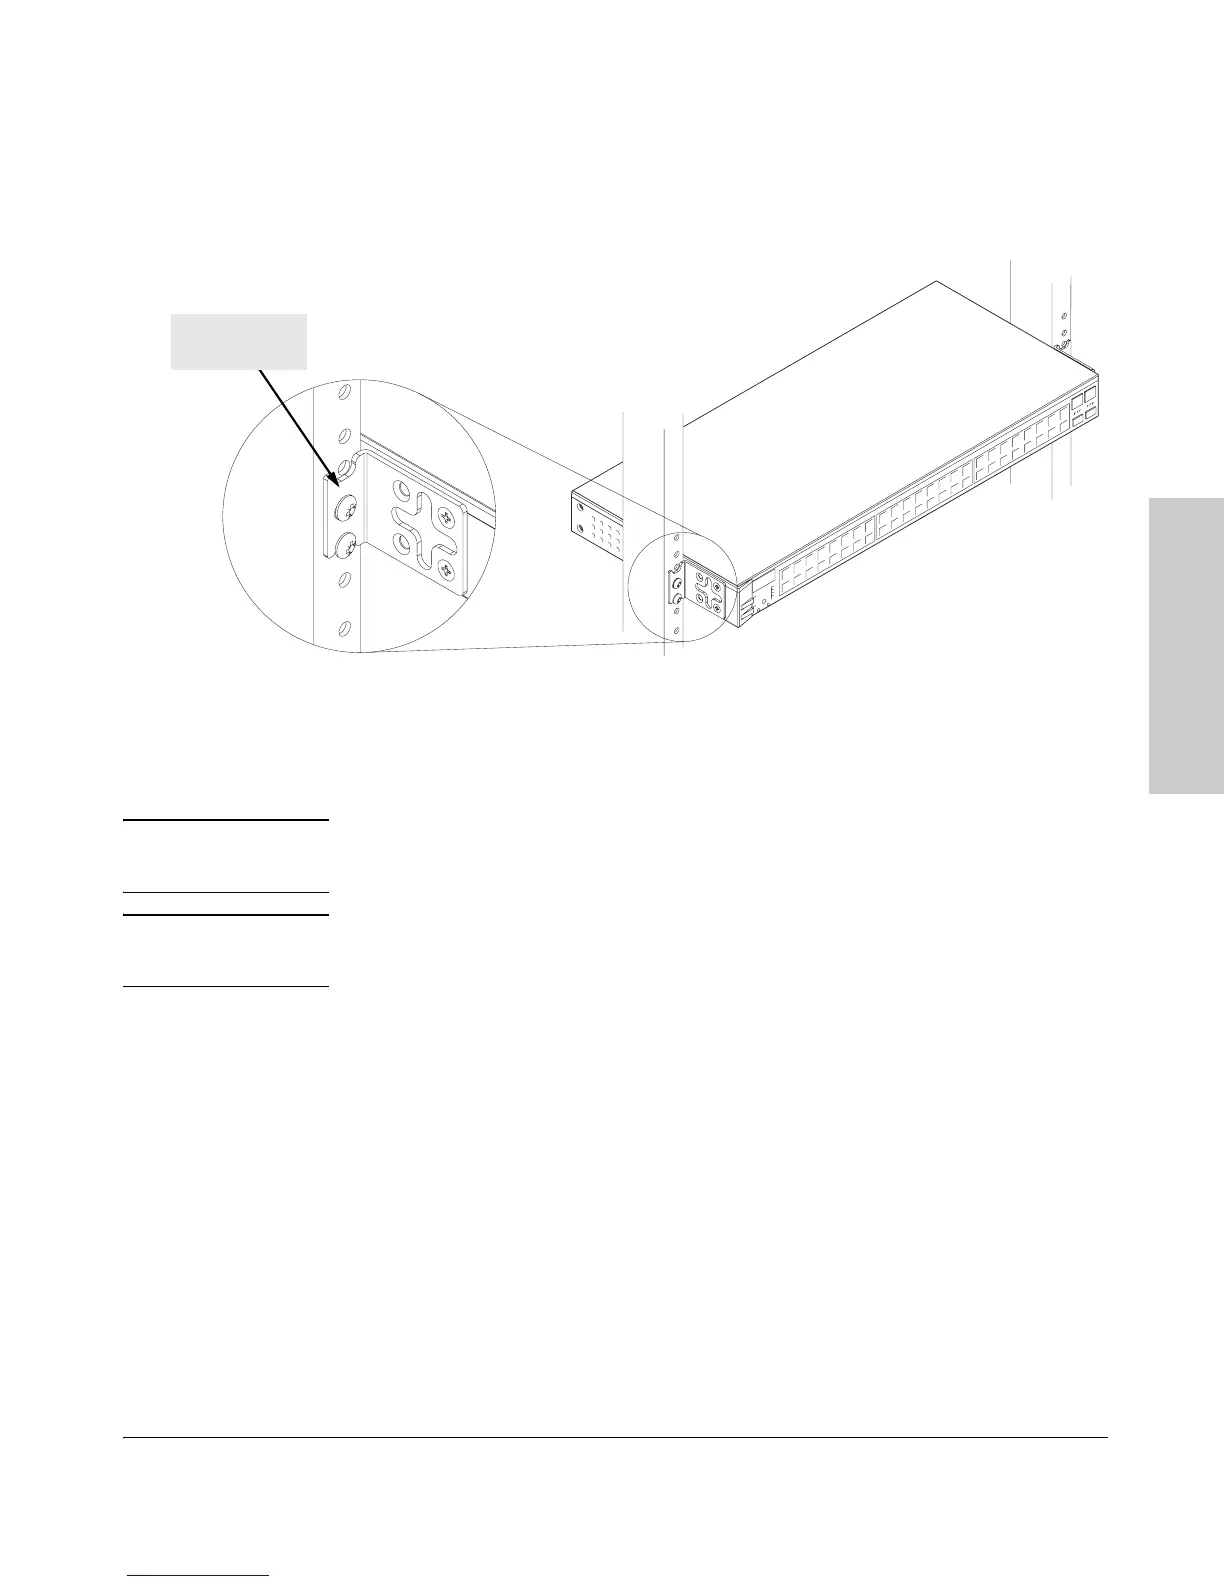
4. Install the other number 12-24 screw into the upper hole in each bracket.
Tighten these screws.
Wall Mounting
You can mount the switch on a wall as shown in the illustrations on the next
page.
Warning For safe operation, do not install the switch with the back face of the
switch (with the fan vents) facing either downward or upward.
Caution The switch should be mounted only to a wall or wood surface that is at least
1/2-inch plywood or its equivalent.
1. Use a #1 Phillips (cross-head) screwdriver and attach the mounting
brackets to the switch with the included 8-mm M4 screws.
2. Attach the switch to the wall or wood surface with two 5/8-inch number
12 wood screws (not included).
Install additional
screw

Table of Contents

Other manuals for HP ProCurve 2650

Questions and Answers:

Question and Answer IconNeed help?

Do you have a question about the HP ProCurve 2650 and is the answer not in the manual?

HP ProCurve 2650 Specifications

General IconGeneral
Switching Capacity13.6 Gbps
Forwarding Rate10.1 Mpps
Layer2
Jumbo Frame SupportYes
Form FactorRack-mountable
VLAN SupportYes
Layer 3 RoutingNo
PoE SupportNo
FanlessNo
AltitudeUp to 3, 000 meters
ManagementCLI, SNMP
Operating Temperature0°C to 50°C
Storage Temperature-40°C to 70°C
Humidity15% to 95% non-condensing

Related product manuals