Removing a 2.5-inch hard disc drive
1. Prepare the computer for disassembly (see Preparing to disassemble the computer on page 22).
2. Remove the rear port cover (see Rear port cover on page 23).
3. Remove the stand (see Attaching and removing a stand on page 24).
4. Remove the access panel (see Access panel on page 28).
5. Disconnect the power and data cables from the hard drive.
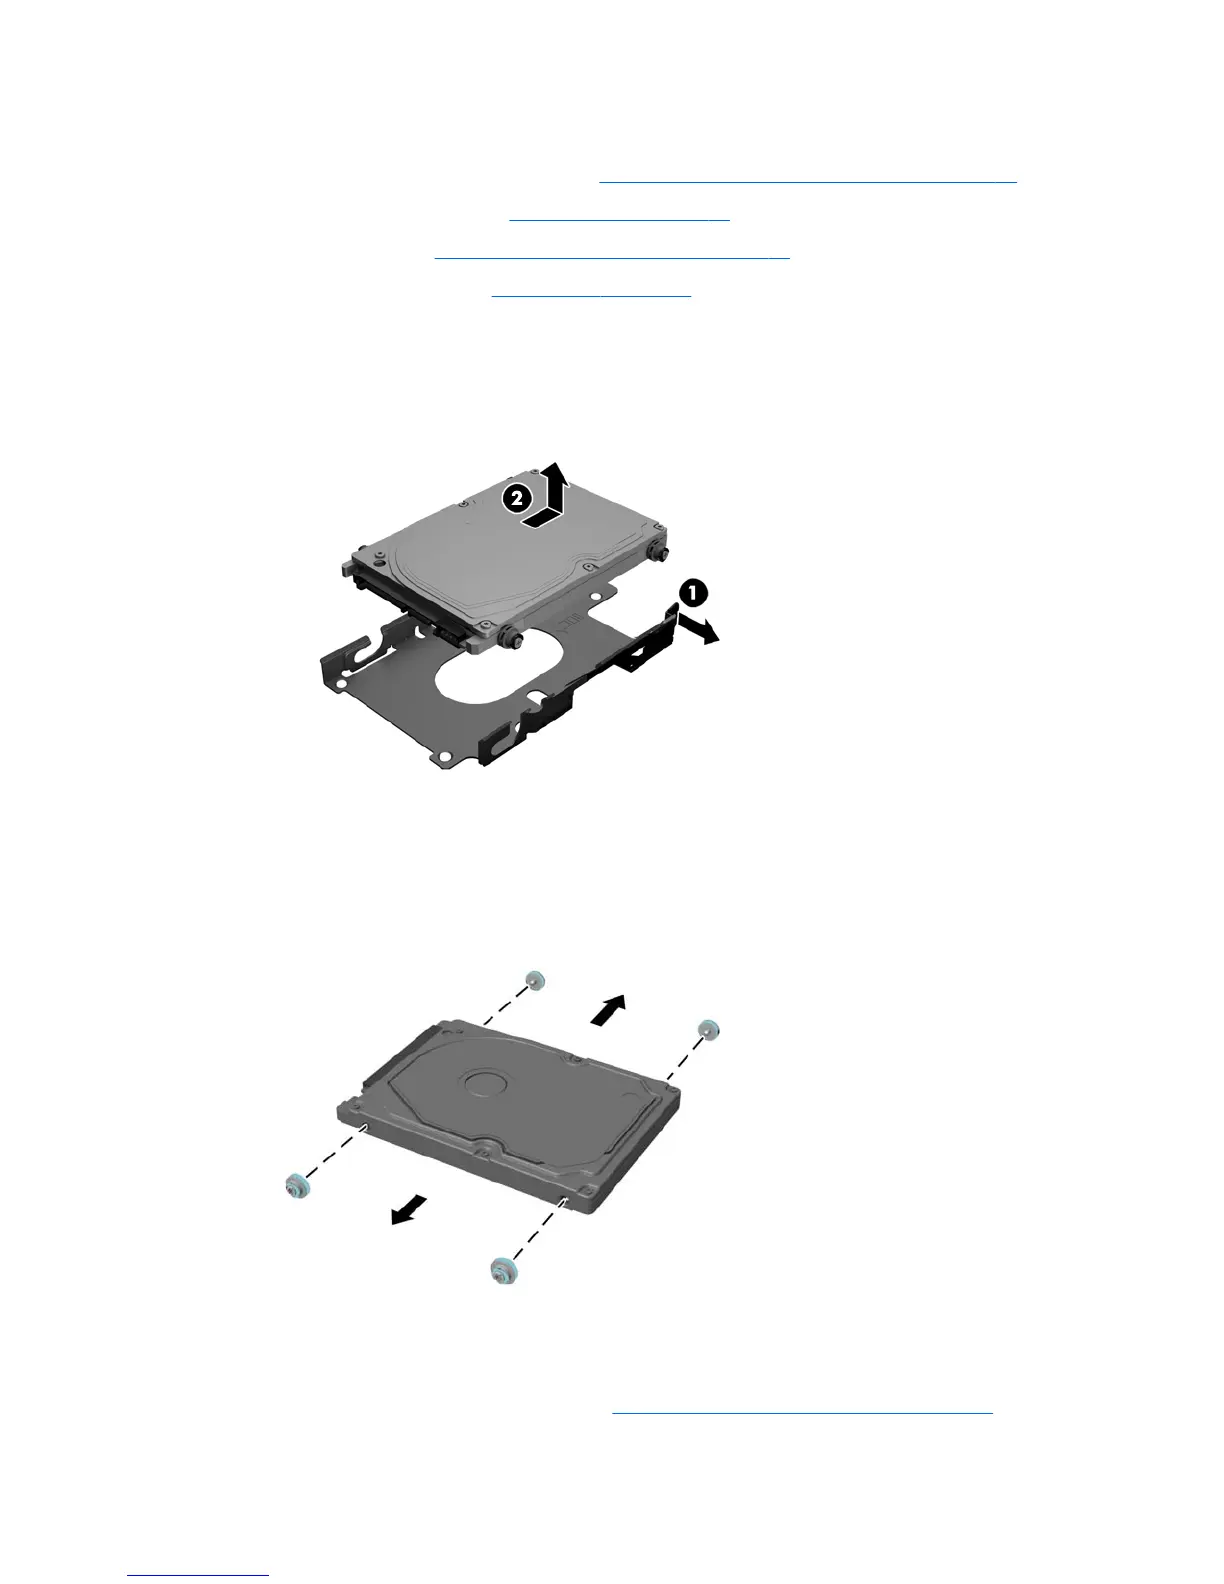
6. Pull the hard drive cage latch away from the 2.5 inch hard drive to release the drive (1).
7. Slide the hard drive toward the latch and lift the hard drive out of the drive cage (2).
8. Remove the four mounting screws from the 2.5 inch hard drive. Be sure to keep the screws together with
the blue rubber grommets to use to install a replacement drive.
9. Remove the 2.5-inch hard disc drive(s) from the cage.
For instructions on installing a hard disc drive, see Installing a 2.5-inch hard disc drive on page 31.
30 Chapter 4 Removal and Replacement Procedures