3. Remove the stand (see Attaching and removing a stand on page 24).
4. Remove the access panel (see Access panel on page 28).
5. Remove the hard drive (see Removing a 2.5-inch hard disc drive on page 30).
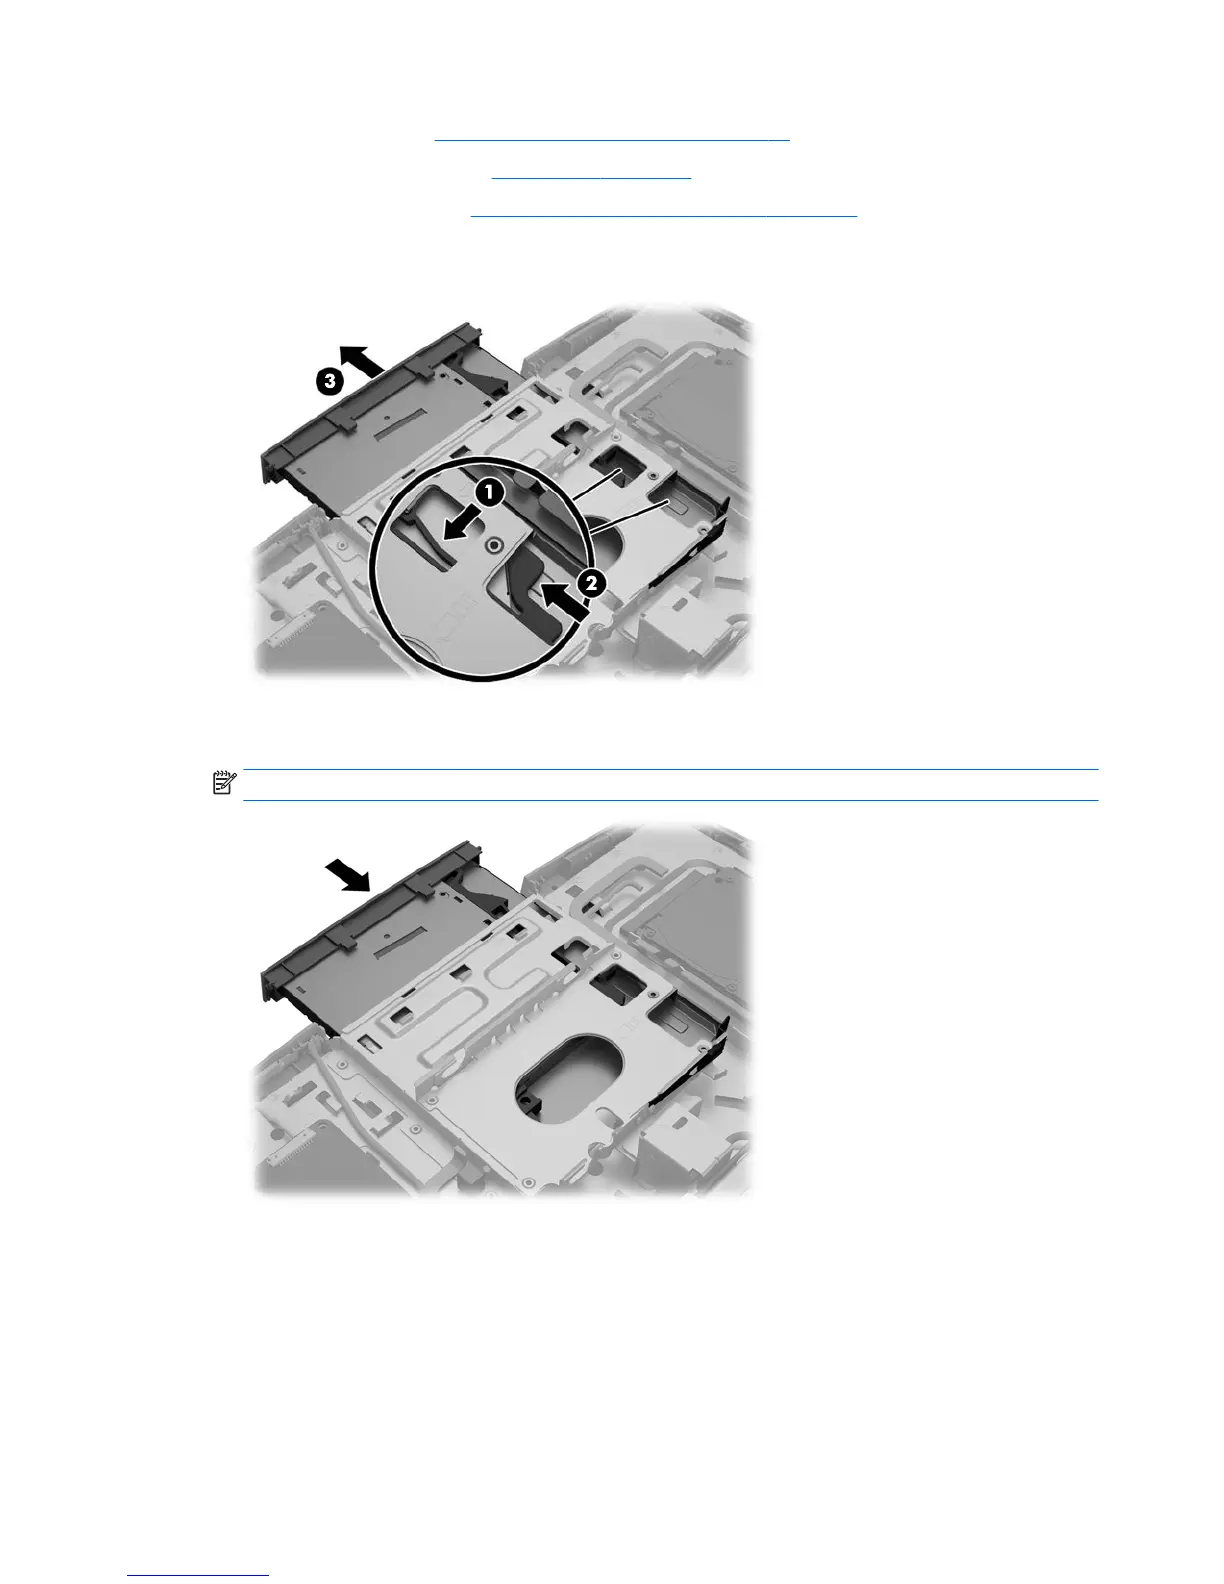
6. Push and hold the tab (1) while pushing in the latch (2) at the back of the optical drive enclosure and
slide the drive (3) out of the chassis.
7. Align the new optical drive with the opening in the side of the computer. Push the drive in rmly until it
snaps into place.
NOTE: The optical drive can be installed in only one way.
32 Chapter 4 Removal and Replacement Procedures
 Loading...