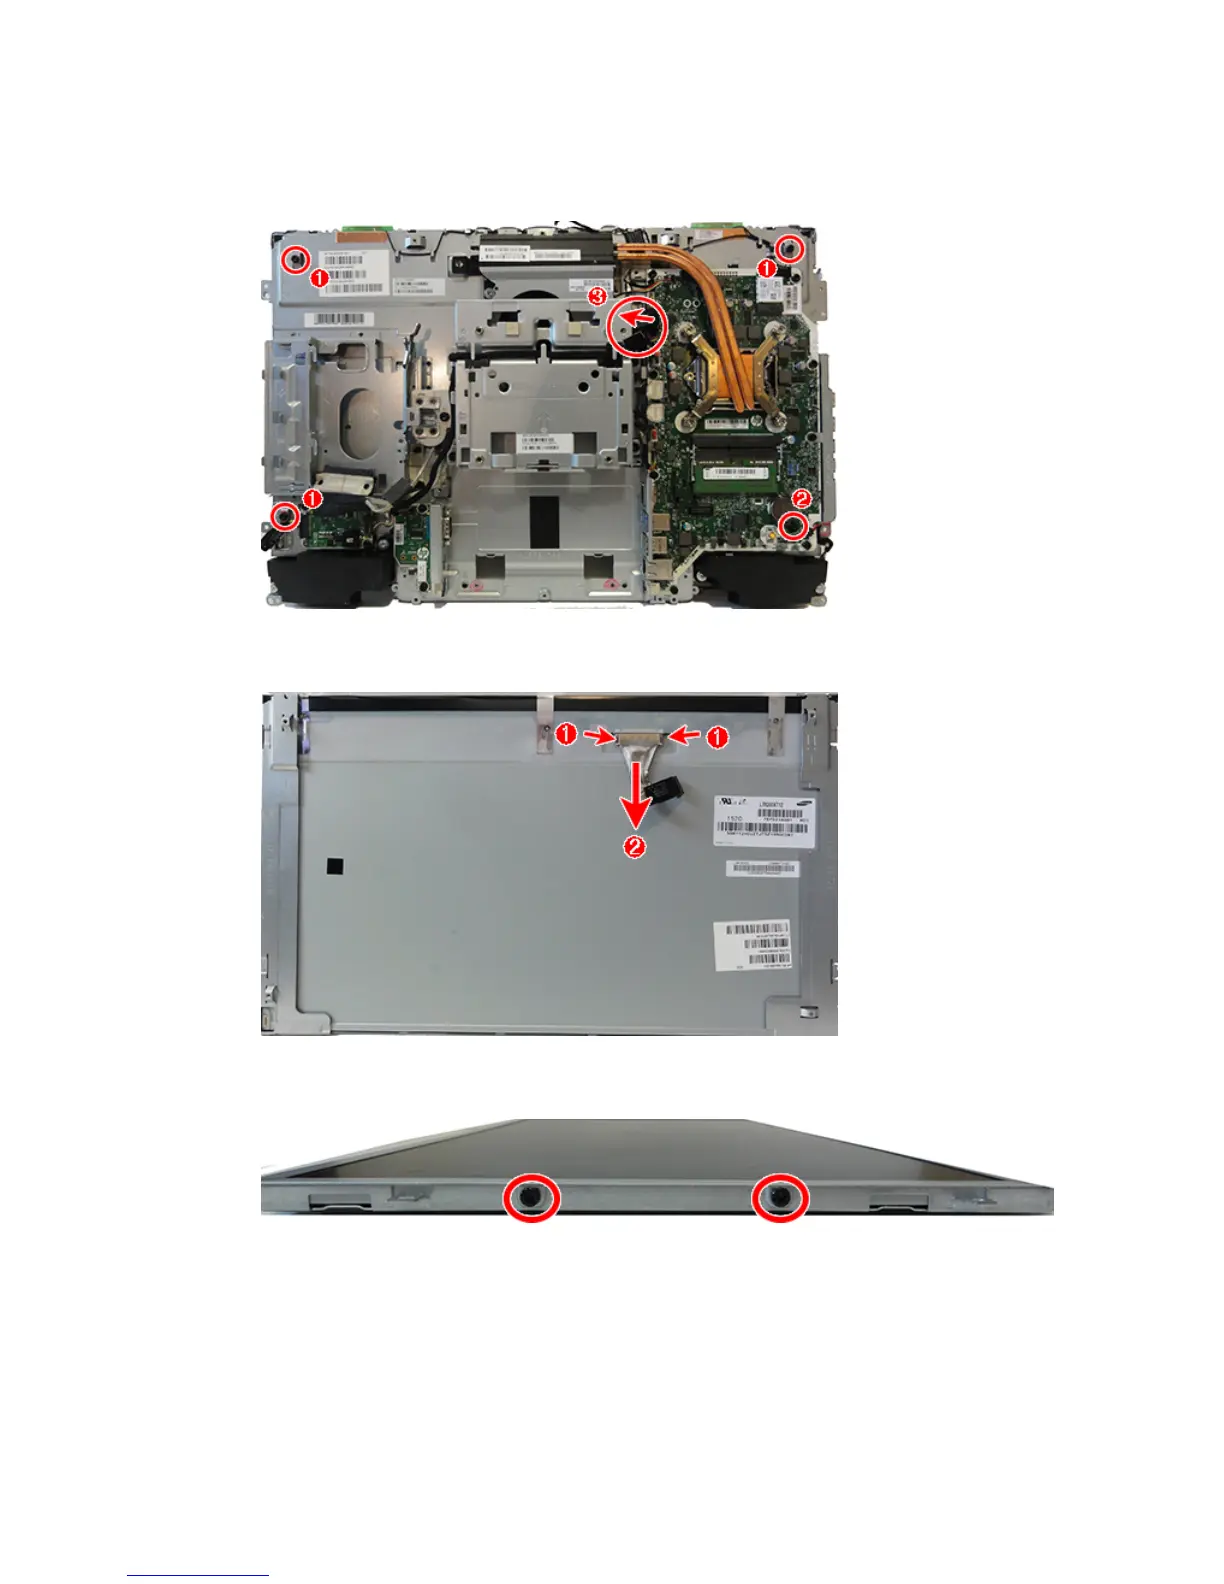
c. Remove the Torx screw embedded in the system board (2).
d. Disconnect the display cable from the system board (3). Separate the display panel from the frame
while routing the display cable through the opening in the frame.
17. Disconnect the display cable from the connector on the display panel by pressing on the latches on each
side of the connector (1), and then pulling the cables from the connector (2).
18. If it is necessary to remove the brackets, remove the two screws from each bracket, and then remove
the brackets from the panels.
To install the display panel, reverse the removal procedures.
Display panel, non-touch 67
 Loading...