1. Prepare the computer for disassembly (see Preparation for disassembly on page 37).
2. Remove the bottom cover (see Bottom cover on page 37).
3. Remove the battery (see Battery on page 39).
4. Remove the fan assembly (see Fan assembly on page 46).
5. Remove the system board with heat sink installed (see System board on page 52).
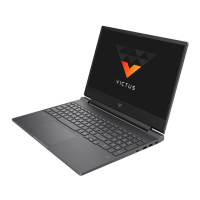
Remove the plastic rear vent and n:
1. Remove the four Phillips 2.0 × 2.0 broadhead screws (1) that secure the n to the computer, and then
remove the n (2).
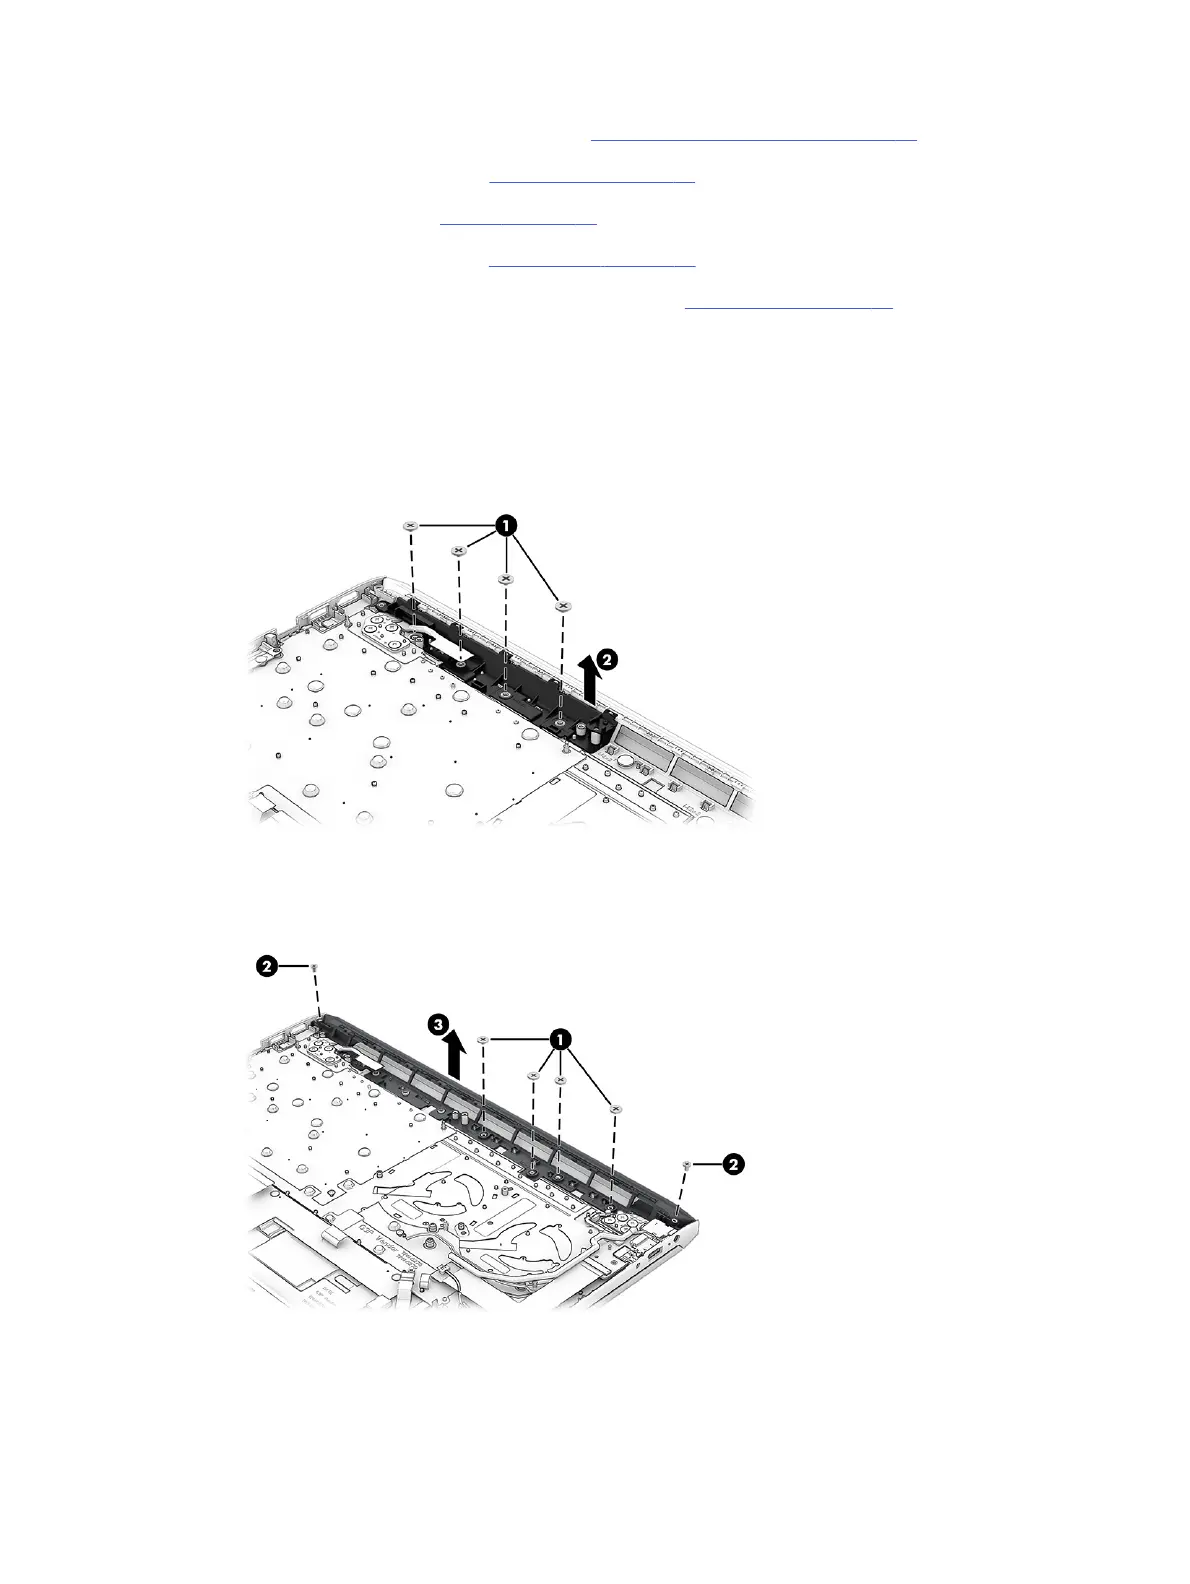
2. Remove the four Phillips M2.0 × 2.0 broadhead screws (1) and two Phillips M2.0 × 2.5 screws (2) that
secure the plastic rear vent to the computer, and then remove the vent (3).
Plastic rear vent and n 57