3. Switch the machine on. From the main screen, click “TOOLS” (Fig. 3) then click “SPECIAL FUNCTION”
then click “UPDATE FROM CARD” When prompted, click “CONFIRM” .
4. The screen will turn white for approximately 7 minutes, then will turn black for a shorter period, and then beep.
The beep indicates that the AutoCal program is loaded.
CAUTION: Do not turn the machine
off during the loading of the
Auto-Calibrate program.
Once the Auto-Calibration program
is properly installed, the machine
can be switched off as needed.
5. While the Auto-Calibrate Program is loading, remove the cutter and install the Calibration Disk. The screen will
now indicate ”AUTO CALIBRATE” (Fig. 4).
Auto-Calibrate
4$)-"(&45"/%"3%
-"45%4%
13&4&5
13&4&5
13&4&5
%4%
$@KHAQ@SD
5NNKR 3DRDS
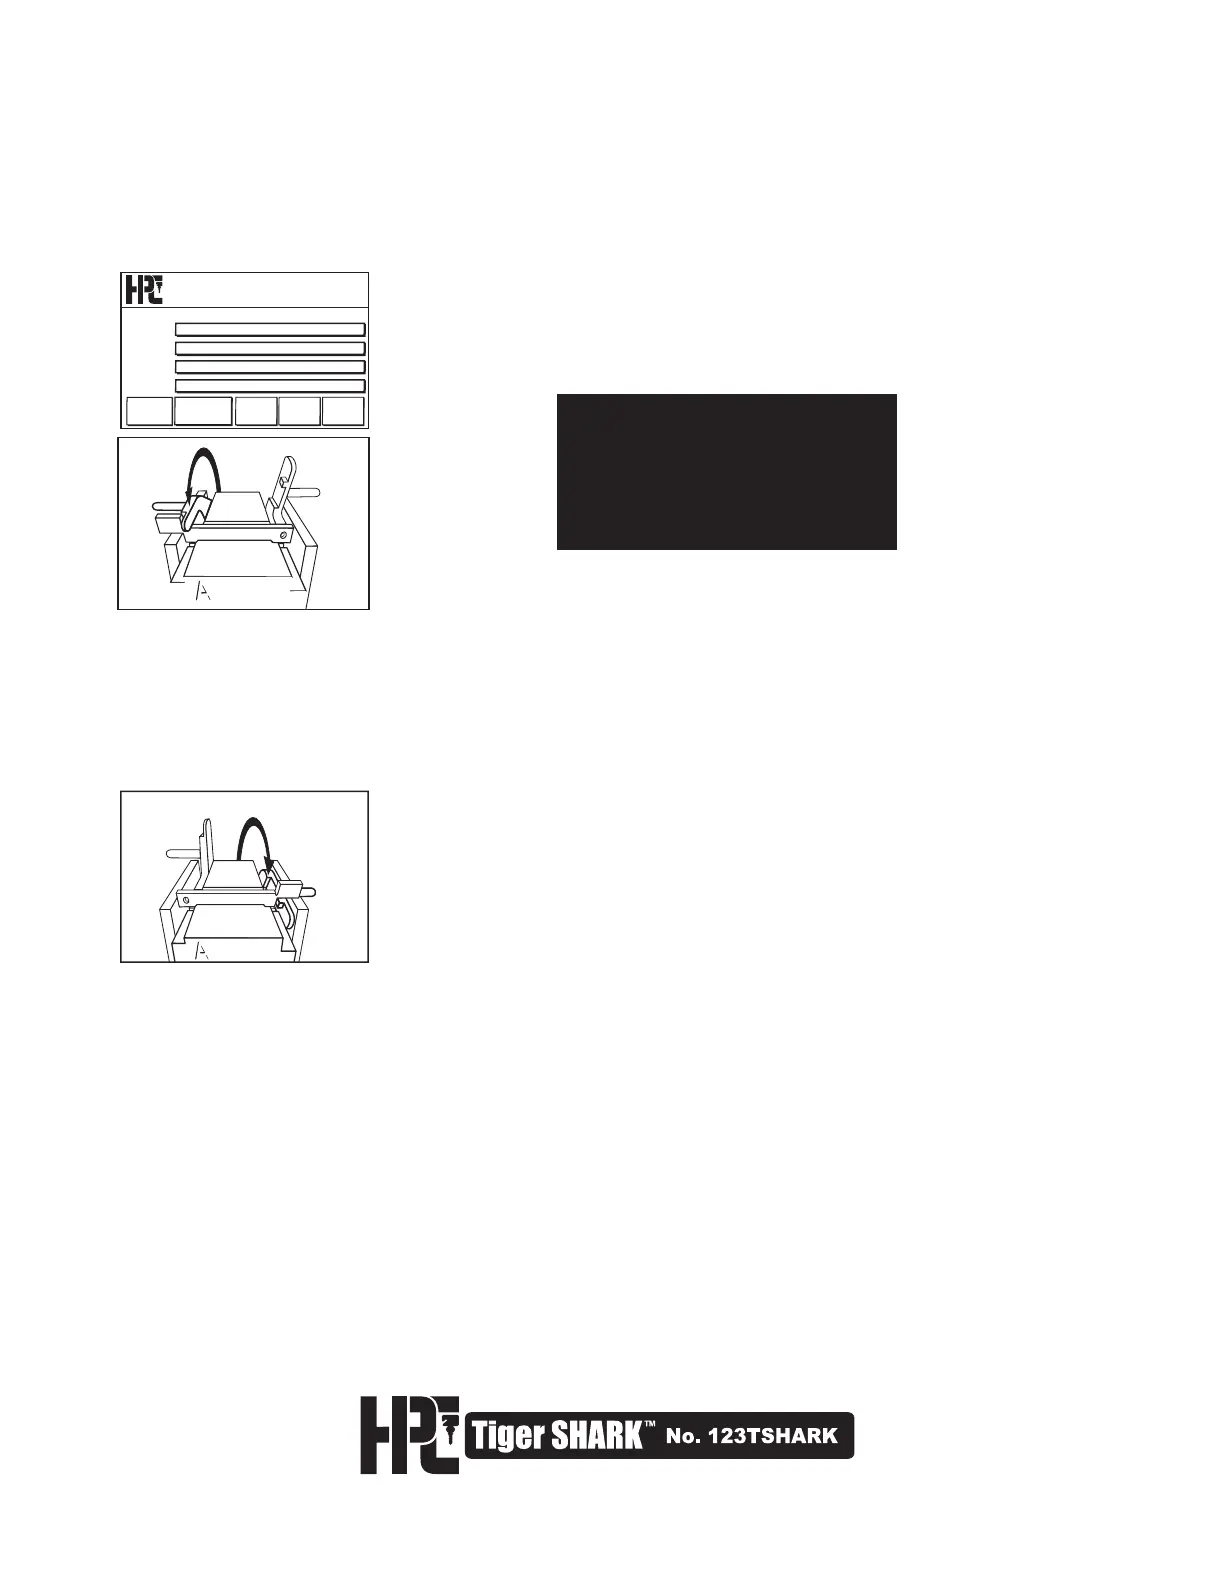
Click the “CALIBRATE” button. The next menu will read“**Mount Shoulder
Gauge Tool**”. Place the Calibration Key in Jaw A and align with the shoulder
gauge. After aligning Calibration Key, lower the shoulder gauge to the rest
position (Fig. 5), and press “Continue”.
6. The carriage will now slowly move in toward the Calibration Disk. The disk will make contact at a number of
points on the Calibration Key. This phase of the program takes about 60 seconds. When this phase is com-
pleted the Tiger SHARK™ will stop and beep 3 times while changing screens.
8. The Tiger SHARK™ will continue to self-calibrate by repeating the touch off routines it did for the shoulder
gauge. This phase will take about 30 seconds. After it finishes the machine will beep 4 times to tell you it has
completed the self-calibration. When prompted, click “Confirm” The screen will change to the main menu.
9. Remove the Calibration Key and Calibration Disk. Install a No. CW-14MC cutter and a standard shoulder
gauge key blank. (eg. Schlage SC1).
10. On the menu, click DSD, then type in “Schlage” or DSD number 60. Follow the instructions on screen, and cut
5-depths in all positions. If a Schlage key blank is not available, select another standard shoulder gauge key
blank, and use the appropriate DSD number and cutter.
11. Use a key micrometer (such as the HPC Ultimate Micrometer, No. SKM-2D) to measure the depths of each cut.
Compare the depths obtained to the depths listed in HPC CodeSource® program, or other reliable source. All
cuts should be within .002” (.05mm) of the manufacturer’s specification (260-inch for a Schlage 5-depth). In most
cases no further adjustments will be needed.
Note: do not cut a key using a DSD where you have made DSD-specific adjustments, as these adjust-
ments will not be a true reading of the machine’s current state of calibration.
7. The screen will read “*Set tool for tip adjustment*”. Remove the Calibration Key, turn it around, and gauge it
with the tip gauge (Fig. 6). Press the “DO TIP” button.
Fig. 5
Fig. 6
38