6.2 Replacement of Cutter Belt
PREPARATION: To replace the Cutter
Belt, you must first remove the Deburring
Brush, the lower chassis cover, the Cutter
Head Housing and the Shaft Lock Button
Assembly.
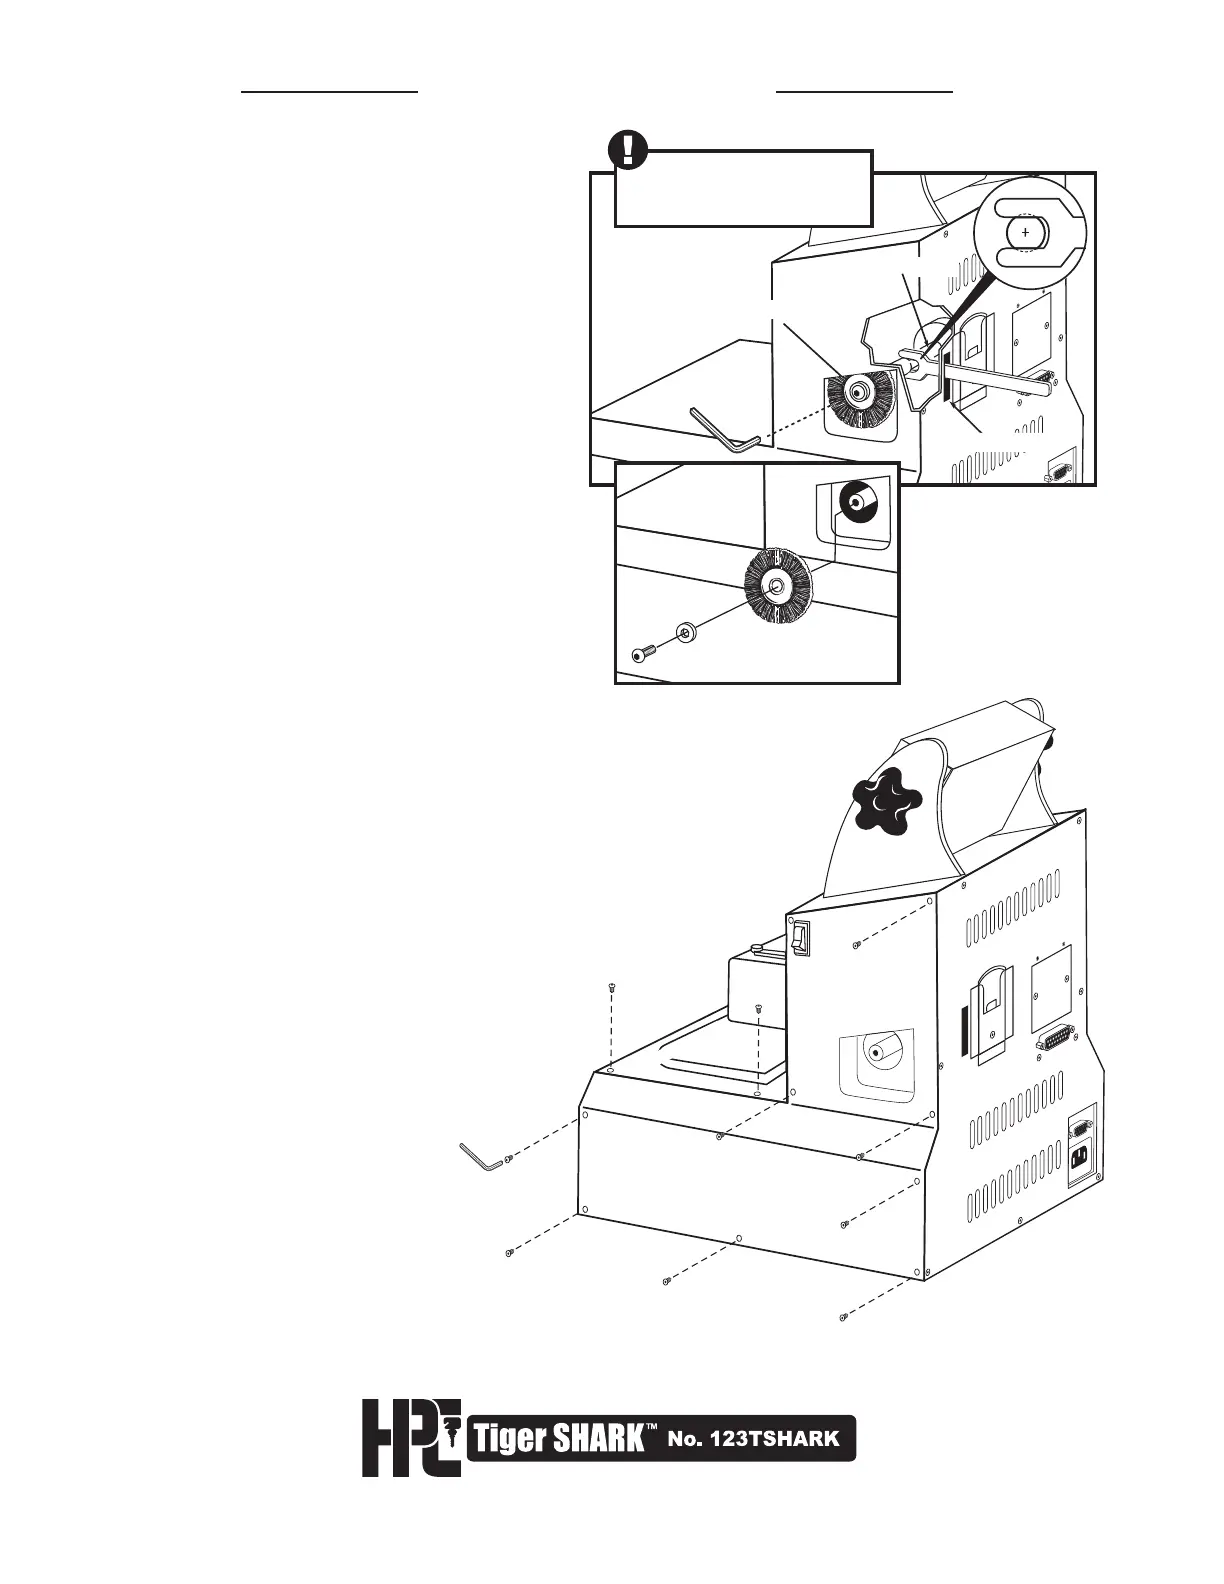
1. REMOVE DEBURRING BRUSH:
Using Adjustment Wrench provided,
locate the wrench slot on back of
machine (Fig. 1). Insert Adjustment
Wrench into slot, and align onto flat
section of cutter shaft. (You may have to
turn shaft manually to align flat area to
wrench). Hold wrench to secure shaft from
turning,while unscrewing Brush Retaining
Screw with Allen Wrench provided.
Remove Allen Screw and Washer.
Remove Deburring Brush by pulling brush
toward you and then down and out of
brush recess (Fig. 2).
2. LOOSEN LOWER CHASSIS COVER:
Using Allen Wrench provided, remove
Allen Screws from side panels of machine.
There are nine (9) Allen Screws on each side
of the chassis. Next, remove four (4) Allen
Screws from top of front platform.
Do not attempt to remove Lower Chassis
Cover until after the next step.
SIDE PANEL
BACK PANEL
TOP PLATFORM