79
80
LP-532 REV. 8.13.2014
LP-532 REV. 8.13.2014
Main components Replacement Instructions
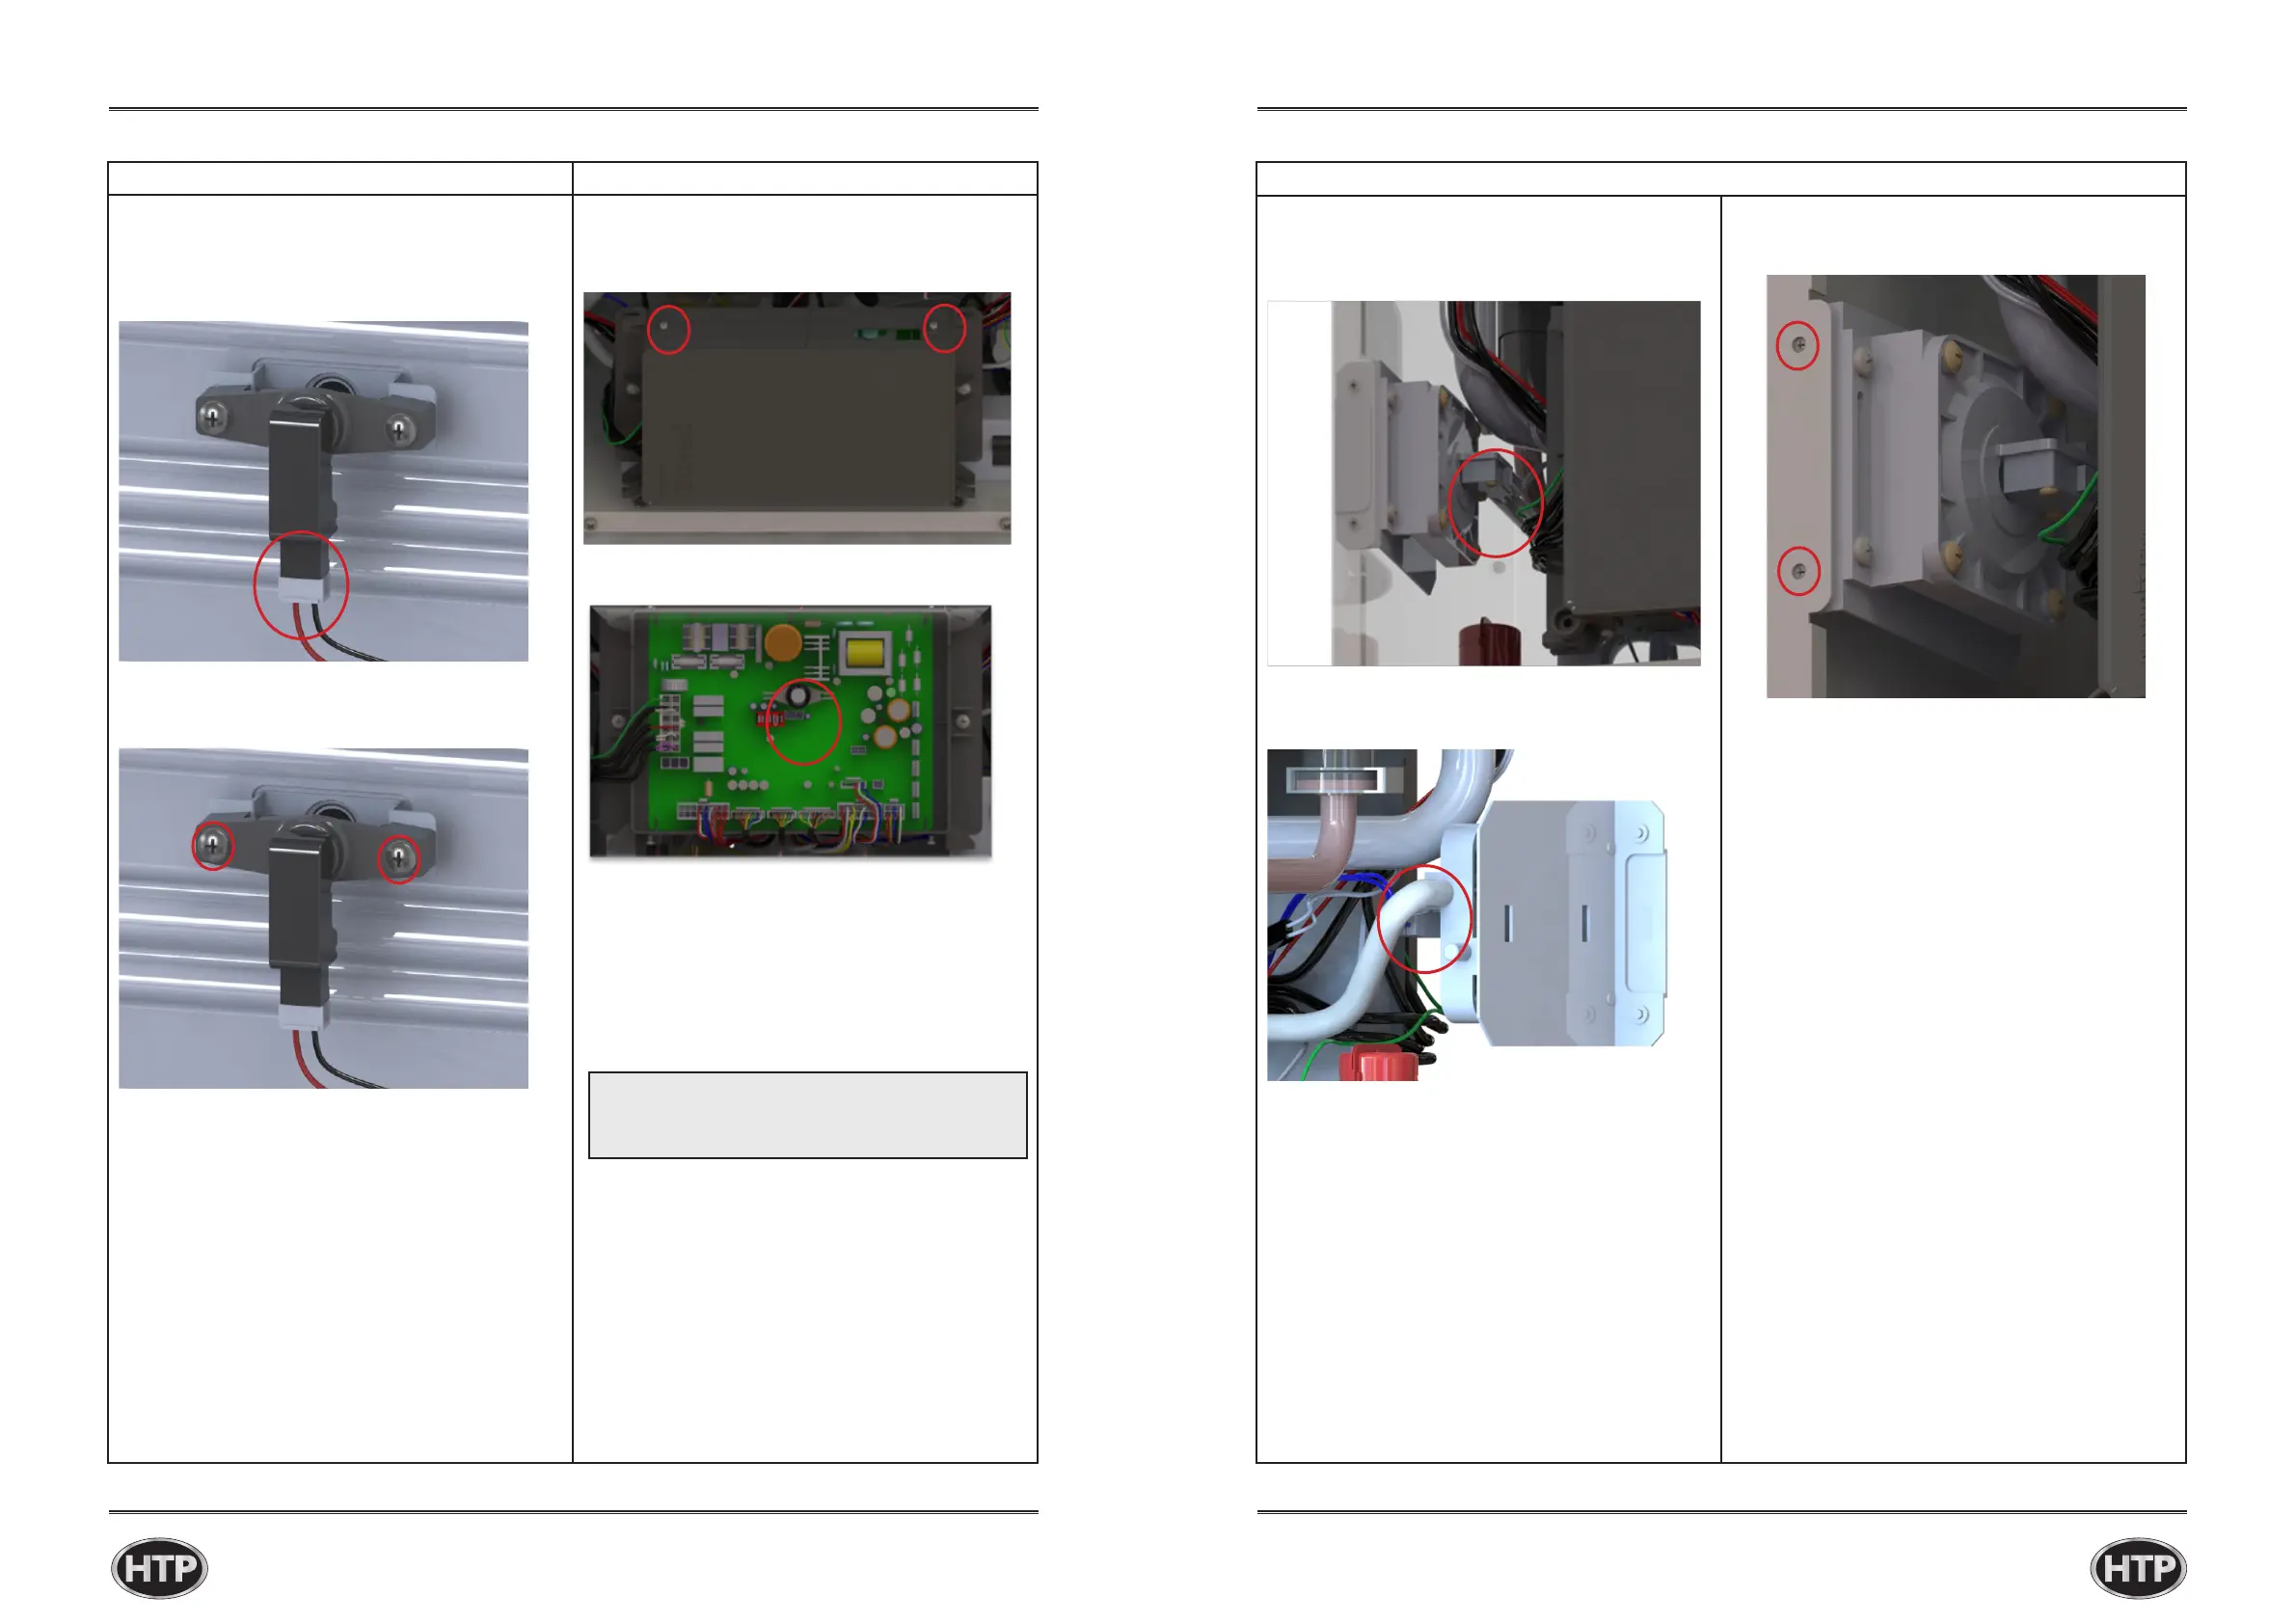
3.FlameDetectionSensor 4.GasLeakDetector
1.Closethegasshutovalve
2.Turnthepowero
3.Disconnectalltheelectricalconnectiontothe
main controller
5.PluckawayPCB’sgasleakagedetector.
6.Replaceleakdetectionwithnewcomponent.
7.Assemblyisinthereverseorderasthepartwas
repaired.
8.Openthegasshutovalve
9.Turnthepoweron
10.Turntheunitonandensureproperoperation.
1.Closethegasshutovalve
2.Turnthepowero
3.Disconnectalltheelectricalconnectiontothe
amedetectionsensor
4.Rotateamedetectionsensor45degrees
clockwiseandpullforward.
5.Replaceamedetectionsensorwithnew
component.
6.Assemblyisinthereverseorderasthepartwas
repaired.
7.Openthegasshutovalve
8.Turnthepoweron
9.Turntheunitonandensureproperoperation.
NOTE:
Ensuretheamedetectionsensoris
properlysecured.
Chapter 5 Replacement instructions
Main components Replacement Instructions
5.Airpressureswtich(APS)
1.Closethegasshutovalve
2.Turnthepowero
3.DisconnecttheelectricalconnectiontotheAPS
4.SeparatehosefromAirPressureswitch.
5.LoosenAirPressureswitchbracket’stwo
screws.
6.ReplaceAPSwithnewcomponent
7.Assemblyisinthereverseorderasthepartwas
repaired.
8.Openthegasshutovalve
9.Turnthepoweron
10.Turntheunitonandensureproperoperation.
Chapter 5 Replacement instructions
WARNING
Failure to turn the power o to the appliance
before repair could result in serious injury or
 Loading...