20
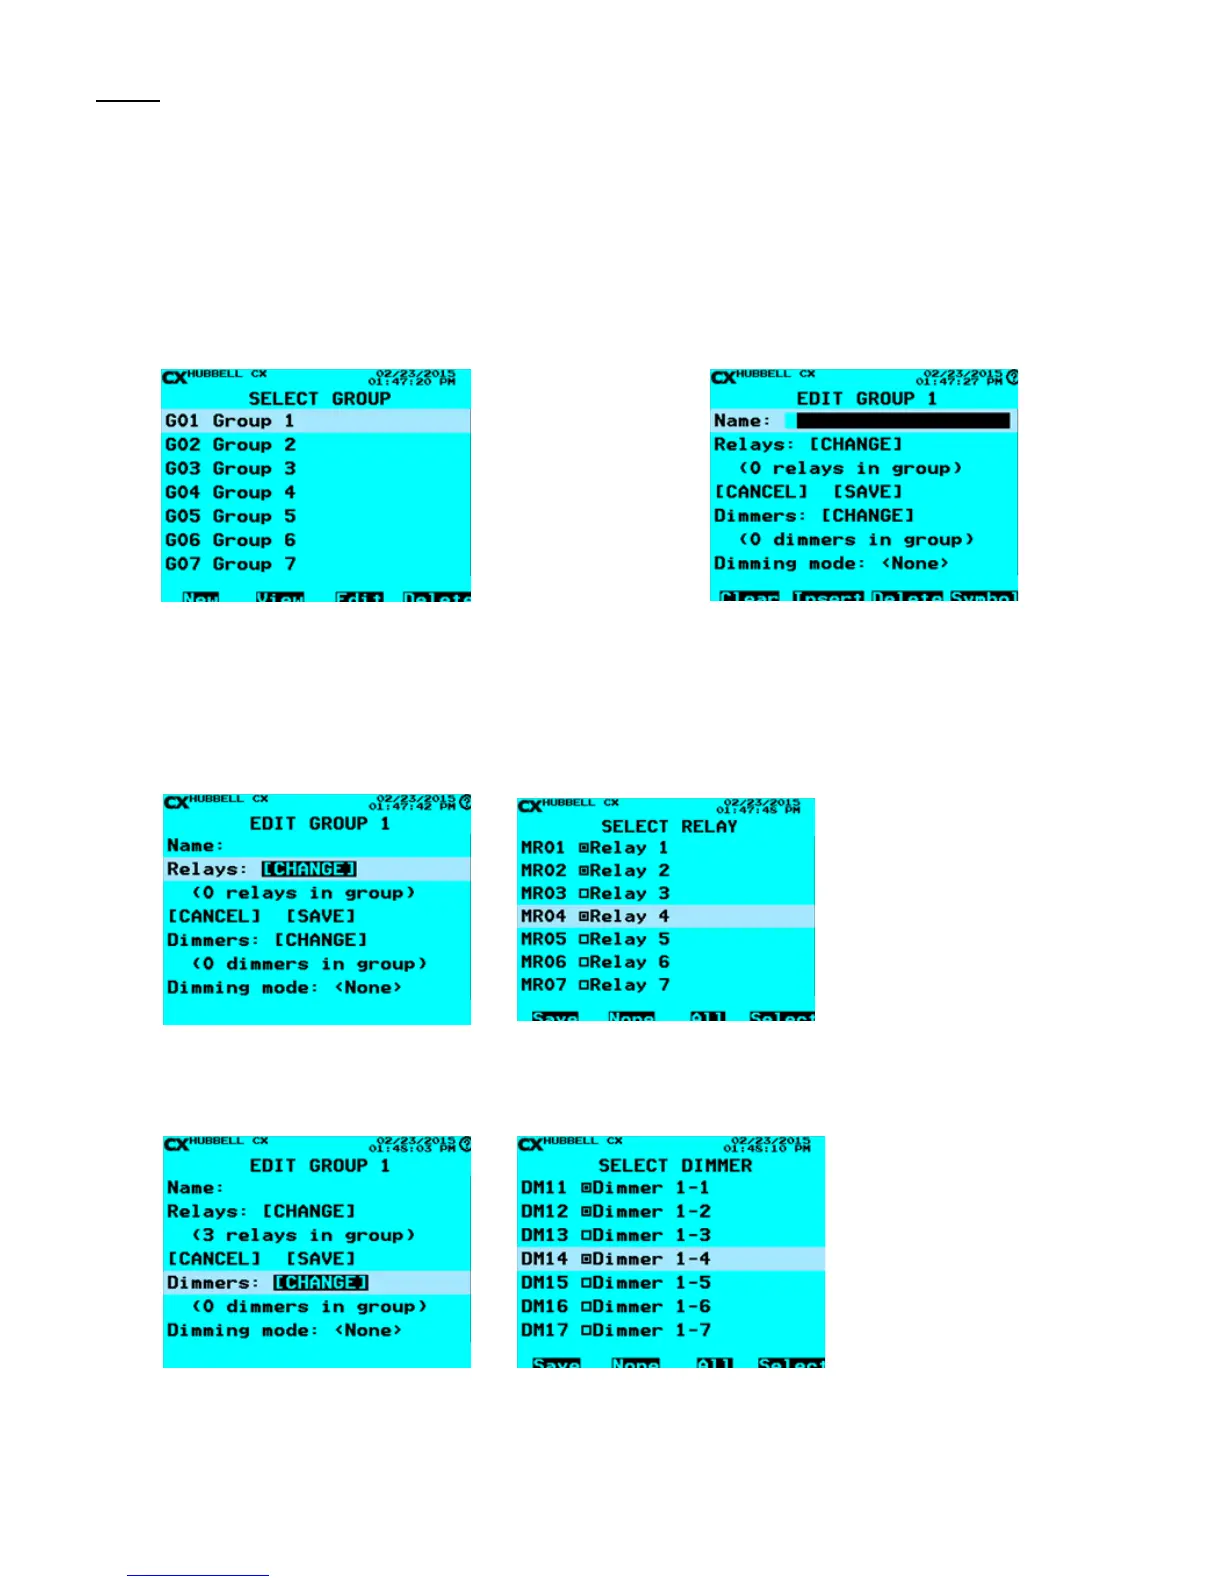
Groups
This menu allows the user to create relay or dimmer groups that can be mapped to inputs, outputs or schedules. Relays and
dimmers in both master and secondary panels can be included in groups. There are a total of 32 groups available. Groups that
have been programmed will be indicated on the CX User Interface display by a solid box adjacent to the group name. Once a
Group has been created and saved, it can be viewed, edited, and deleted.
• When nished scroll down to highlight SAVE. Press ENTER to save your changes.
• The Group you created should appear in the Group list. Note the small black square next to the Group name. Scroll to
it and press the F2 key to view the Group. Press the F3 or F4 keys to edit or delete the Group.
1. From the Main Menu, select Groups. Then press the
ENTER key.
2. Select Group – Scroll to Group to program. Select any
of the 32 Groups Press the ENTER key or the F1 key to
create a Group.
3. Name Group – Use the Function keys and the
alphanumeric keypad to edit the Group name. Refer to
“Function Keys” section at the beginning of the Programming
Section of this manual.
4. Select Relays: [CHANGE] Then press the ENTER key. Use the ENTER key or the
F4 key to select or deselect relays to include in the group. Press the F1 key to SAVE
the Group.
5. Select Dimmers: [CHANGE] Then press the ENTER key. Use the ENTER key or the
F4 key to select or deselect dimmers to include in the group. Press the F1 key to SAVE
the Group.
 Loading...