ATTACHing THe ASSeMbled Solenoid And PiloT VAlVe To THe flAnge CoMPARTMenT
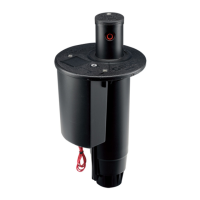
With the Solenoid and Pilot Valve correctly assembled as outlined above, look at the bottom of the Pilot Valve. Notice
there are two opposing sections of plastic that protrude to the outside and away from the center (g 139). These two
“ears”mustengagethePilotValve’smountingbaseinthebodyangecompartmentduringinstallation(g140).
ToinstalltheSolenoidandPilotValve,rstpositionyourselftothesideoftherotorsuchthattherotorsange
compartment is at the 6:00 position (closest to you). Next, lower the Solenoid and Pilot Valve assembly (g 141) into
theangecompartmentwiththePilotValve’sttingspointingtotheleftside(9:00position).Engagethebottomof
thePilotValvewiththePilot’sValve’smountingbaselocatedattherightandrearoftheangecompartment.Press
down to engage Pilot Valve’s mounting ears (g 142).
FIG 139
FIG 141
FIG 140
FIG 142
49
 Loading...
