inleT VAlVe inSTAllATion
–
g900 SeRieS
Remove excess water from the rotor’s body cavity. Inspect the upper and lower snap ring grooves making sure there
are no damaged or missing sections of plastic adjacent to (next to) the snap ring grooves. Remove all plastic shavings
or burrs of plastic that are found within the body cavity.
Ifneeded,asmallamountofDowCorning™#111ValveLubricantorpurepetroleumjellylikeVaseline™canbe
used around the O-Ring on the inlet valve. In most instances, residual water within the rotor’s body cavity is sufcient
lubrication for inlet valve installation.
Caution! Use of other non-specied lubricants can attack and deteriorate the plastic used in golf rotors. Stress cracks
or leaking caused by the use of improper lubricants are not covered under warranty.
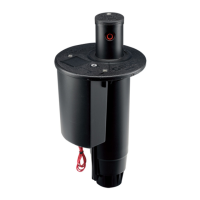
G900 Series inlet valves are installed in the body using the G900 Valve Tool. Prior to using the tool, familiarize yourself
with the individual features of the G900 Valve Tool. First, notice there are hooks at the end of each metal bar (g 114).
These hooks are used to grab/hook the inlet valve during installation. The black plastic part of the G900 Valve Tool
includes physical features that hold or nest the inlet valve and the white lower snap ring to the tool during installation.
In order to engage the inlet valve and white lower snap ring with the G900 Valve Tool properly, you must be familiar
with the pointing and alignment features on the tool’s black plastic part. First, look at the top inside diameter (inner
circle) of the black plastic part on the tool. Next, nd the small pointer arrow that protrudes towards the center (g
115). This pointer is used to indicate the direction and alignment that the tool must have as it is inserted into the
rotor’s body.
Directly below the pointer on the underside of the G900 Valve Tool there are a series raise tabs (g 116). The tab
directly below the pointer appears to be missing but this gap between tabs is intentional (it is designed to be this
way). When the tool is nested to the valve, the gap provides clearance for the inlet valve’s communication port.
FIG 114 FIG 115 FIG 116
38
 Loading...
