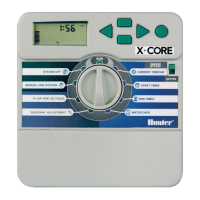
CONNECTING A HUNTER SOLAR SYNC
The
So
lar Sync is a "smart" control system that, when connected
to
the
I-Core, w
il
l automatically adjust your controller's station run times based
upon changes in
local climate conditions. The
So
lar Sync incorporates a
solar and temperature sensor
to
determine evapotranspiration, also known
as
ET
. It al
so
utili
zes
a
Rain
Clik and Freeze-Clik
to
shut down your irrigation
when
condit
ions ari
se.
The I-Core now
has
the Solar Sync software
built
into the controller.
New
I-Core controllers with built in Solar
Sync
are easily identified
by
the new
SOLAR SYNC SETTINGS dial position on the facepack. Because the new
I-Core
has
built in
So
lar Sync software, the Solar Sync Sensor
is
the only
item
to
be connected
to
the controller. The Solar Sync module will not be
used and
is
not compatible with I-Core controllers
that
have Solar
Sync
software built in.
1.
To
connect the Solar Sync Sensor route the black and green
se
nsor
wires into the
controller and connect them
to
the
two
S1
terminal
positions. It does
not
matter which wire goes
to
which
S1
termi
na
l,
but
the
S1
terminal must be used when connecting a Solar Sync sensor.
2.
Mount
the Solar Sync sensor
in
a location that receives
as
much
sunlight
as
possible
for
best results.
(see
Solar Sync owner's manual
for
more details on sensor location)
3. The Solar
Sync
Sensor must now be assigned
to
the SEN1 locati
on
in the controller. Turn the dial
to
the
ADVANCED
FEATURES position.
4.
Use
the T button
to
scroll
to
Sensor Configuration and press the +
button.
5.
In
the SE
N1
position use the + button
to
scroll through the
opt
ions
until
Solar Sync
is
shown. The I-Core now recognizes that a Solar
Syn
c
sensor
has
been connected.
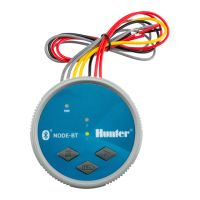
If connecting a
Wireless Solar
Sync
to
the I-Core, steps 1-5
are
the same
~in
step 1, you will
be
connecting the green and black wires from
the
Wireless Solar Sync Receiver
to
the
S1
terminal positions. The Wireless
So
lar Sync Receiver then communicates with the Wireless Sensor.
The Solar Sync
can
be programmed
to
adjust station run times
by
program.
To
set the I-Core
to
Solar Sync Adjust
mode
:
1.
Tu
rn
the dial
to
Set Seasona l Adjustment.
Use
the
PRG
Button
to
se
lect the desired program.
2.
Press
the +/
-button
to
select
By
Solar Sync Seasonal Adjust mode.
Repeat
for
other programs if nee
ded
(Se
e Sensor Configuration on
page
22)
.
Once a Solar
Sync
is connected and programmed the station run times
will be adjusted according
to
the findings
of
the Solar Sync. The Solar
Sync
will automatically adjust station
run
times and
can
be programmed
independently for each
of
the four I-Core programs. The
Ra
in Clik and
Freeze-C
li
k sensor incorporated
in
the Solar Sync
can
be programmed by
station whi
ch
is
discussed
in
the Set Sensor
Operat
ion section.
5('1.AR ·
SYNC
Do
not
install
0
Black
II