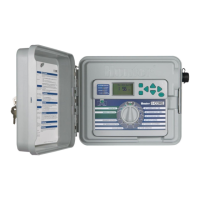
MOUNTING
THE CONTROLLER (METAL PEDESTAL)
Pedestal
Mount
for Metal/Stainless Cabinet
Loca
tion Requirement: A) A switch
or
circuit-breaker shall
be
included in
building
installations;
B)
the
switch
or
breaker shall
be
in close proximity
to
the
controller, and within easy reach
of
the
operator; C)
the
switch
or
breaker shall
be
marked
as
the
disconnecting device
for
the
controller;
D)
the
switch
or
circuit breaker used must
comply
with IEC 60947-1 and IEC
60947-3.
Select a location
for
your
cont roller
that
can
be
easily accessible, and
is
within close proximity
to
a 120VAC(10A)
or
230/240VAC(5A)
power
source.
1. Set concrete forms using
the
installation instructions
provided
with
the
controller.
Allow
2"(
50 mm)
of
the
conduit
sweep
above
the
surface
of
the
concrete pad.
2. Assemble
the
mounting
template. Twist
one
nut
on each
of
the
four
J-
bolts
and slide each
bolt
through
the
template
. P
ut
a washer and
nut
on each
J-bolt
to
secure
it
to
the
template
(allow 2 W' [64 mm]
of
thread
protruding
above
each nut).
3. Level
the
mounting
template
before
the
concrete sets. Uneven
surfaces may cause
the
pede
stal
to
distort, preventing
proper
sealing
of
the
doors.
4.
Allow
the
concrete
to
cure
for
at least 24 hours.
After
the
concrete
sets, remove
the
nuts and washers from
the
four
J-bolts, and slide
the
pedestal
over
the
bolts. Secure
the
pedestal
to
the
bolts using
the
enclosed washers and nuts.
Yi''
(13
mm)Conduit
Nu
t
~
-
2"
(50
mm)Conduit Nut
W'
(13
mm)Conduit
Nu
t -
~
- 2"
(50
mm)Conduit Nut
%"
(20
mm)Washe
r
(4)
%"
(9
.5
mm)
Mounting
Nu
t (
8)
%"
(9
.5 mm) Mounting Nut
(8)
Mounting
Plate
5. Remove
the
door
and faceplate
of
the
I-Core and attach
the
metal
cabinet
of
the
I-Core
to
the
top
of
the
pedestal using
the
enclosed
hardware
in
the
pedesta
I.
6. Replace
the
pedestal
door
first and then replace
the
faceplate and
the
cabinet
door. The pedestal
door
cannot
be removed
or
replaced when
the
cabinet
door
is closed.
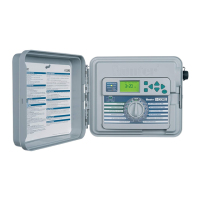
MOUNTING
THE CONTROLLER (PLASTIC PEDESTAL)
Plastic Pedestal Mounting
Locati
on
Requirement: A) A switch
or
circuit-breaker shall
be
included in
building
installations; B)
the
switch
or
breaker shall
be
in
close proximity
to
the
controller, and within easy reach
of
the
operator;
C)
the
switch
or
breaker shall
be
marked
as
the
disconnecting device
for
the
controller;
D)
the
switch
or
circuit breaker used must
comply
with IEC 60947-1 and IEC
60947-
3.
Select a location
for
your
controller that can
be
easily accessible, and
is
within close proximity
to
a 120VAC(10A)
or
230/240VAC(5A)
power
source.
1. Set concrete forms using
the
installation instructions
provided
with
the
controller
.
Allow
2"(50
mm)
of
the
conduit sweep
above
the
surface
of
the
concrete pad.
2. Assemble
the
mounting
template
. Twist
one
nut
on each
of
the
four
J-
bolts
and slide each
bolt
through
the
template
. Put a washer and
nut
on each J-
bolt
to
secure it
to
the
template
(allow 2 W' [64 mm]
of
thread
protruding
above
each nut).
3.
Level
the
mounting
template
before
the
concrete sets. It
is
important
with
plastic pedestals
to
ensure a
smooth
mounting
surface. Uneven
surfaces may cause
the
pedestal
to
distort, preventing
proper
sealing
of
the
doors.
4.
Allow
the
concrete
to
cure
for
at least 24 hours.
After
the
concrete
sets, remove
the
nuts and washers from
the
four
J-bolts, and
sl
i
de
the
pedestal over
the
bolts. Secure
the
pedestal
to
the
bolts using
the
enclosed washers and nuts.
AC
Power
Wire
S/P
---.
(3
'
[7
.6
cm]
Max
Above
Concrete)
26
'
Min
(
66
cm
)
T
hread
Length
2.
50
'
(6.4
cm)
Min
Above
Concrete