• Keep a minimum of 150 cm / 60 in. of free space
to the right and left of the center of the charging
station.
• Put the charging station near a power outlet.
• Put the charging station on a level surface.
• The baseplate of the charging station must not be
bent.
• If the work area has two parts separated with a
steep slope, we recommend to put the charging
station in the lower section.
• Put the charging station in an area with protection
from the sun.
• For Automower
®
310E NERA, put the charging
station where there is Wi-Fi coverage to download
new firmware. Refer to
Download firmware over
the air FOTA (Firmware over the air) on page 24
.
For Automower
®
410XE NERA cellular technology
is used for FOTA. You can also select to use Wi-Fi
with FOTA.
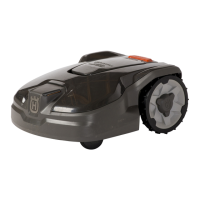
• If the charging station is installed on an island,
make sure to connect the guide wire to the island.
3.4.2 To examine where to put the power
supply
CAUTION:
Make sure that the blades
on the product do not cut the low-voltage
cable.
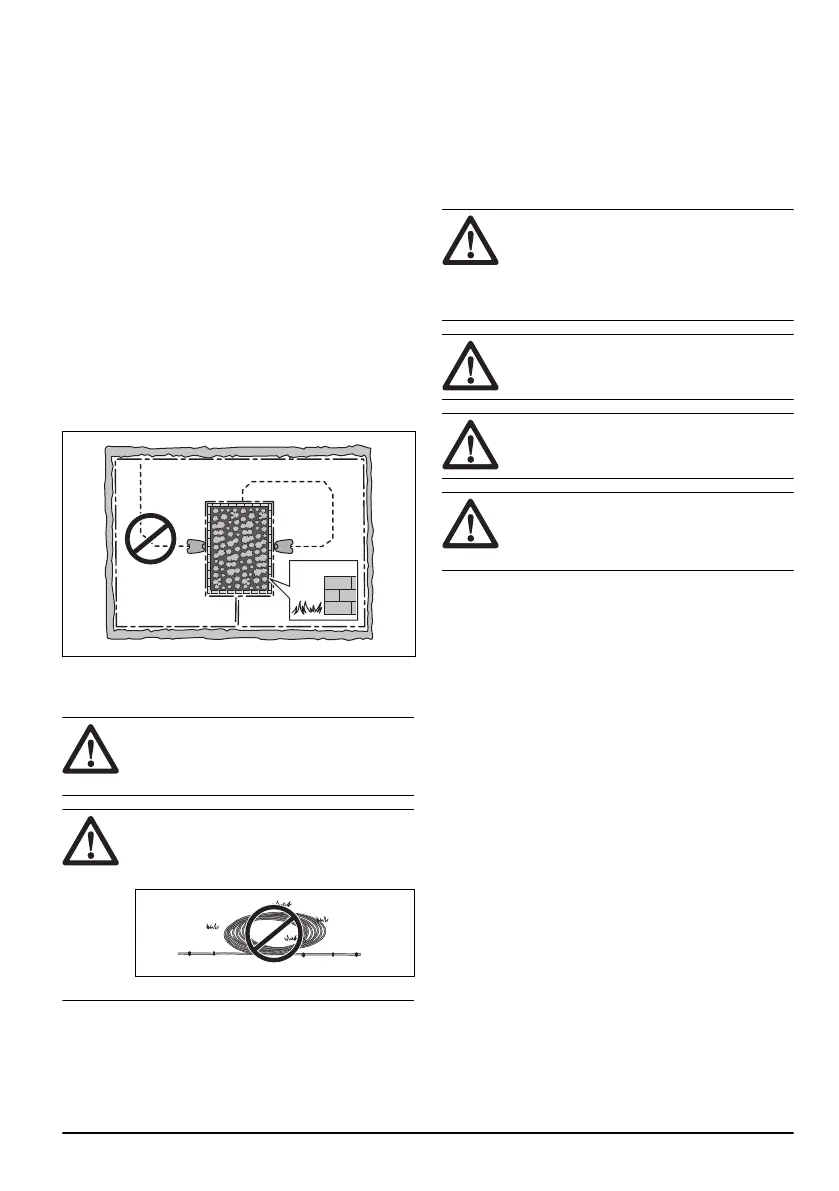
CAUTION: Do not put the low-voltage
cable in a coil or below the charging station
plate. The coil causes interference with the
signal from the charging station.
• Put the power supply in an area with a roof and
protection from the sun and rain.
• Put the power supply in an area with good airflow.
• Use a residual-current device (RCD) with a tripping
current of maximum 30 mA when you connect the
power supply to the power outlet.
Low-voltage cables of different lengths are available as
accessories.
3.4.3 To examine where to put the
boundary wire
CAUTION: There must be a barrier of
minimum 15 cm / 6 in. in height between
the boundary wire and water bodies, slopes,
precipices or public roads. This will prevent
damage to the product.
CAUTION: Do not let the product
operate on gravel.
CAUTION: Do not make sharp bends
when you install the boundary wire.
CAUTION: For a careful operation
without noise, isolate all obstacles such as
trees, roots and stones.
The boundary wire must be put as a loop around the
work area. For good cutting results with EdgeCut, it is
necessary to install the boundary wire at the correct
distances to obstacles. The product only cuts with
EdgeCut by the boundary wire. To use EdgeCut around
trees and obstacles, make islands around them. Refer to
To make an island on page 14
. Sensors in the product
sense when the product goes near the boundary wire,
and the product selects a different direction. All parts of
the work area must be maximum 35 m / 115 ft. from the
boundary wire.
• Put the boundary wire around the work area (A).
Adapt the distance between the boundary wire and
obstacles.
2369 - 001 - 05.02.2024
Installation with wire - 13
 Loading...