GTXR + Owner’s Manual - iv
List of Figures
Figure 1-1. Hard Water Map of Mainland United States ............................................ 1-15
Figure 2-1. Location of Roof Vents in Vehicle ..............................................................2-1
Figure 2-2. Recommended Location of GTXR+ in Van ................................................2-3
Figure 2-3. Install Fuel Pump, Outlet Side Up ..............................................................2-6
Figure 2-4. Fuel Pump Must Be in Vertical Position .....................................................2-6
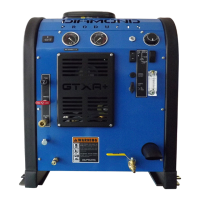
Figure 4-1. GTXR+ Upper Dash Assembly ..................................................................4-1
Figure 4-2. GTXR+ Lower Dash Assembly ..................................................................4-2
Figure 4-3. GTXR+ Chemical System Control and Metering .......................................4-4
Figure 5-1. Remove Valve Cap and Valve Assembly ...................................................5-8
Figure 5-2. Inspect Manifold and Old Valves ................................................................5-8
Figure 5-3. Replace Center Inlet Check Valve With Modied Check Valve ..................5-9
Figure 5-4. Apply Grease and Install Valves .................................................................5-9
Figure 5-5. Replace Valve Capand Torque to 95 ft lbs .................................................5-9
Figure 5-6. Separate Manifold from Crankcase......................................................... 5-10
Figure 5-7. Seal Assemblies May Come Off with Manifold ........................................ 5-10
Figure 5-8. Examine Ceramic Plungers..................................................................... 5-10
Figure 5-9. Remove Stainless Steel Plunger Bolt and Ceramic Plunger ...................5-11
Figure 5-10. Install O-ring, Apply Sealant and Slide Plunger over Plunger Guide .....5-11
Figure 5-11. Extract Retainers and Seals .................................................................. 5-12
Figure 5-12. Seal Kit and Insertion Tool for Seal Installation ..................................... 5-13
Figure 5-13. Install Seal Assembly Using O-Ring Grease ......................................... 5-13
Figure 5-14. Install Retainers into Cavities ................................................................ 5-14
Figure 5-15. Press Low Pressure Seal Assembly into Cavity.................................... 5-14
Figure 5-16. Re-install Manifold and Torque Fasteners ............................................. 5-15
Figure 5-17. Torque Sequence in “X” Pattern ............................................................ 5-15
Figure 5-18. Torque Bolts to 22 ft. lbs ........................................................................ 5-15
Figure 5-19. Recirculation Fitting............................................................................... 5-17
Figure 6-1. Flow Diagram - View 1 of 3 ........................................................................6-3
Figure 6-2. Flow Diagram - View 2 of 3 ........................................................................6-4
Figure 6-3. Flow Diagram - View 3 of 3 ........................................................................6-5
Figure 7-1. Electrical Schematic ...................................................................................7-2
Figure 7-2. Wiring Diagram - View 1 of 2 .....................................................................7-4
Figure 7-3. Wiring Diagram - View 2 of 2 .....................................................................7-5