WeatherTRAK 2-Wire Controller Installation Guide
12
©2020 HydroPoint Data Systems Inc. All rights reserved. 800.362.8774 • hydropoint.com
B. Connect the Controller to AC Power
WARNING! Before making a connection to your WeatherTRAK 2-wire controller, disconnect the power to
avoid electric shock. This installation should be made by a qualified electrician and should meet state and
local electrical codes.
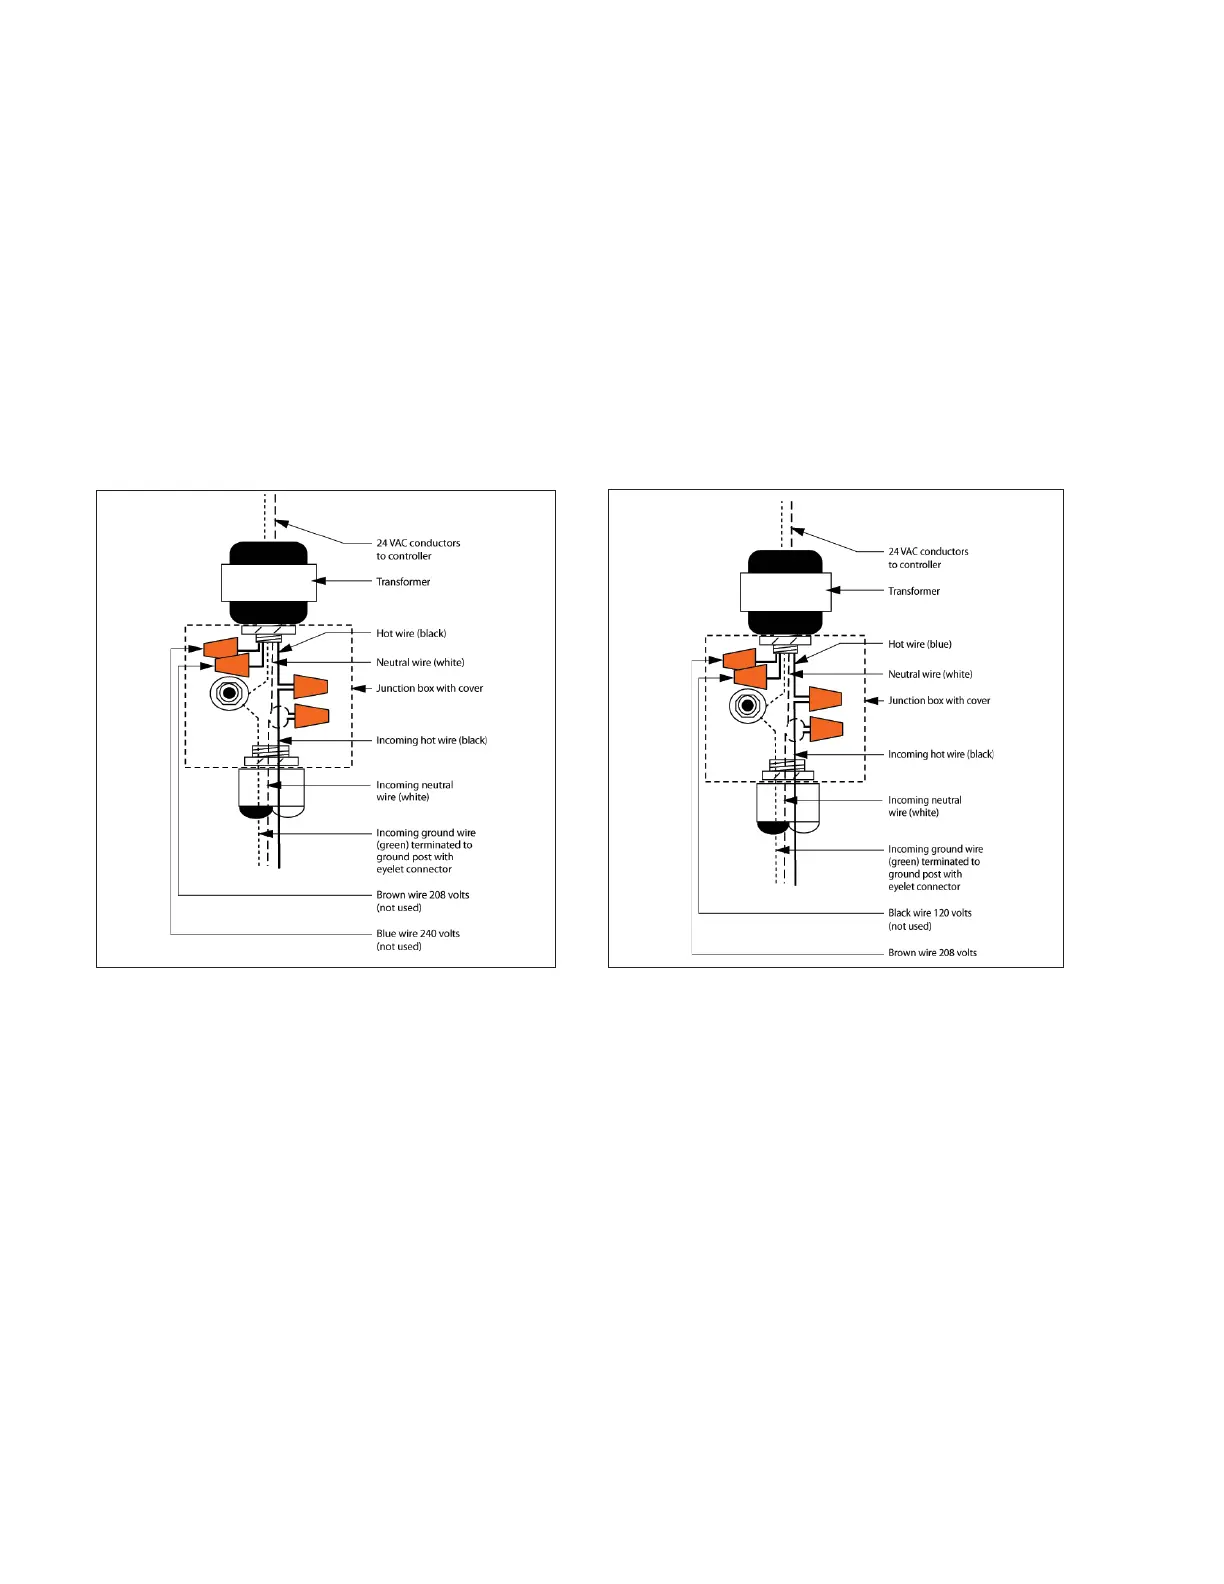
The WeatherTRAK ET Pro 3 2-wire controller incorporates a dual voltage power supply for a wide range of
commercial applications. The controller can be connected to a single phase 120 VAC or single phase 220
VAC source.
The following wiring diagrams and instructions indicate AC power connections to both wall-mount and
pedestal style controllers.
The input side of the transformer has 5 color-coded conductors. A label is attached to the transformer body
with identification for each conductor. Two of the conductors (specific to 220 VAC connections) have been
terminated with wire nuts, shortened and tied together with a zip-tie to avoid confusion for 120 VAC
installations.
• For 120 VAC wire applications, connect the following conductors from the primary side of the transformer
to wiring from an approved electrical source (see Typical 120 Volt Diagram). The unused blue and brown
wires are cut short and terminated with a wire nut.
• For 220 VAC, single-phase applications connect the following conductors from the primary side of the
transformer to wiring from an approved electrical source (see Typical 220 Volt Diagram).
Wiring Diagram.
Wiring Diagram
: Secure each ground wire with its own individual
locking nut and integral star
washer. The Unused black and
wn wires should be terminated with a wire nut
the unused blue and brown wires should be
terminated with a wire nut separately.