26
©2020
HydroPoint Data Systems Inc. All rights reserved. 800.362.8774 • hydropoint.com
WeatherTRAK 2-Wire Controller Installation Guide
Best Practices
Install all decoders according to package directions.
Typically, decoders are placed inside the valve box next to the valve. If necessary, the valve decoder can be
installed up to 5 feet away from the valve.
We recommend 24-36” of extra 2-wire at each splice to allow for future repairs and easier troubleshooting.
Use caution when stripping insulation from the decoder wire and copper wire. Nicks and scores in wire
and insulation can lead to problems.
Note: Do not attach more than one valve to a decoder that is specifically a single valve decoder (WT2W-
H2O-1VD).
Make all splices in valve boxes. Keep splices upright and high in the valve box to avoid submersion.
Mark the location of all decoders, splices and surge protectors on the plans. Leave 12" of wire coiled at
all splices for easier servicing.
There are 4 waterproof connectors included with each decoder. It is important that ONLY waterproof
connectors (type DBR/Y-6 or equivalent) be used to connect all decoder wires.
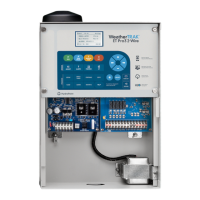
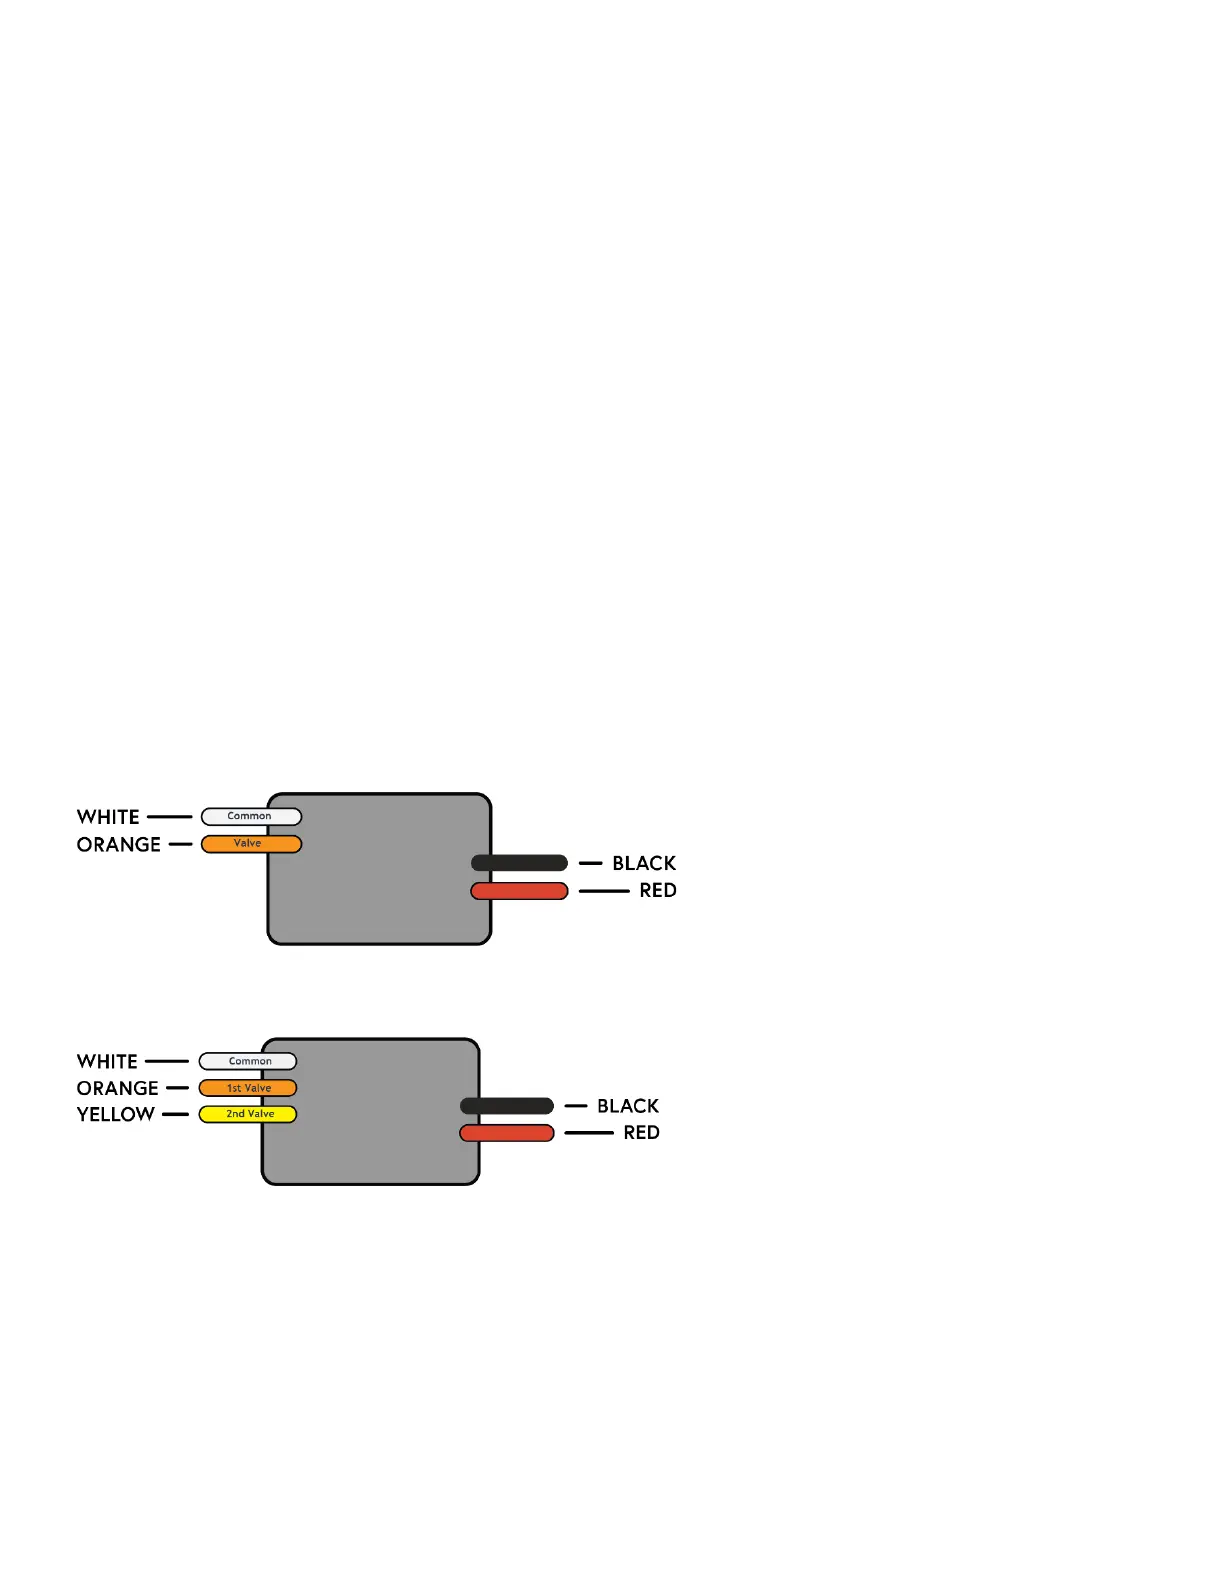
Decoders are manufactured using color coded wires to help keep track of the wiring process. Below is a
description of each type of decoder.
Single Valve Decoder and Master Valve Decoder (WT2W-H2O-1VD) (WT2W-H2O-MV)
Dual
Valve Decoder (WT2W-H2O-2VD)