WeatherTRAK 2-Wire Controller Installation Guide
30
©
2020 HydroPoint Data Systems Inc. All rights reserved. 800.362.8774 • hydropoint.com
Di
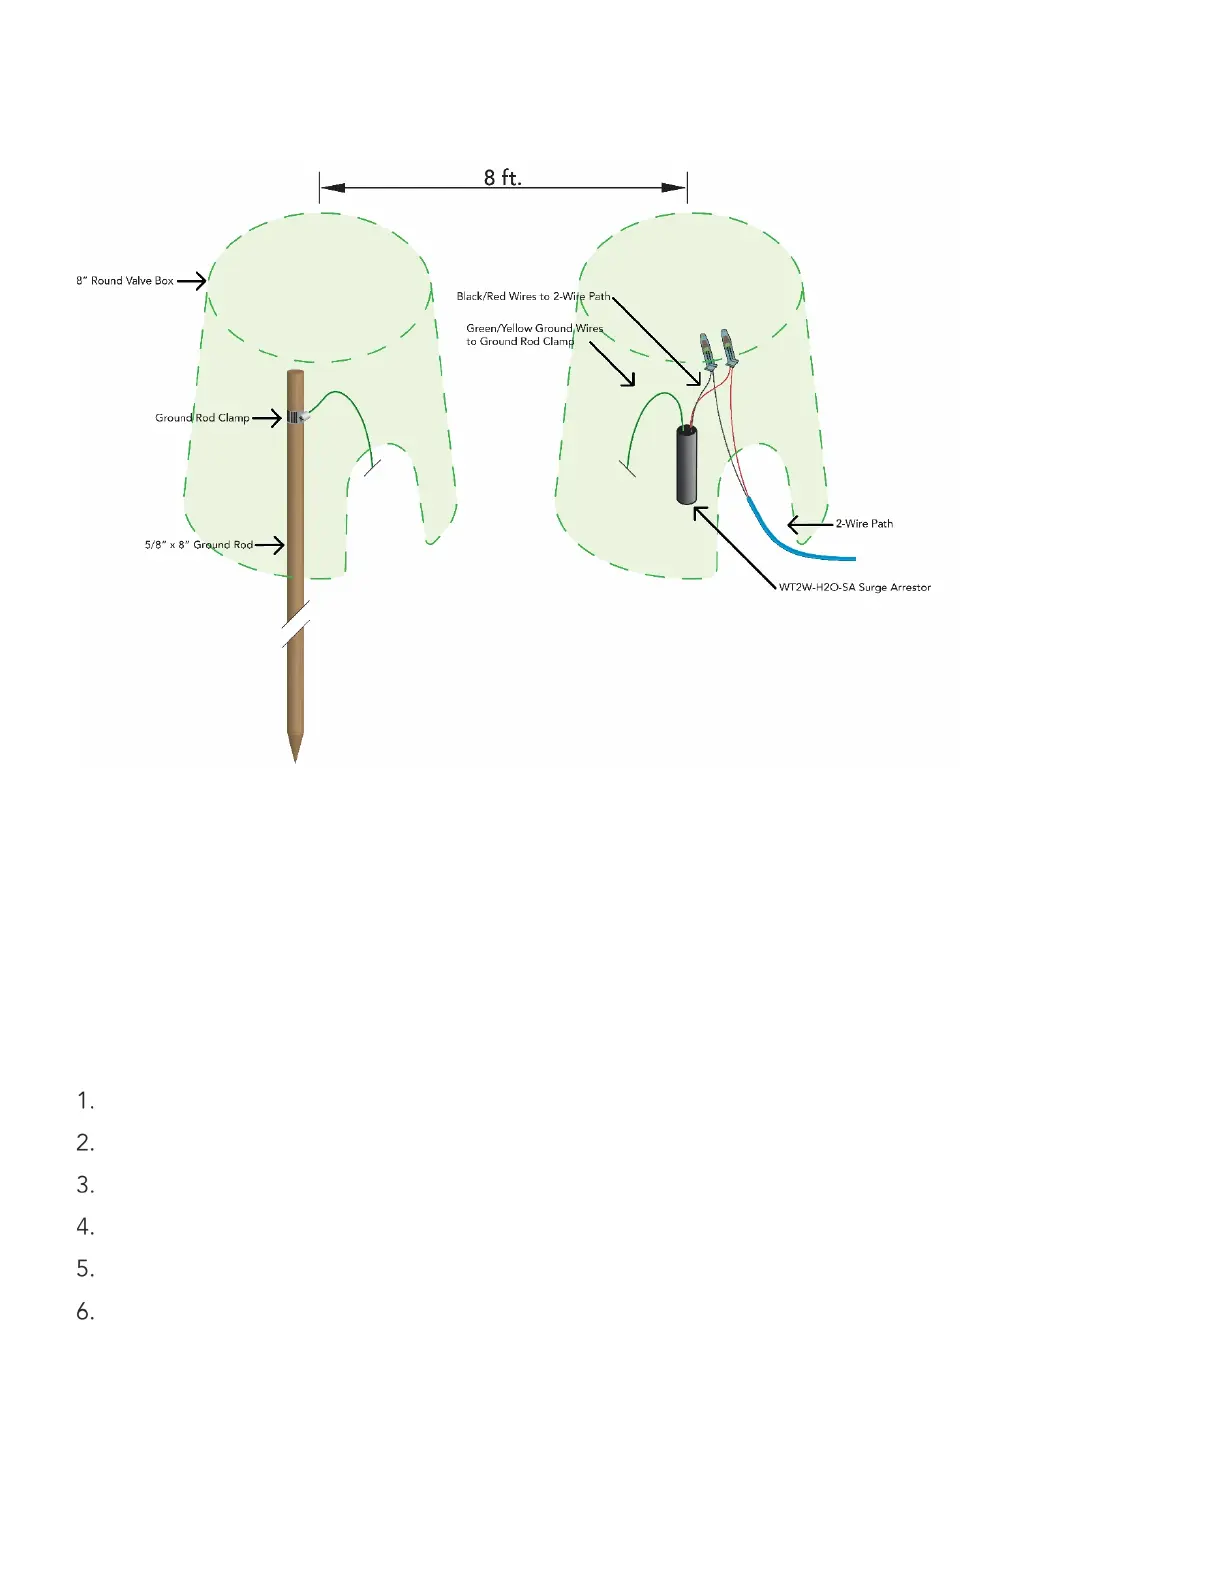
agram of valve box and wiring:
Step
5
—
Connect the
Two
-
‐
Wire
Path
to
the
Controller
There are three sets of terminals for the two
-
‐
wire path. Connect the red and black wire from the two-wire to
the corresponding red and black terminals on the controller. It is critical that polarity be maintained.
Step 6 —
Configure the 2
-
‐
Wire
on
the
WeatherTRAK
Control Panel
You can configure the master valve and / or flow sensor to use either the direct wire connections or a decoder
on the 2
-
‐
wire path. Note master valves and flow sensors on the same point of connection do not need to
use the same connection type. For example, a master valve may be controlled via a decoder and a flow
sensor may be connected directly or visa
-
‐
versa.
Press the FLOW button.
Press the button until the SELECT FLOW OPTION screen displays.
Press the + or – button to select 2-Wire.
Press the button until Flow displays.
Pres the button to underline and select the appropriate master valve (MV) or flow sensor (FS).
Press the + or - button to change the setting to Direct Wired (DI) or 2
-
‐
Wire (2W).