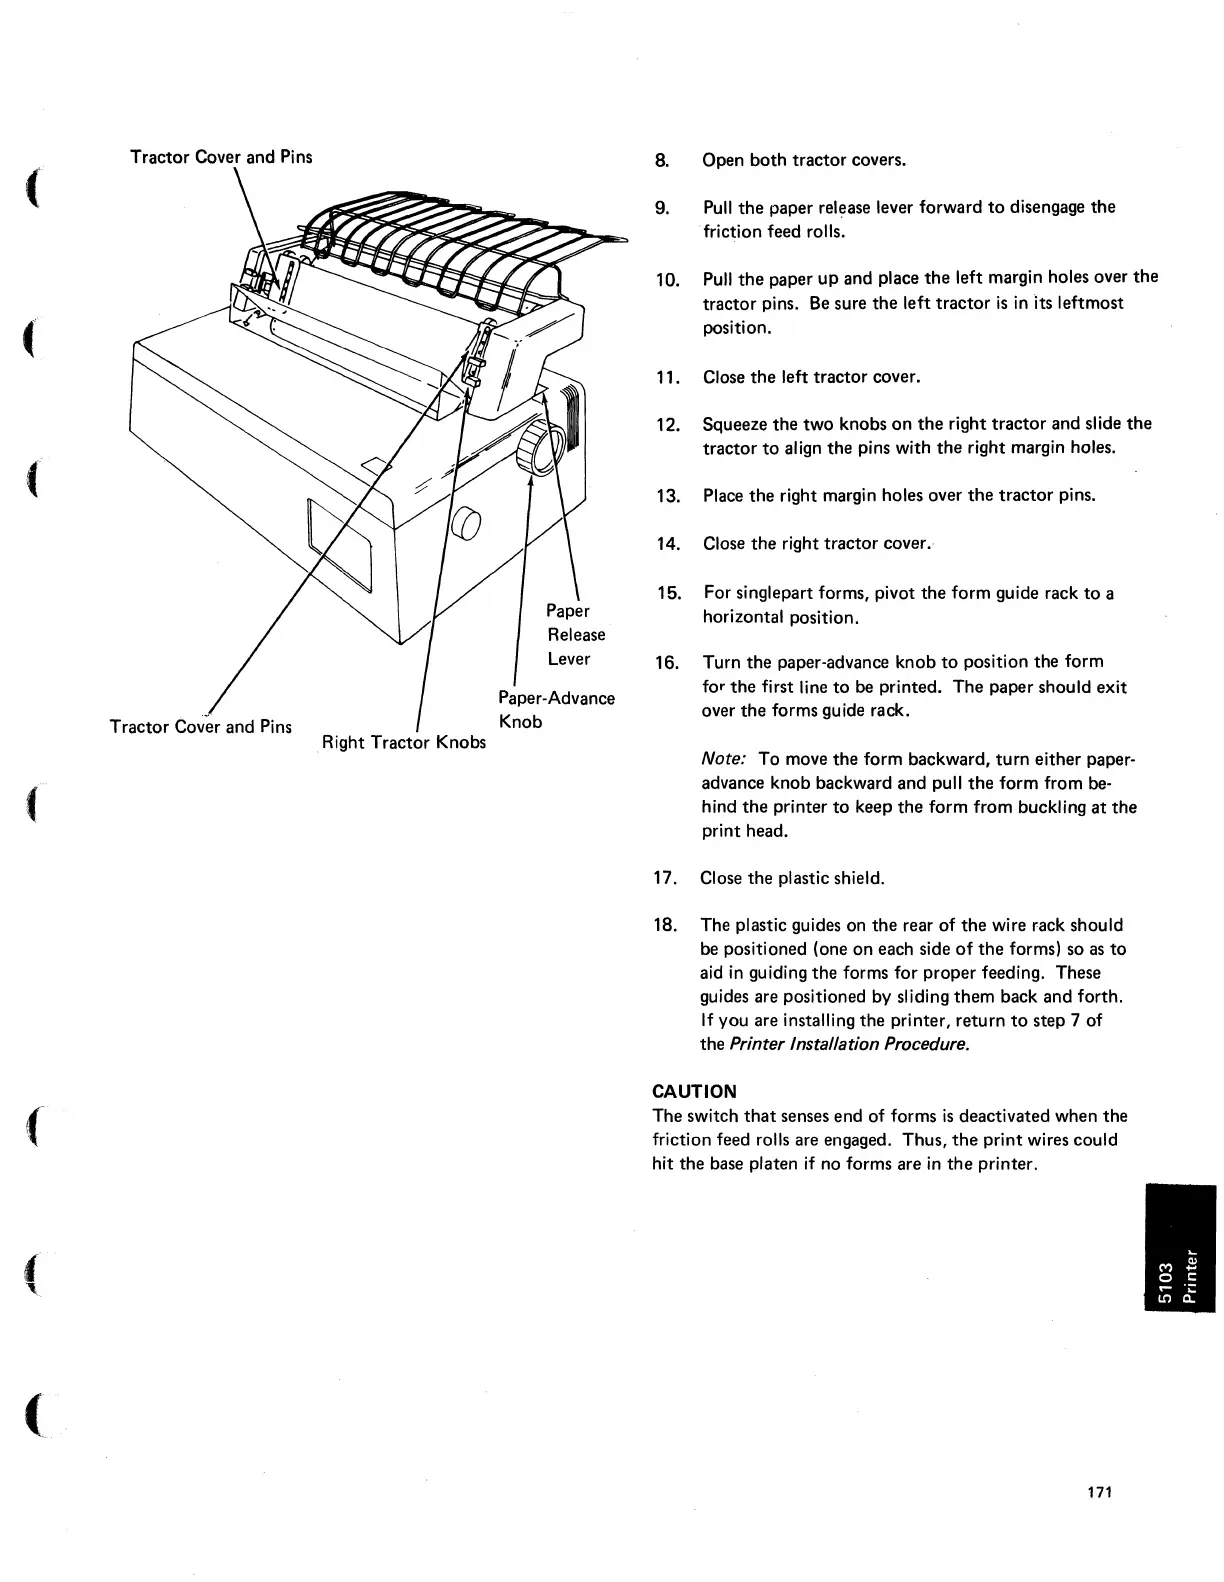
Tractor Cover and Pins
. Right Tractor Knobs
(
(
Release
8. Open both tractor covers.
9.
Pull
the
paper release lever forward
to
disengage the
friction feed rolls.
10.
11.
12.
Pull
the
paper
up
and place
the
left margin holes over
the
tractor pins.
Be
sure the left tractor
is
in
its leftmost
position.
Close
the
left tractor cover.
Squeeze the two knobs
on
the
right
tractor
and slide
the
tractor
to
align the pins with
the
right margin holes.
13. Place
the
right margin holes over
the
tractor pins.
14. Close
the
right tractor cover.
15. For singlepart forms, pivot the form guide rack
to
a
horizontal position.
Lever 16. Turn the paper-advance knob
to
position the form
Paper-Advance
Knob
for
the
first line
to
be printed. The paper should exit
over the forms guide rack.
Note: To move the form backward,
turn
either paper-
advance knob backward and pull
the
form from
be-
hind
the
printer
to
keep the form from buckling
at
the
print head.
17. Close the plastic shield.
18. The plastic guides on
the
rear of the wire rack should
be
positioned (one on each side
of
the
forms) so
as
to
aid
in
guiding the forms for proper feeding. These
guides are positioned by sliding them back and forth.
If
you are installing the printer, return
to
step 7 of
the
Printer Installation Procedure.
CAUTION
The switch
that
senses end of forms
is
deactivated when the
friction feed rolls are engaged. Thus,
the
print wires could
hit the base platen
if
no forms are
in
the
printer.
171

 Loading...