Figure 34. Replace the drive
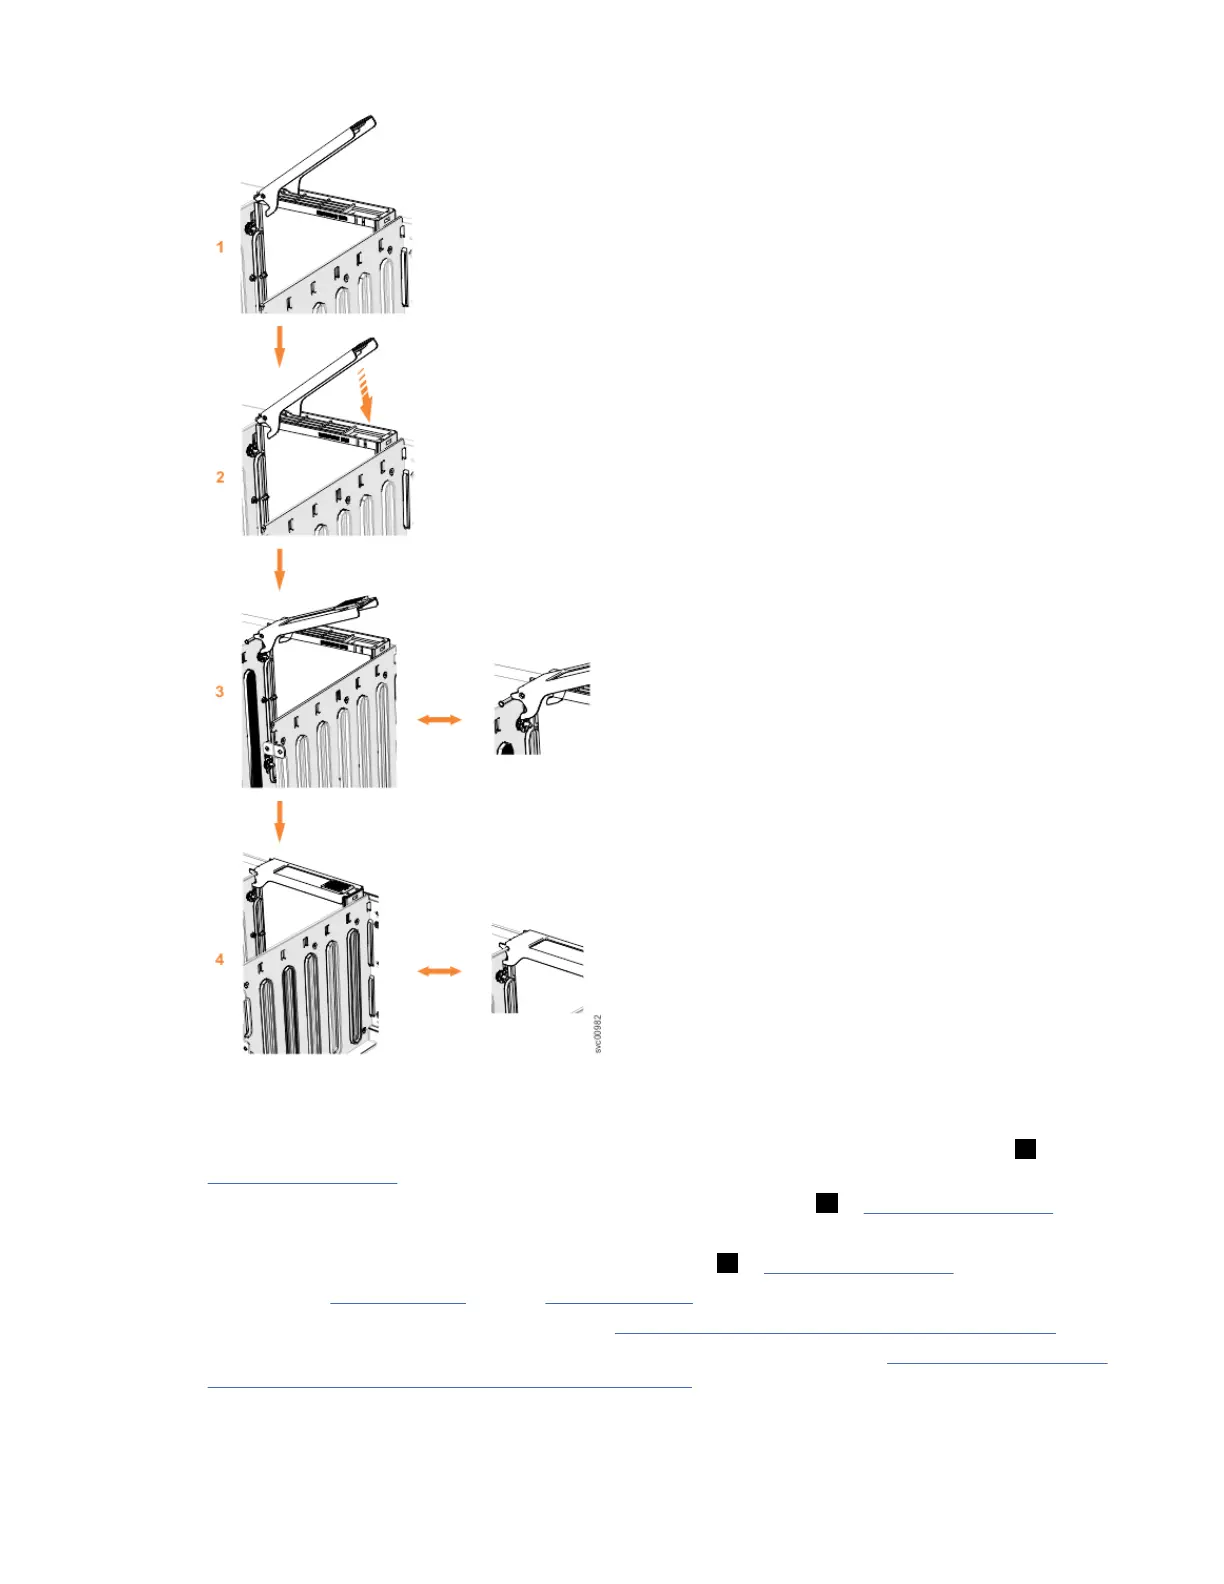
7. Gently push the drive down until it stops, and the bottom of the latch is aligned with the top of the
partition. Ensure that the handle is not open more than 45 degrees from the drive carrier. ( 2 in
Figure 34 on page 53).
8. Rotate the handle down to lock the drive assembly into the chassis ( 3 in Figure 34 on page 53).
9. Ensure the toe on the bottom of the latch is fully engaged with the partition in the chassis.
10. Ensure that the top toe of the latch is also fully engaged ( 4 in Figure 34 on page 53).
11. Repeat steps “4” on page 52 through “10” on page 53 for each drive you are replacing.
12. Replace the cover. For more information, see “Installing or replacing the top cover” on page 54.
13. Slide the expansion enclosure back into the rack. For more information, see “Installing or replacing a
Model 092 expansion enclosure in a rack ” on page 55.
Chapter 5. Installing Model 092 expansion enclosure
53
 Loading...


