Figure 56. SAS port orientation on expansion enclosures
1 Input SAS port
2 Output SAS port
Powering on the 5U expansion enclosure
Use the following procedure to provide power to the 5U expansion enclosure as part of the initial
installation process or after a service procedure.
Before you begin
Important: Before you connect the power cables to the rear of the enclosure, always check that the
expansion enclosure is secured in the rack. If needed, tighten the thumbscrews on the front of the
enclosure ( 2 in Figure 57 on page 57) to ensure that the enclosure drawer does not roll open.
About this task
The 5U expansion enclosure has two power supply units (PSUs) that are accessible from the front of the
enclosure ( 4 in Figure 57 on page 57). As the gure also shows, the PSUs are covered by the 1U fascia
( 5 ).
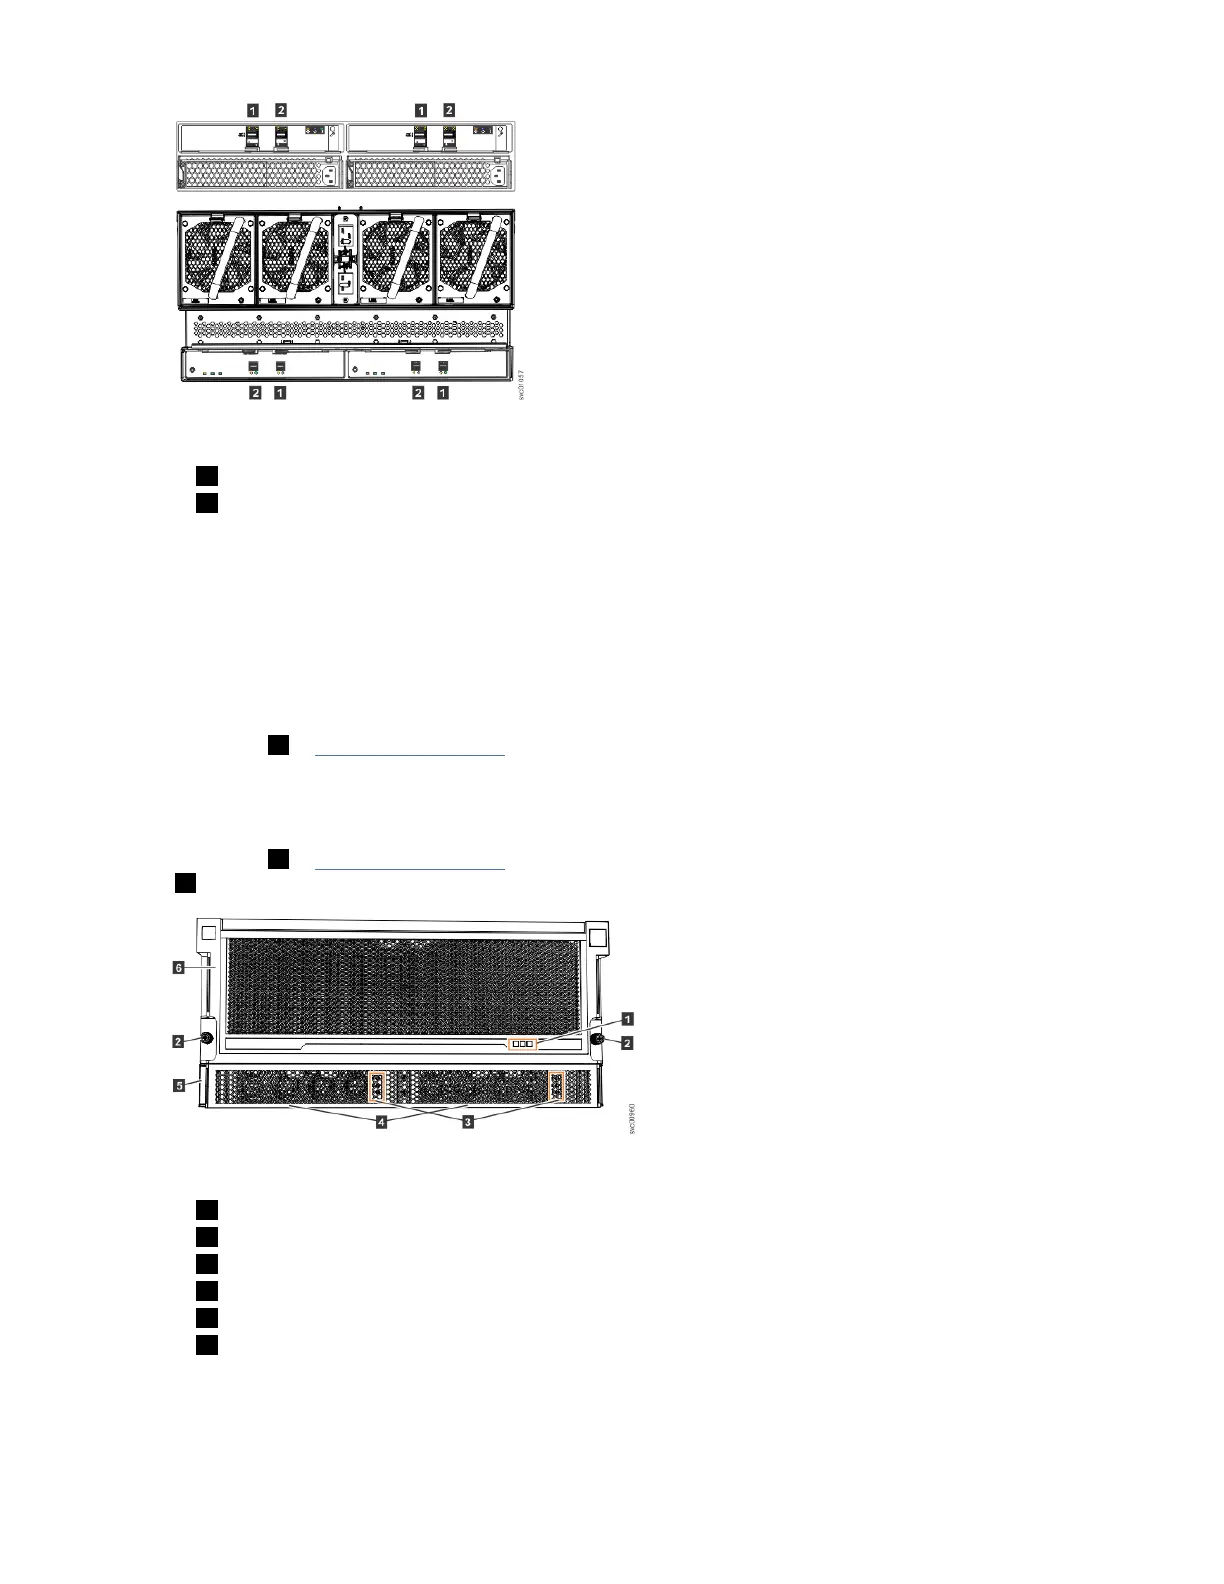
Figure 57. Features on the front of the 5U expansion enclosure
1 Display panel LEDs
2 Rack retention thumb screws
3 Power supply unit LEDs
4 Power supply units (PSUs)
5 PSU fascia (1U)
6 Front fascia (4U)
Each PSU has a power supply connector and power cable, which are accessible from the back of the
enclosure. Power is provided by plugging a C19-C20 power cable into each power supply unit and, if
necessary, turning on the power source. The expansion enclosure does not have a power button.
Chapter 4. Installing the system hardware
57