The top of the system unit serves as a built-in flat I/O tray. Use this surface when
grouping IBM and non-IBM peripheral devices with varying dimensions.
Note: A version of the slanted I/O tray is available that can be placed on the
wide-footprint SurePOS 700 in an integrated environment. Other versions of
the tray can be placed directly on the counter or on the full-size cash drawer.
The cash drawers provide a built-in flat I/O tray.
To remove a slanted I/O tray, follow these steps:
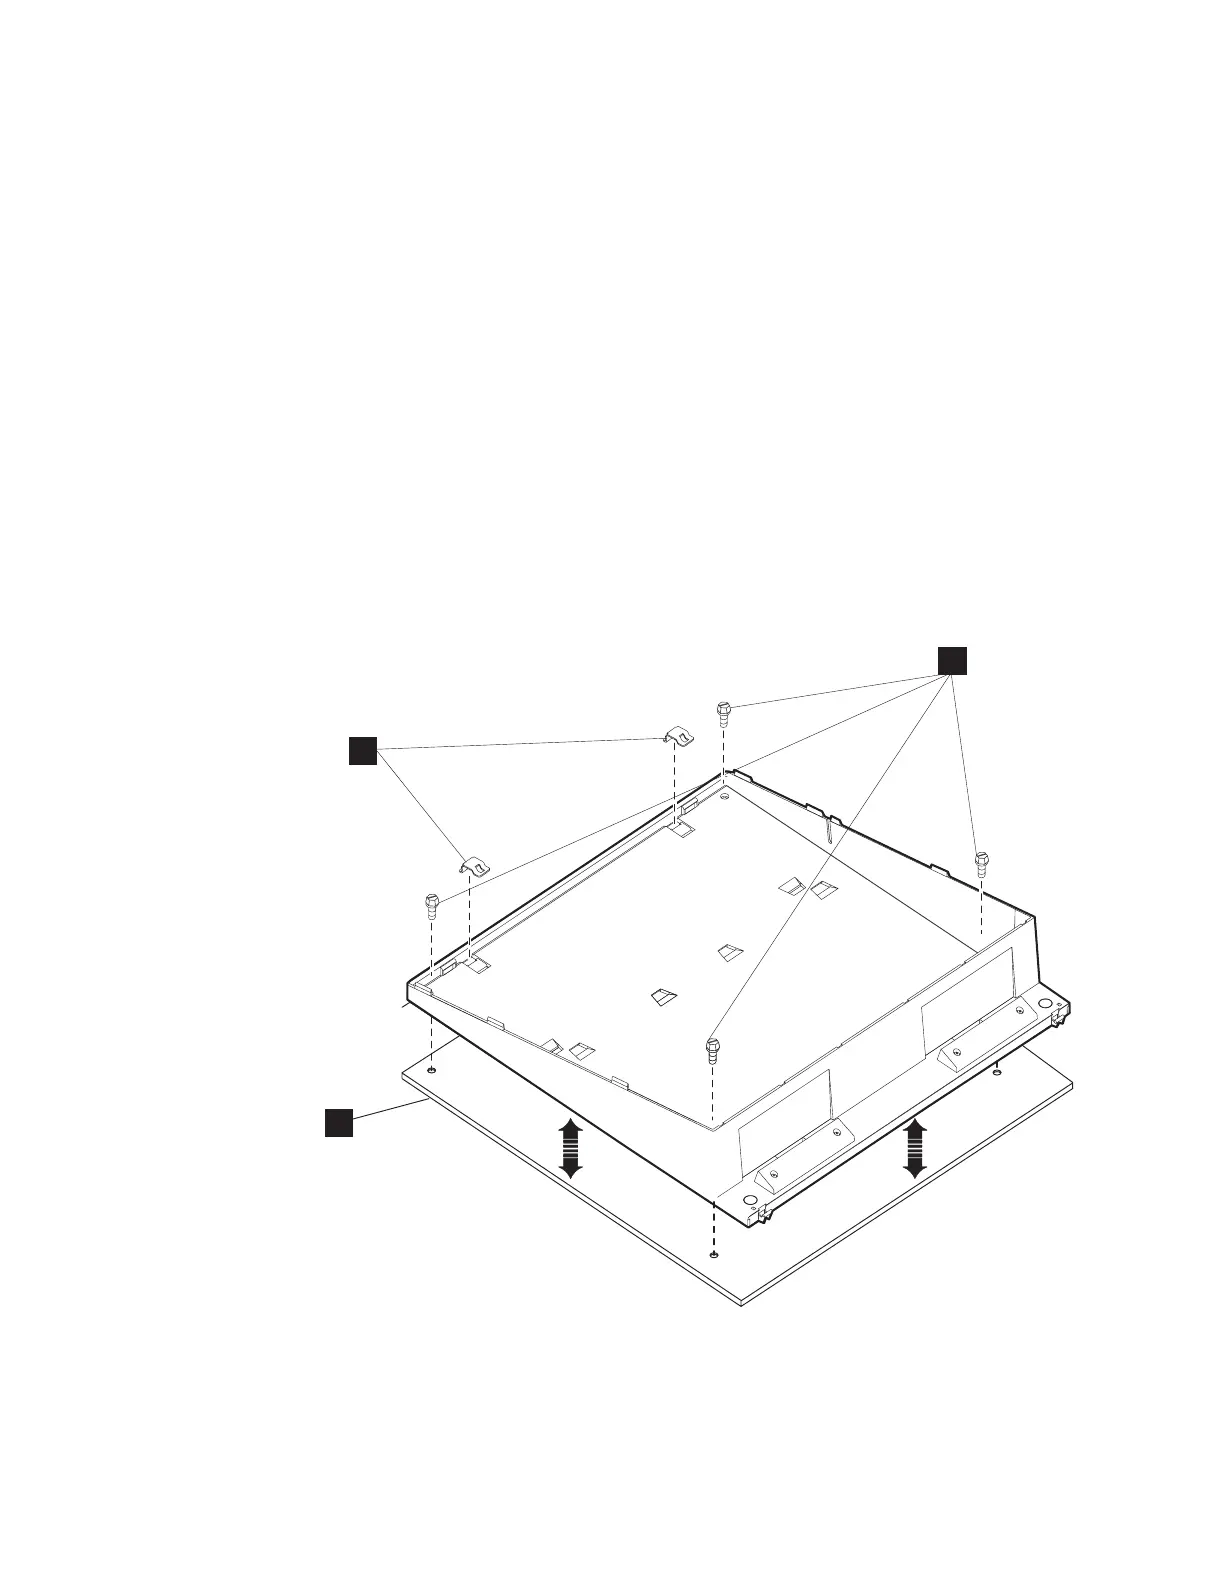
1. Working from above the system unit, remove the screws from the holes at the
back corners of the I/O tray.
2. Lift off the I/O tray.
3. To remove the front mount clips, push each of the front mounting tabs forward
until it unlatches.
To replace the I/O tray:
1. Install the two mounting clips (A in Figure 18) into the slanted I/O tray. From
the inside of the I/O tray, insert the back of the mounting clip first and push the
front part into the opening.
2. Turn the I/O tray over. Push on the front of the tab until it clicks into place.
3. Set the I/O tray on top of the unit, and connect the tabs in front of the unit.
4. Attach the I/O tray to the cash drawer by inserting and tightening the two plastic
thumbscrews into the holes at the back corners of the I/O tray.
B
A
B
A
AC
Figure 18. Installing two mounting tabs into the slanted I/O tray
30 SurePOS 700-723/743/783/784 Hardware Service Guide
 Loading...
