46
MAINTENANCE
Check the wear of the rear rubber blade on the squeegee unit; if the
edge of the rubber in contact with the oor is worn, replace it (though
the rubber can be turned onto another of its 4 edges) as follows:
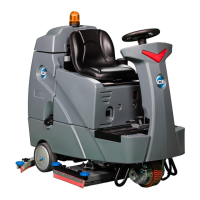
1. Take the device to the dedicated maintenance area.
2. Take all necessary steps to ensure that the device is in a safe
condition (see "MACHINE SAFETY’”).
3. Raise the squeegee unit off the oor and press the squeegee unit
control lever (1) on the back of the device (Fig.1).
ATTENTION: these operations must be carried out using
protective gloves to avoid any possible contact with the edges
or tips of metal objects.
4. Remove the vacuum hose (2) from the vacuum nozzle (3) on the
squeegee unit (Fig.2).
5. Completely unscrew the knobs (4) in the squeegee unit pre-
assembly (Fig.3).
6. Remove the squeegee unit from the slits in the squeegee
connector (Fig.4).
7. Turn the wing nuts (12) to the horizontal position (Fig.11).
8. Remove the front rubber-pressing blades (12) (Fig.11).
9. Remove the rubber blade (14) and replace it (Fig.11).
10. Proceed in reverse to replace the rubber.
7. Adjust the detergent solution ow (read “ADJUSTING THE
DETERGENT SOLUTION (VERSIONS WITHOUT CDS)” or
“ADJUSTING THE DETERGENT SOLUTION (VERSIONS WITH
CDS)” )
8. By activating the dead man's lever (6), the machine will start to
move (Fig.5).
9. During the rst few metres of work, check that the squeegee
rubber blades touch the oor evenly. If the rubber blade's tilt
needs to be increased in the middle, tighten the screw (8) (Fig.6).
To decrease its tilt, simply turn the screw (8) in the opposite
direction.
ATTENTION: Loosen the locknut (7) before turning the screw
(8). When nished, remember to secure the screw by
tightening the locknut (7).
10. During working operation, the rear rubber blade should be slightly
tilted backwards by about 30°- 45° with respect to the oor along
its whole length. If you need to adjust the height of the rubber
blades in relation to the oor, turn the knob (9) (the diagram only
shows the left knob) counter-clockwise to raise the squeegee or
clockwise to lower it (Fig.7).
ATTENTION: the right and left wheels must be adjusted to the
same level, so the squeegee can work parallel to the oor.
Careful adjustment of the height between the squeegee rubber
blades and the oor guarantees better drying and cleaning of
the ooring as well as a longer vacuum motor life. To adjust the
squeegee rubber blades, proceed as follows:
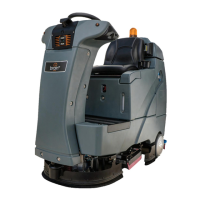
1. Take the device to the dedicated maintenance area.
2. Get in the driving seat, behind the machine.
3. For 50D versions, switch on the appliance by pressing the main
switch (1) on the back of it (Fig.1).
ATTENTION: in 50D versions, the main switch (1) is in the
work position when the LED inside it is ON and the activation
symbol is visible.
4. For traction versions, switch on the machine by bringing the main
switch (2) to "I" and making a quarter turn to the right with the
key (3) Fig.2)).
5. Lower the brush head unit by pressing the brush head control
pedal (4) on the back of the appliance (Fig.3).
6. Lower the squeegee unit by means of the lever (5) on the back of
the appliance (Fig.4).
ADJUSTING THE SQUEEGEE UNIT
11
10
10
9
14
13
11
12
6
8
7
9
5 6 7
3
1
2
1 2
ON
5
4
4
3