3
BASIC OPERATION
8
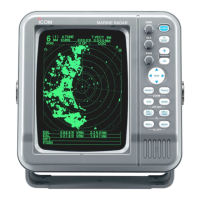
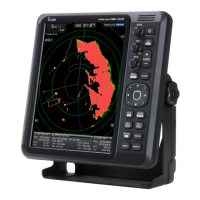
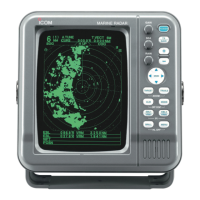
■ Basic operation
TX
SAVE
TARGET TRAILS
MODEALM
+
-
MOB
MENU
EBL2
VRM2
EBL1
VRM1
BRILL
ZOOM
OFF CENT
PI
HL OFF
GAIN
SEA
RAIN
POWER
e
q
w
u
r
t
y
e
q
w
u
r
t
y
q Turn ON the power.
w Push [TX]/[ ] after the countdown disap-
pears from the screen.
• See “Turning power ON/OFF” on page at left.
e Push [+]/[ ] or [–]/[ ] one or more times
to select the display range.
• The screen range readout shows the maximum range
of the screen.
r Rotate [GAIN]/[ ] to the 1 o’clock position.
• Clockwise rotation increases the gain.
• Increased gain may increase screen noise.
t Rotate [SEA]/[ ] to set the sensitivity time
control to minimum.
y Rotate [RAIN]/[ ] to set the rain clutter con-
trol to minimum.
u Push [MODE]/[ ] to select either the
Head-up; H UP, Course-up; C UP, North-up; N UP
or True Motion; TM screen.
C UP, N UP or TM can be selected only when
bearing, position or speed data is provided.
(See page 38 for details)
CAUTION: When setting the [SEA]/[ ] control to
a fully clockwise position, close targets are blanked.
DHeading marker
The heading marker is a line that shows your ship’s
bow direction. (This marker will appear in the cen-
ter of the screen when the Head-up screen H UP
is selected.) The heading marker can be hidden
when the desired target is located under the heading
marker.
➥ Simultaneously hold down [BRILL]/[
] and
[MENU]/[ ] to hide the heading marker.
DFixed range rings
The fixed range rings can be used for rough distance
measurements. (p. 13)
➥ Push [MENU]/[
] to open the FUNCTION menu,
then push [q] to select RING. Push [u] to turn ON
the ring.
DManual tuning
The receiver tuning can be manually adjusted.
➥ Push [MENU]/[
] to open the VIDEO menu, then
select MANUAL. Push [q] to activate the manual
tuning slider, then push [t] [u] to set the tuning
level indicator to the maximum level. (p. 5)
• “M.TUNE” appears at the top of the display.
DBrilliance adjustment
The intensity of the screen can be adjusted. When
you require continuous operation, but not constant
viewing, a lower setting can increase the life of the
CRT display.
➥ Push
[BRILL]/[ ] to increase or decrease the bril-
liance of the picture on the display.
➥ Hold down [BRILL]/[ ] for 1 second to select max-
imum brilliance.
NOTE: High intensity will shorten the life of the CRT
display.
• Key illumination
The backlighting of the keys can be adjusted for con-
venient operation. (p. 6)
➥ Push [MENU]/[
] four times to call up the INT.
SETTING menu. Push [t] [u] to select the illumi-
nation level.
• Key illumination corresponds with [BRILL]/[ ] con-
trol.
NOTE:
Manual adjustment can be used. (See below.)
 Loading...