76
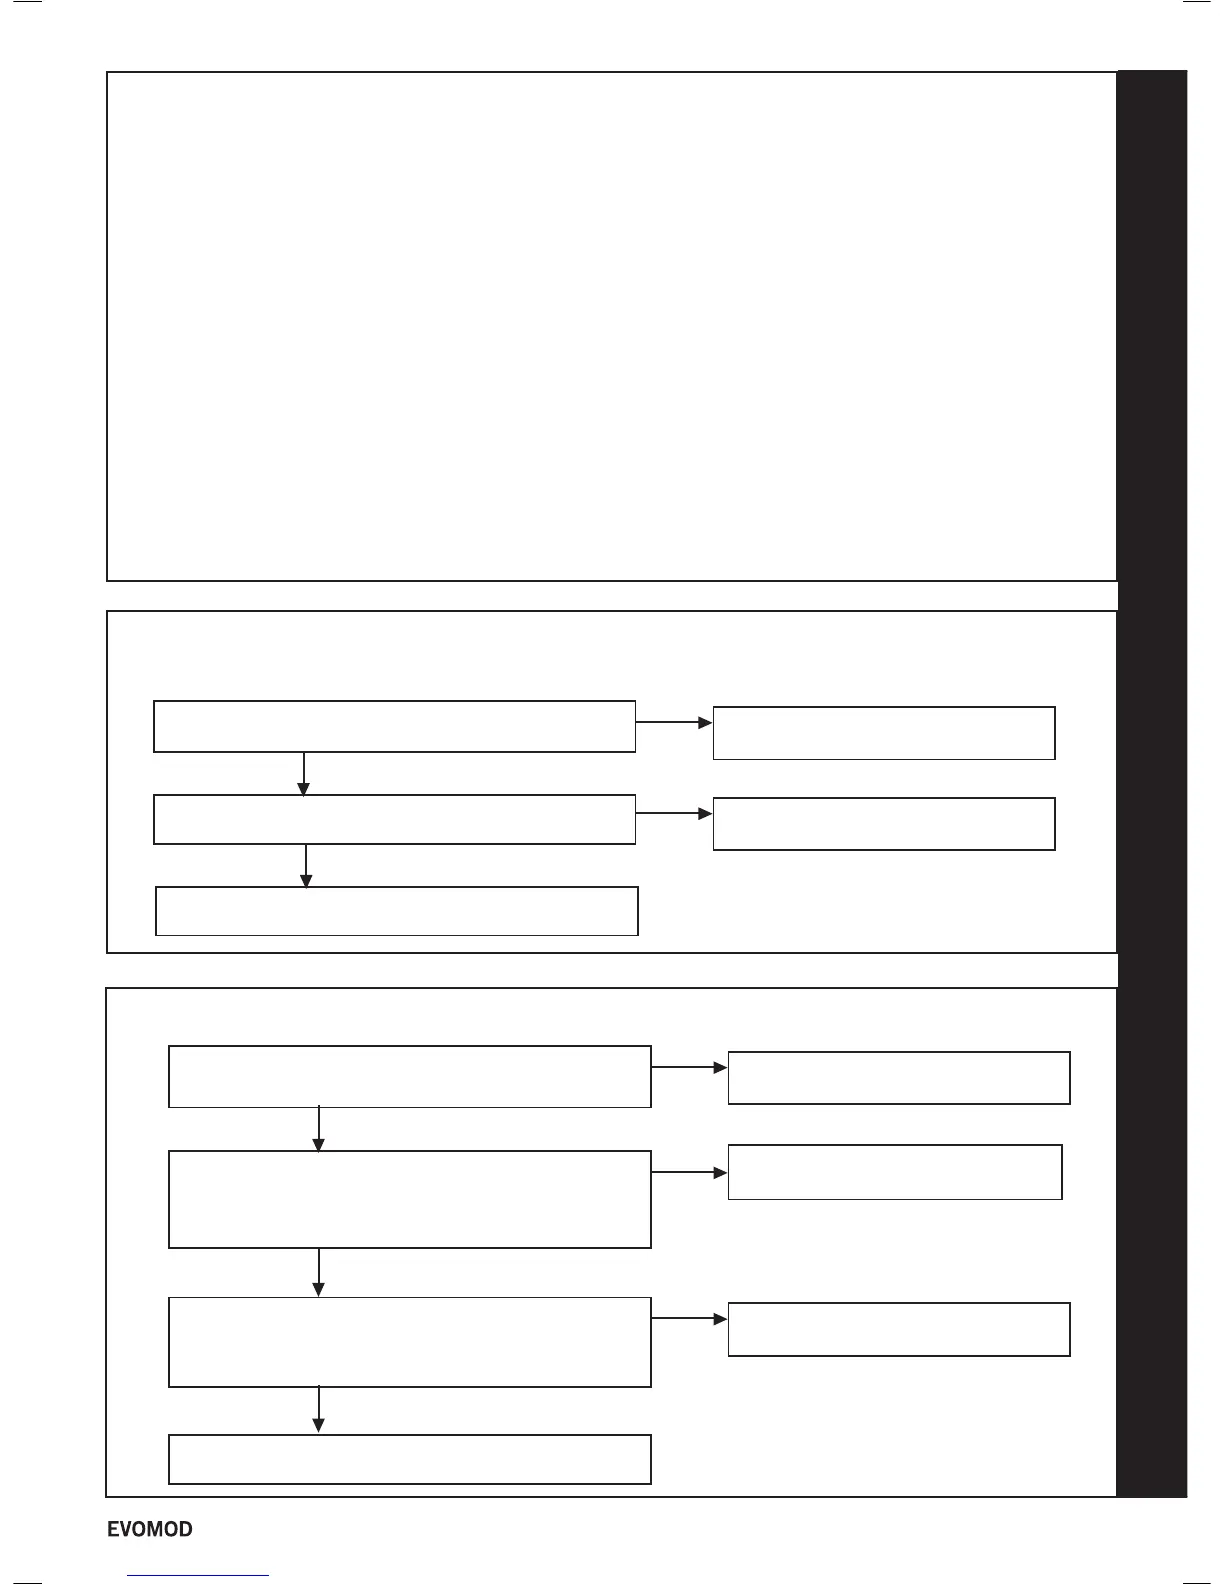
FLAPPER VALVE
Replace Flapper Valve Sensor
no
Disconnect the wiring to the Flapper Valve. With the
fan running is there continuity across the wiring to the
Flapper Valve?
yes
Replace the wiring from the Module
PCB to the Flapper Valve.
no
Does the wiring from the Module PCB to the Flapper
Valve have continuity?
yes
Replace the Module PCB
Check for ue blockage, if clear
replace Flapper Valve
no
Does the Flapper Valve open when the fan is on?
yes
75
FLOW/RETURN REVERSED
74A
SAFETY THERMOSTAT OPEN
Is the Module Pump connected the correct way?
Reverse Header Pump
no
Is the Header Pump connected the correct way?
yes
Check that the system pipework is correct
yes
Reverse Module Pump
no
The release of the thermostat will require the intervention of a qualied person in the boiler's maintenance; they will have to
remedy the defect responsible for the unusual temperature rise and then carry out a verication (see protocol) of the heat
exchanger before re-engaging the thermostat.
Protocol;
(By following your recommendations for the maintenance to the boiler)
1. Remove the burner door.
2. Check the condition of door gaskets - replace if necessary.
3. Check the condition of the insulation on the door, and the
insulation at the rear of the combustion chamber - replace
if necessary.
4. Check the condition of the burner.
5. Check for fouling of the combustion chamber. If necessary,
clean it (nylon brush and removal of these deposits).
6. Check the condition of the condensate drain. (Clean the
siphon)
7. Check the condition of the ue system.
8. By re-assembling the burner door on to the heat
exchanger, screw the nuts in accordance with the torque to
5N/m.
9. Re-engage the safety thermostat (must be reset at
room temperature which is about 22ºC) and check the
connection (wiring of the thermostat).
10. Before restarting of the boiler, check the water pressure in
the boiler.
11. After restarting, control the level of combustion (CO
2
measurement) by verifying the correct adjustment of the
gas valve in relation to the type of gas.
53
- Installation & Servicing
 Loading...