FC6A S
ERIES
MICROS
MART
U
SER
’
S
M
ANUAL
FC9Y-B1722 7-31
7: HMI F
UNCTION
Setting the Calender/Clock
This section describes how to adjust the internal clock in the CPU module.
These settings can be configured when the user program is stopped. This cannot be adjusted while the user program is running.
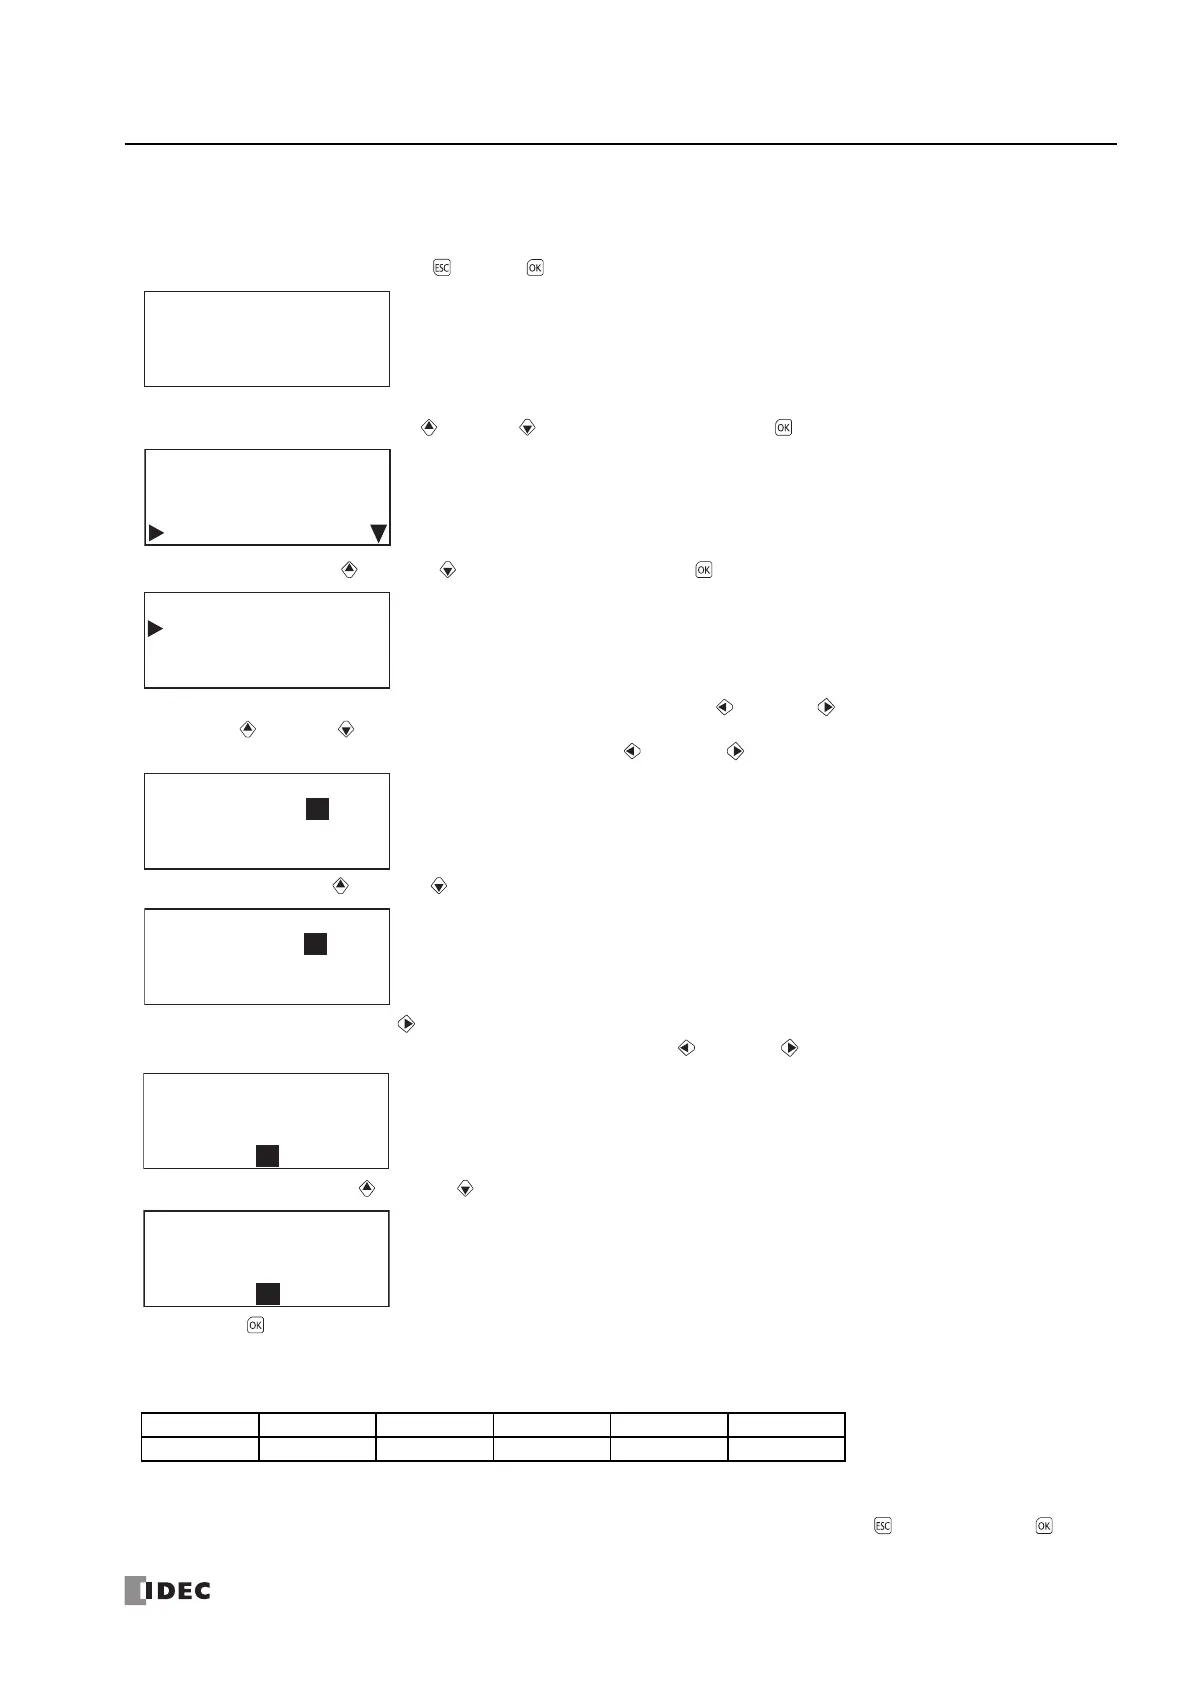
1. On the standard screen, press the (ESC) + (OK) buttons.
The system menu is displayed.
2. Select Configurations with the (up) and (down) buttons and press the (OK) button.
3. Select Clock with the (up) and (down) buttons and press the (OK) button.
4. Move the cursor (yearmonthdayhourminutesecond) with the (left) and (right) buttons and modify the value
with the (up) and (down) buttons.
For example, modify Day. Move the cursor to Day with the (left) and (right) buttons.
5. Modify Day with the (up) and (down) buttons.
6. From Day position, press the (right) button to next move to the (hour:minute:second) row.
For example, modify Minute. Move the cursor to Minute with the (left) and (right) buttons.
7. Modify Minute with the (up) and (down) buttons.
8. Press the (OK) button to confirm the modifications to the calendar/clock.
Calendar/clock configuration range
The calendar/clock configuration range is as follows.
Notes:
When the date is modified, the day of the week automatically changes. The day of the week is not displayed on the configuration screen.
If an invalid date is set, an error message is displayed. When the error message is displayed, press the (ESC) button or the (OK)
button to return to the configuration screen, and then set a valid date.
Year Month Day Hour Minute Second
2000 to 2099 01 to 12 01 to 31 00 to 23 00 to 59 00 to 59
Stopped
2015/DEC/01/TUE
13:30:40
Run
Edit Program
External Memory
Configurations
Function
Clock
Menu Languages
Backlight
 Loading...